 Greetings friends, sometimes we overlook some features that the products include, such as Veeam Enterprise Manager, and all the features that this allows us. Today I come to talk to you about a wonderful hidden and little-known feature, DataLabs on demand using Veeam Enterprise Manager.
Diagram with the use case
The first thing I want to show you is the technical diagram of where this solution can be a good practice, let’s imagine:
- There are several technical groups in an Infrastructure
- The developers group does not have access to the VMware, Veeam and/or production network infrastructure, only a VPN that gives them access only to the DataLabs Proxy Appliance
- This group of developers must be able to create DataLabs with a group of applications when they need them on demand from Enterprise Manager
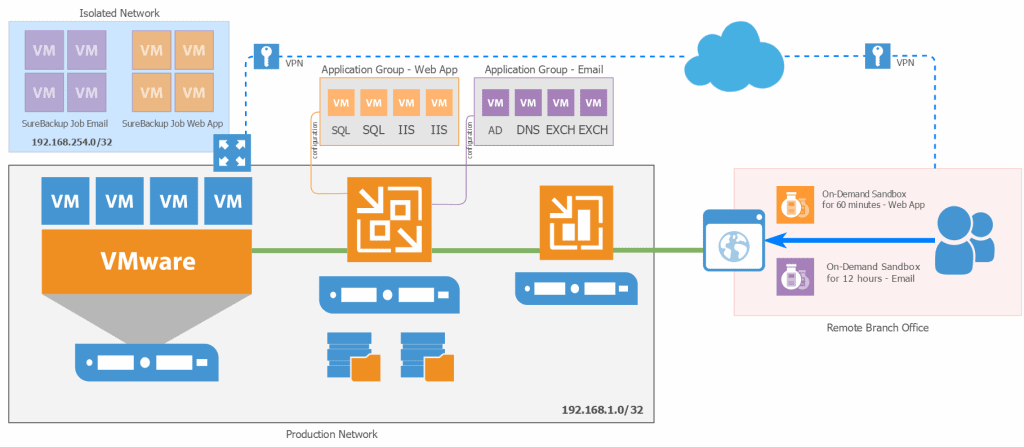 In this way, the group of Developers located in a remote office can access the Enterprise Manager portal via the Internet for example, or via a DMZ, launch their On-demand Sandbox requests as long as they need, and then access those DataLabs using a VPN to the DataLab Virtual Proxy, which will give connectivity to the VMs that are in that on-demand sandbox.
Technical requirements
The requirements for administrators to have permission to create DataLabs on demand are:
- Veeam Enterprise Plus License
- Veeam Enterprise Manager installed
- A user, or groups of users with Portal Administrator privileges to approve the requests
- A Virtual Lab already created
- An Application Group already created
- A SureBackup job with the application group with the VM or VMs they need to lift
With all this, we can go to the next step.
Create a new DataLab request in Enterprise Manager
With one of the Enterprise Manager user, we’ll go to the Requests tab in our Veeam Enterprise Manager:
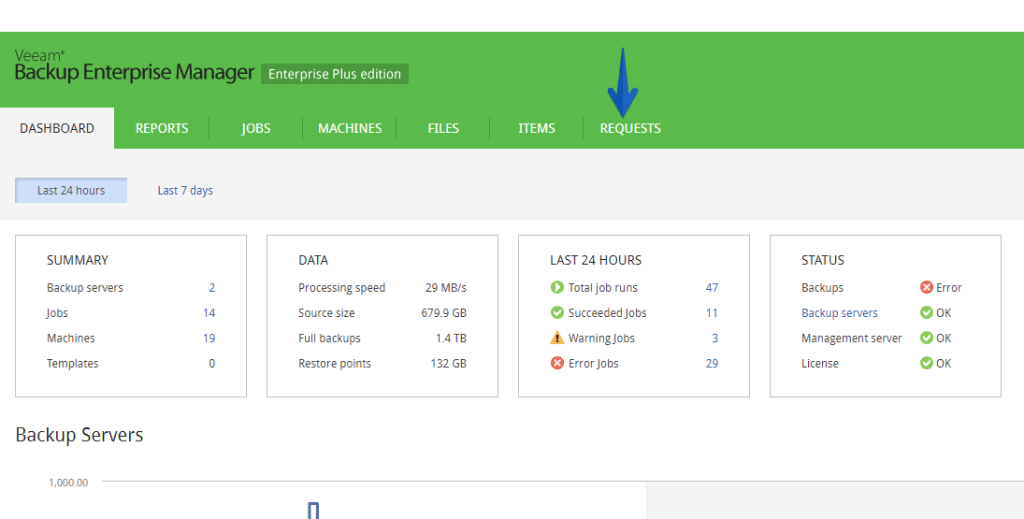 Once in Requests, click on the Create button:
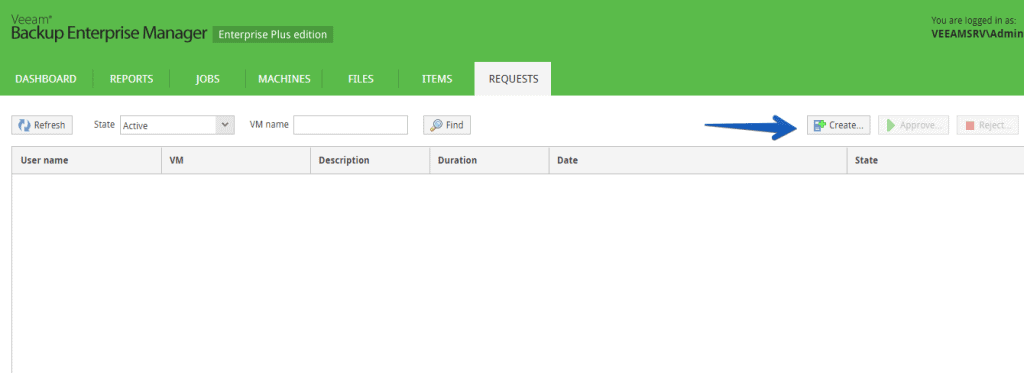 When creating the request we will have to enter the name of one of the VMs we have in the Application Group we want to recover, it is also important that we select an hour that is longer than the current time, and of course the duration we want to have this on-demand sandbox up:
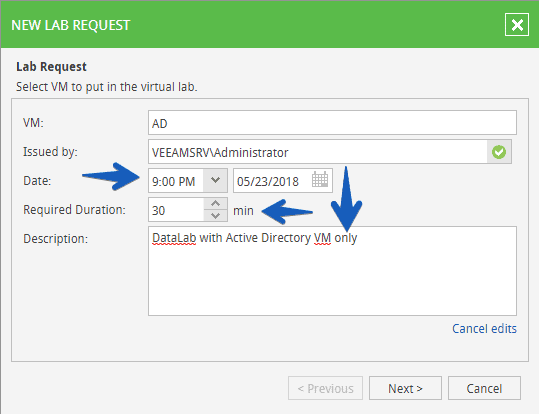 The next step is to select where we want to restore this VM for our on-demand sandbox, in my case I have replicas, copies to Cloud Connect, and local copies, I have selected the local copies because they take less time to restore, etc:
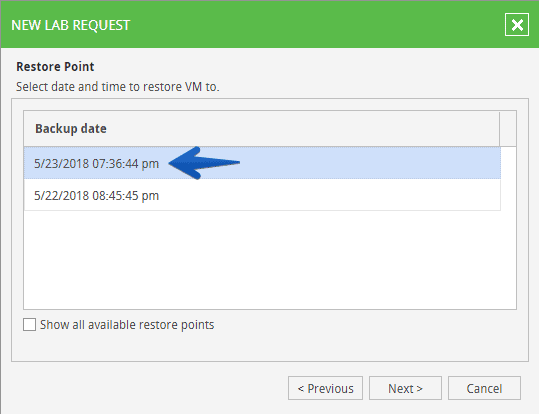
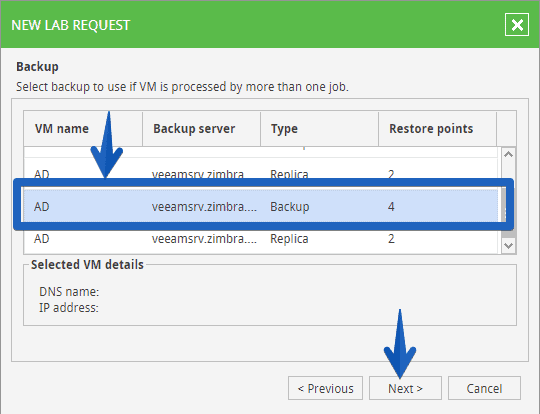 We will be able to see the restore points of the backup job:
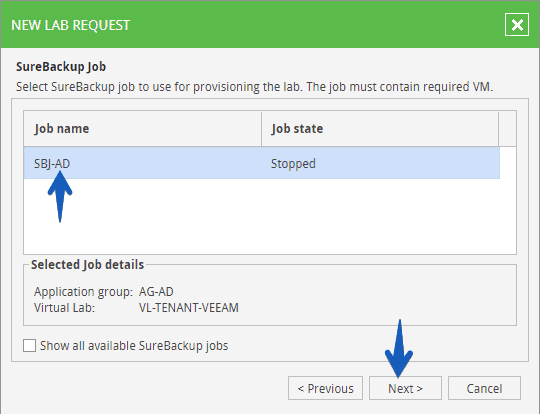
 We will now see SureBackup’s work where the VM is, so we will select it and click next:
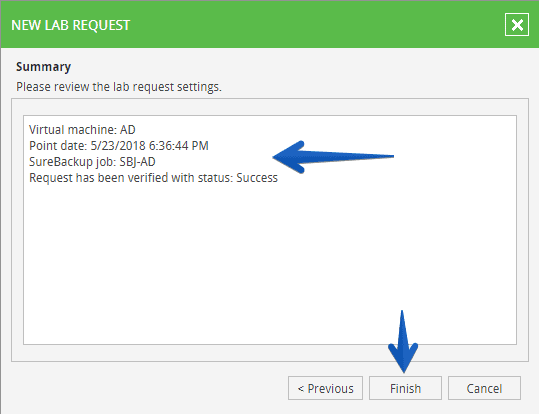
 We will see the typical Veeam summary with all the components and if we are happy with them, we will click on Finish:
 Now the request needs to be marked as approved by an Admin, once it is approved, the DataLab will start to be built, and we will have a small log to help us understand where we are at work:
After a few minutes, or hours depending on the complexity and size of the DataLab, we can see the following in the log, which gives us a clue as to how we can access this DataLab:
[May 24 2018  8:53PM] Pending, User: VEEAMSRV\Administrator, VM: AD, Required date: May 24 2018  9:00PM
[May 24 2018  8:53PM] Approved, By User: VEEAMSRV\Administrator, Backup Server: veeamsrv.zimbra.io, Job: SBJ-AD, Virtual Lab: VL-TENANT-VEEAM, VM: AD, Date: May 24 2018  7:36PM
[May 24 2018  8:53PM] Preparing, new session started.
[May 24 2018  9:09PM] Ready:
     Gateway Ip: 192.168.1.180
     Subnet Ip: 192.168.254.0
     Subnet Mask: 255.255.255.0
     Virtual Machine external Ip: 192.168.254.36
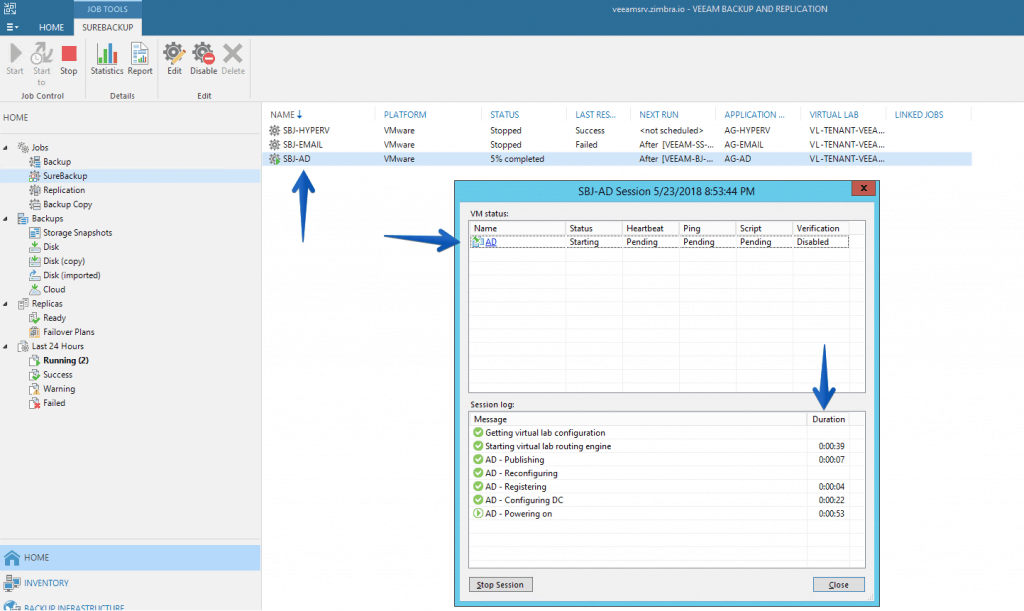
Of course these users will not see what is going on underneath, if we access the Veeam console with an administrator user we can actually see how the job is running and the steps, details, etc, but this view is only for users who have access to the Veeam console:
Connect to the DataLab environment from outside the network
As we can imagine, what the Developers have to do is to connect to the IP range of the DataLab using the Veeam Network Proxy, for that, it will be as simple as using a path, in Windows or Linux in the following way, the path is very adjusted to only one VM, in your case you can use 192.168.254.0 and 255.255.255.0 for the whole C class:
route add 192.168.254.36 mask 255.255.255.255.255 192.168.1.180
With this we will be able to launch a ping that will go from our network of Developers, to the network inside the DataLab through Veeam Network Proxy:
ping 192.168.254.36

Pinging 192.168.1.36 with 32 bytes of data:
Reply from 192.168.254.36: bytes=32 time=9ms TTL=128
Reply from 192.168.254.36: bytes=32 time=10ms TTL=128
Reply from 192.168.254.36: bytes=32 time=11ms TTL=128
Reply from 192.168.254.36: bytes=32 time=26ms TTL=128
These developers could already access this VM or VMs through these isolated and new IP ranges in the on-demand sandbox.

Leave a Reply