
 Greetings friends, I told you in 2016 how I found the best homelab, so far, with the fantastic Supermicro Superserver 5028D-TN4T, I made a very complete review with an official discount by Serverfactory:
The truth is that this equipment is still working giving me the best performance I’ve had in years, so even if you wanted to, now it would still be a really good buy.
But as the 4 years have passed, it is time to pass the baton, I bought some time ago a Supermicro Superserver E-300-9D-8CN8TP, which certainly has a lot of power and is a piece of good equipment to replace the 5028D, but the E-300-9D has several very negative points:
- The noise is immense, it has three fans that are set at 7000rpm practically during all use, making it unusable if you have it near your desk.
- Being a small format, Supermicro people put a fanless heatsink, which is impossible to lower the temperature without having the fans at 7000rpm which can destroy a marriage, and surely your health if you have it close 24×7.
- Being small format, you can put up to 3 m.2 (one on board and two by PCI-e) and if you hurry a lot of space two SSD in the housing, which is located above the RAM and CPU, imagine how long it will last the SSD withstanding temperatures of 80C.
On the other hand, the Supermicro Superserver E-300-9D-8CN8TP, has very positive points:
- If you have this computer in a rack away from people and well ventilated, supports up to 512GB of RAM.
- The equipment occupies very little, and if you buy the accessory can be racked without problem in your rack of confidence.
- Includes 2x10GbE Ethernet, and 2x10GbE SFP, plus another 4x1GbE
- A very powerful, state-of-the-art processor that can handle any load
AMD EPYC 3251 – Supermicro M11SDV-8C+-LN4F
Looking at the Supermicro mini-ATX boards, and looking for options that had 8 Cores/16 Threads, that support a good amount of RAM, I haven’t found many new features, but if there was one that caught my attention, it was the M11SDV-8C+-LN4F that is based on AMD EPYC 3251. I leave you a comparison between the three models in question:
| 5028-D TN4T | E-300-9D 8C | M11SDV-8C+-LN4F | |
|---|---|---|---|
| Cores | 8 | 8 | 8 |
| Threads | 16 | 16 | 16 |
| Base Frequency | 2.10GHz | 2.30GHz | 2.50GHz |
| Max Frequency | 2.70GHz | 3.00GHz | 3.10GHz |
| Max RAM | 128GB | 512GB | 512GB |
| RAM Speed | 2400MHz | 2666MHz | 2666MHz |
| TDP | 45W | 80W | 50W |
Of course, if you are starting, it is a good time to do it in AMD, if you already have a cluster of servers with Intel, adding an AMD reduces the power to do vMotion, with what it entails as it is DRS, etc. But, equally, we are speaking of homelab, with what perhaps it is not the end of the world, it is not it for me at the moment, if I want to move VMs, I do shut down and I do power on in the new AMD.
BOM (Bill of Materials) – Lista de materiales
I leave you the list of materials to acquire this great equipment, they are links to my Amazon affiliate account, so if you buy using these links you help me to maintain this blog and I thank you a lot.
- CSE-721TQ-250B – Supermicro Mini-Tower Chassis
- M11SDV-8C-LN4F (it does not have fan, so please add two of these Noctua NF-A6x25 PWM)
- M11SDV-8C+-LN4F (with active fan) but very few and rare availability
- M393A4K40CB2-CTD – Samsung 32GB DDR4 2666MHz ECC RDIMM (You can order 4 to get the 128GB of RAM, or purchase 64GB modules if you want)
- SSD-DM032-SMCMVN1 – Supermicro 32GB SATADOM
Assembling the materials – Building the perfect Homelab
For this AMD Ryzen 3251 motherboard, I have chosen a box known to all of us, the always versatile CSE-721Q-250B, which comes with a 12cm fan, and power supply, besides having 4 3.5″ disk bays and two additional SSDs that can be put in the case: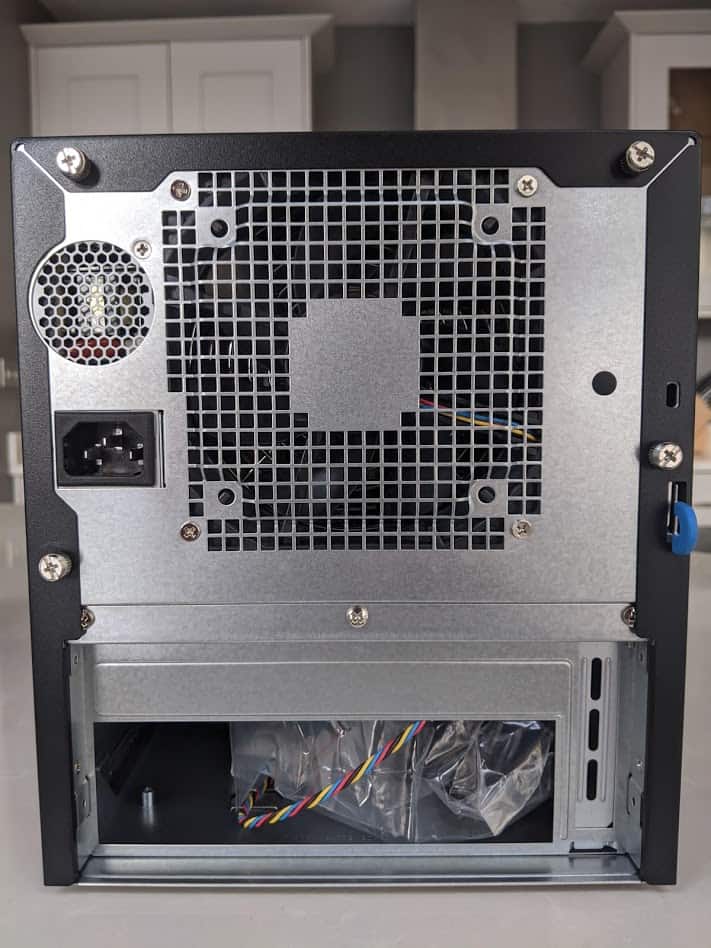 In the motherboard box, we will find everything necessary to be able to connect it and to start working without problems, in addition, we include some SATA cables, which will come later handy:
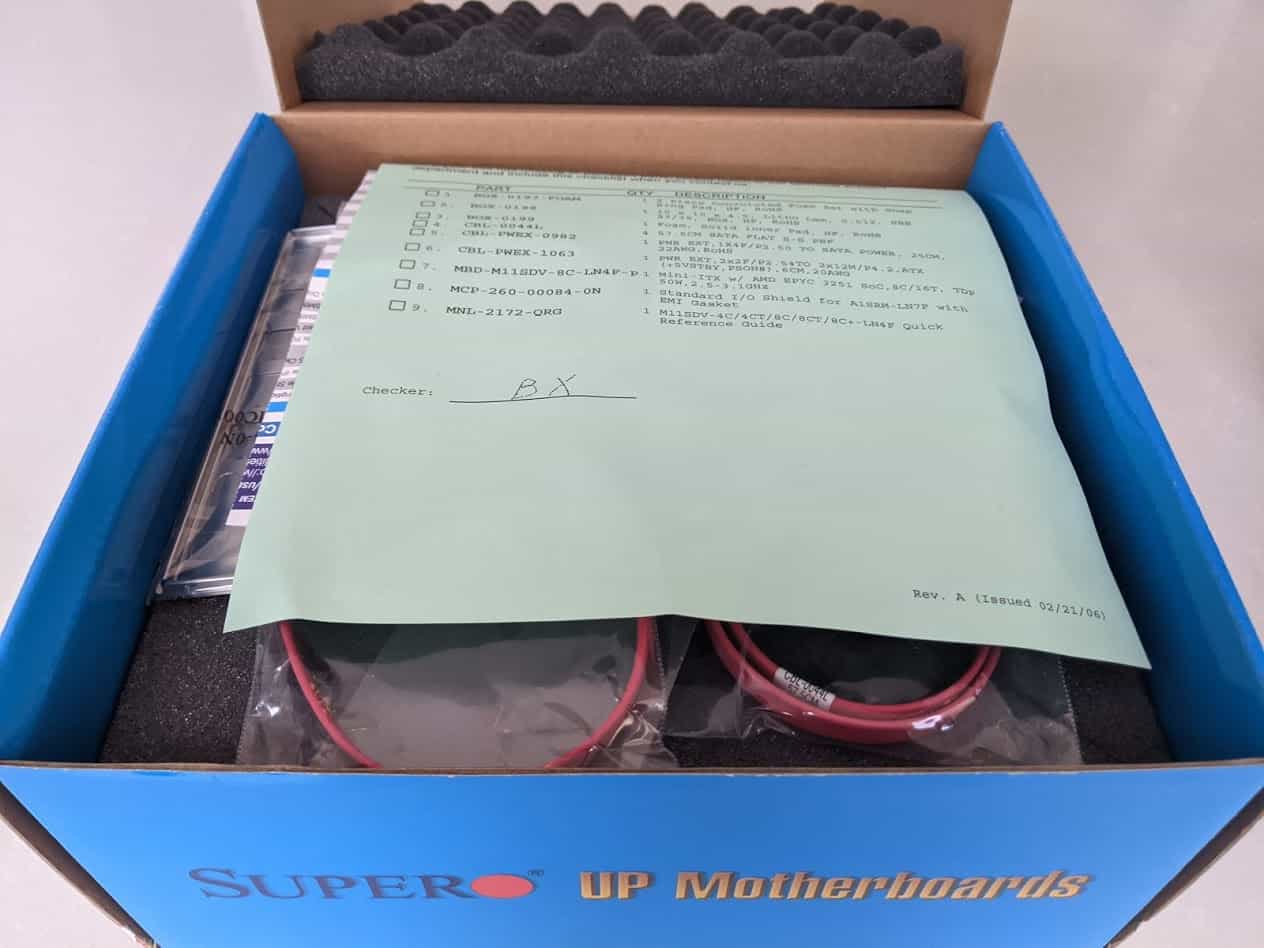 If we take everything out of the box, this is what we will have, the manual comes very well to know where the FANs are and with what order you have to put the RAM modules (important)
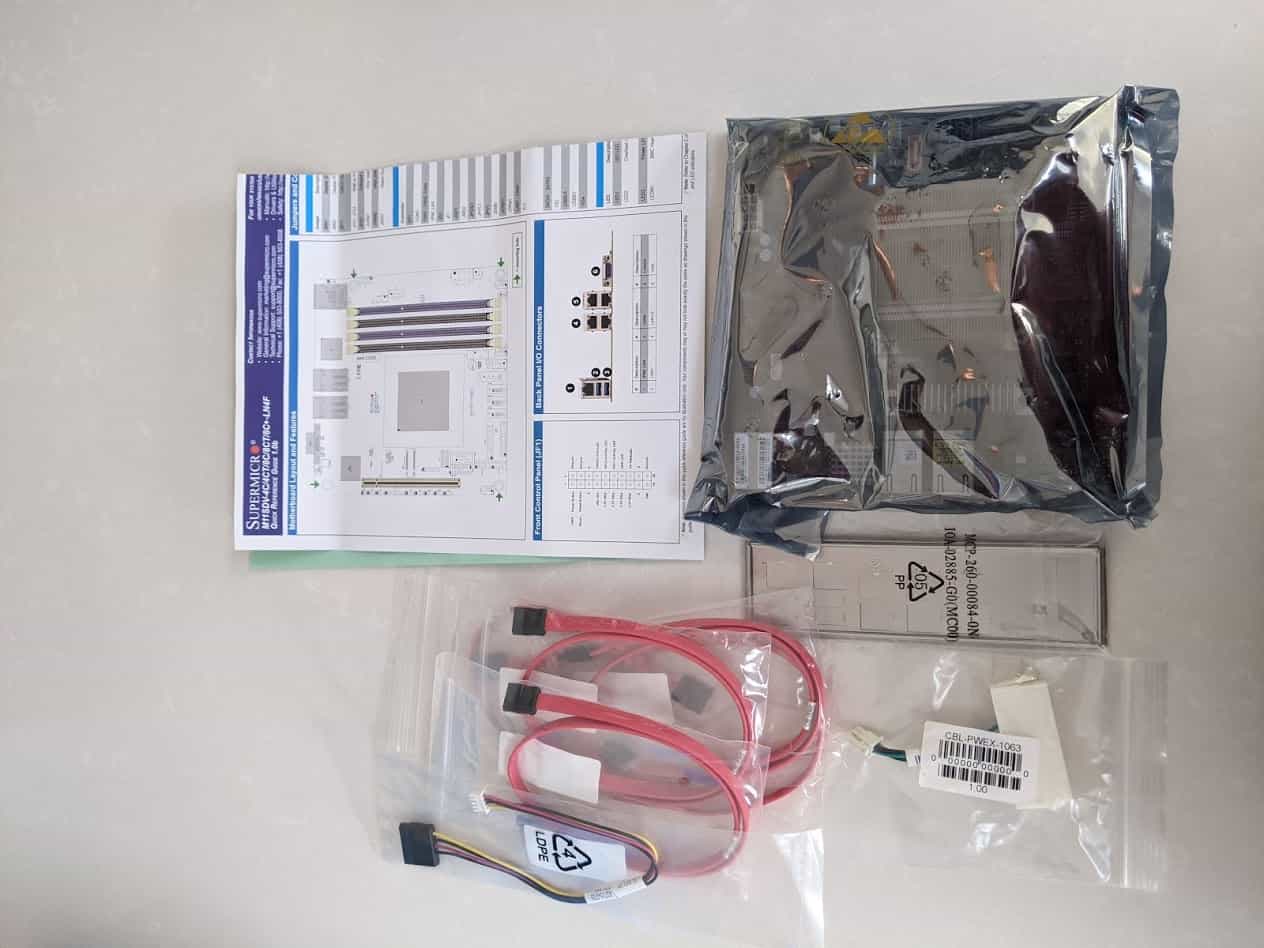 The motherboard, mine without the official fan, is really beautiful, although it is true that it could include 10GbE ports, it is not the end of the world since it includes a PCI-e that will surely be the candidate for that 2x10GbE card:
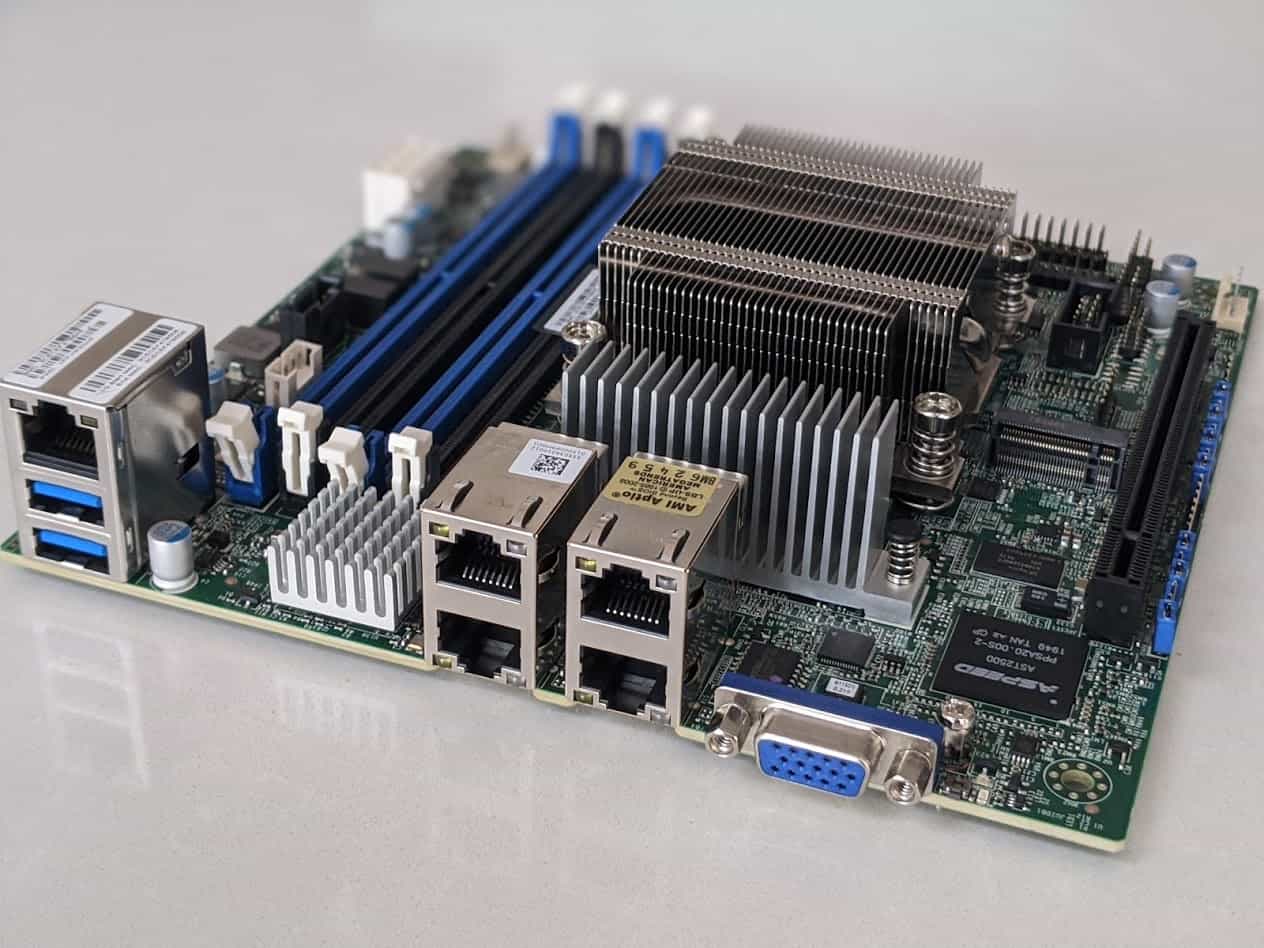 This is the view from the top of the motherboard, it is really beautiful, and small, very small:
 We return to the case, once we remove the case, we can access the inside, it has all the screws and cables needed in a bag, also if you look closely, that seen in the right corner, is one of the two extra bays for SSD:
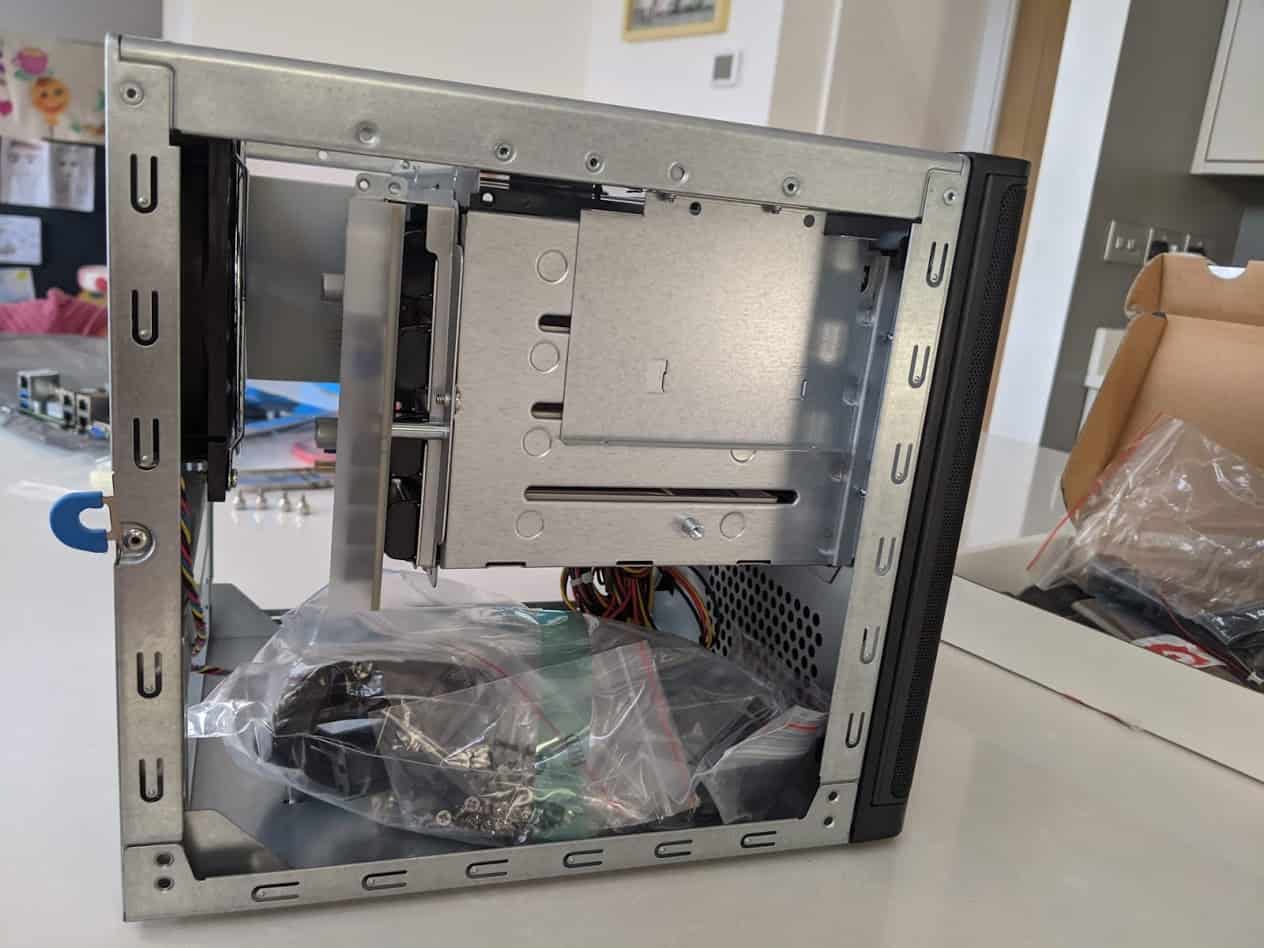 Looking at the case from behind, we see that there are three screws, plus another two small ones, holding what we could call a small drawer that houses the base plate, we will remove them all to take it out:
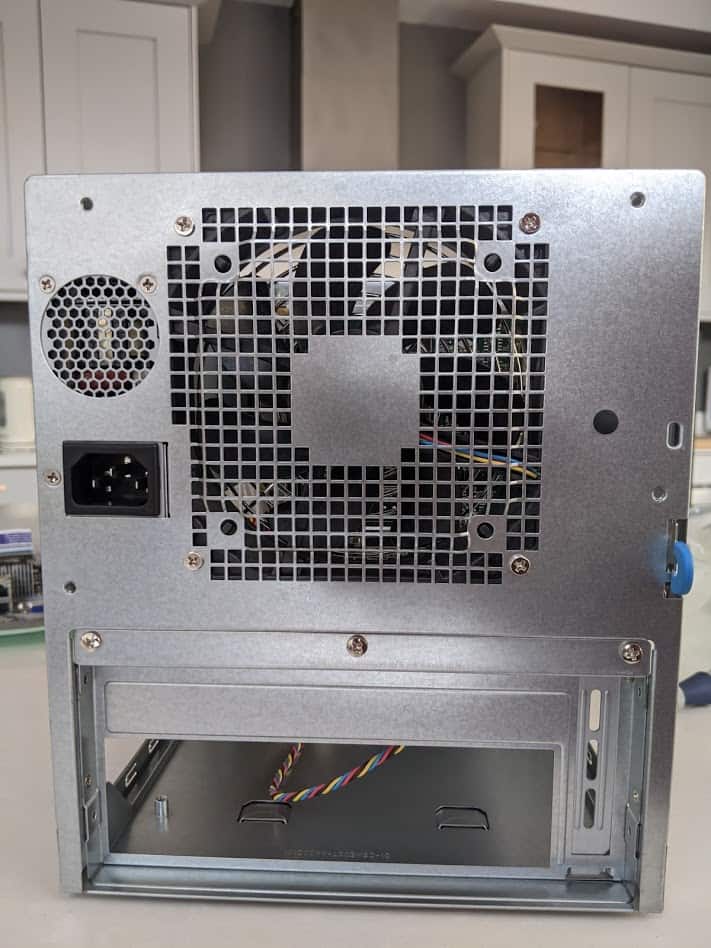 This is the result once we have removed the screws, we see that we have the little drawer ready to put the motherboard:
 The connector plate comes all blind, we will have to remove the connectors that we want to use, careful not to remove more than we need, because the so precious air escapes to be able to cool well, if you have the same model that I am commenting, this will be the aspect:
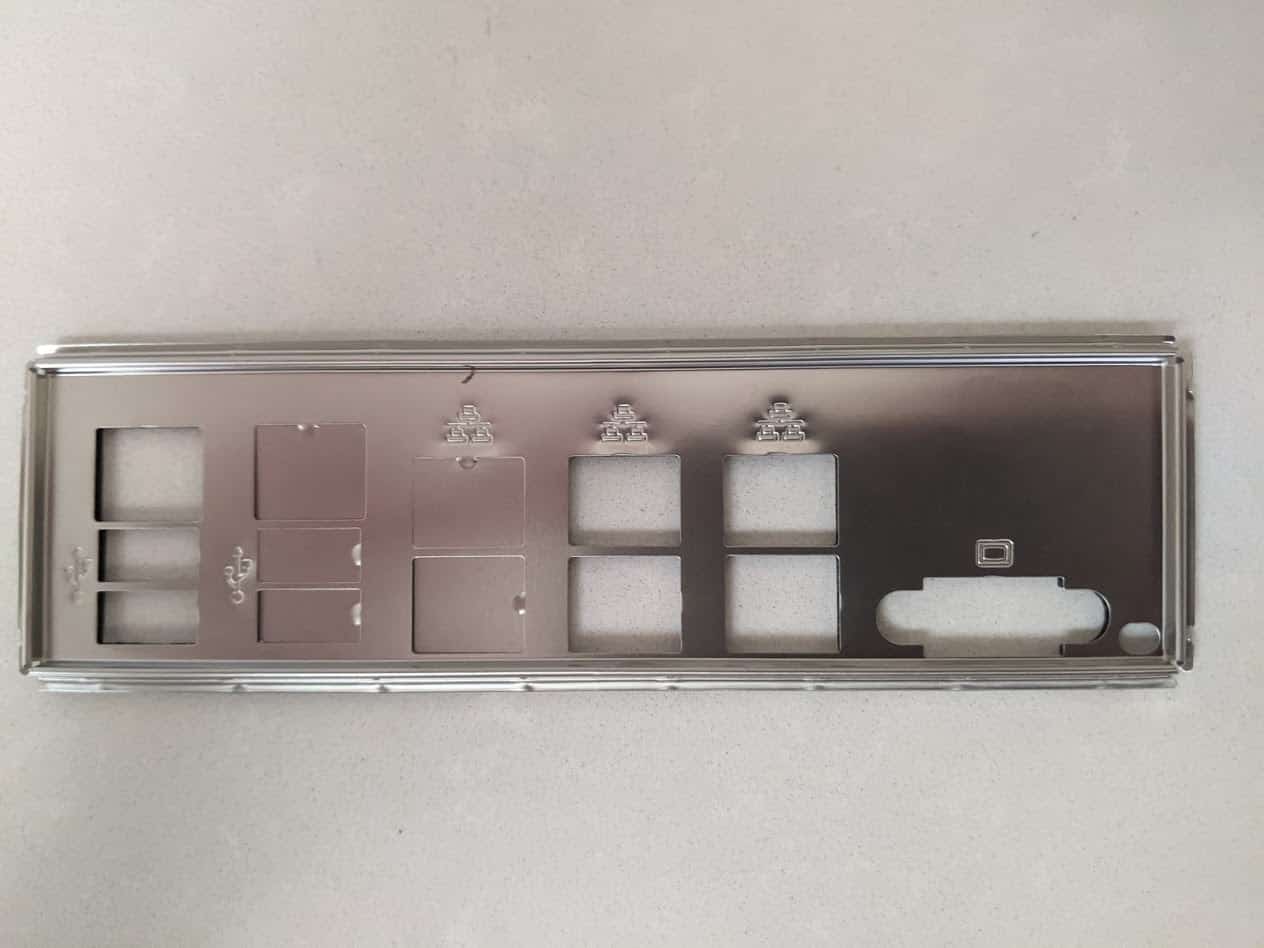 Before placing the base plate, place the plate in the drawer, and now yes, we can place the motherboard and put the four screws to hold it:
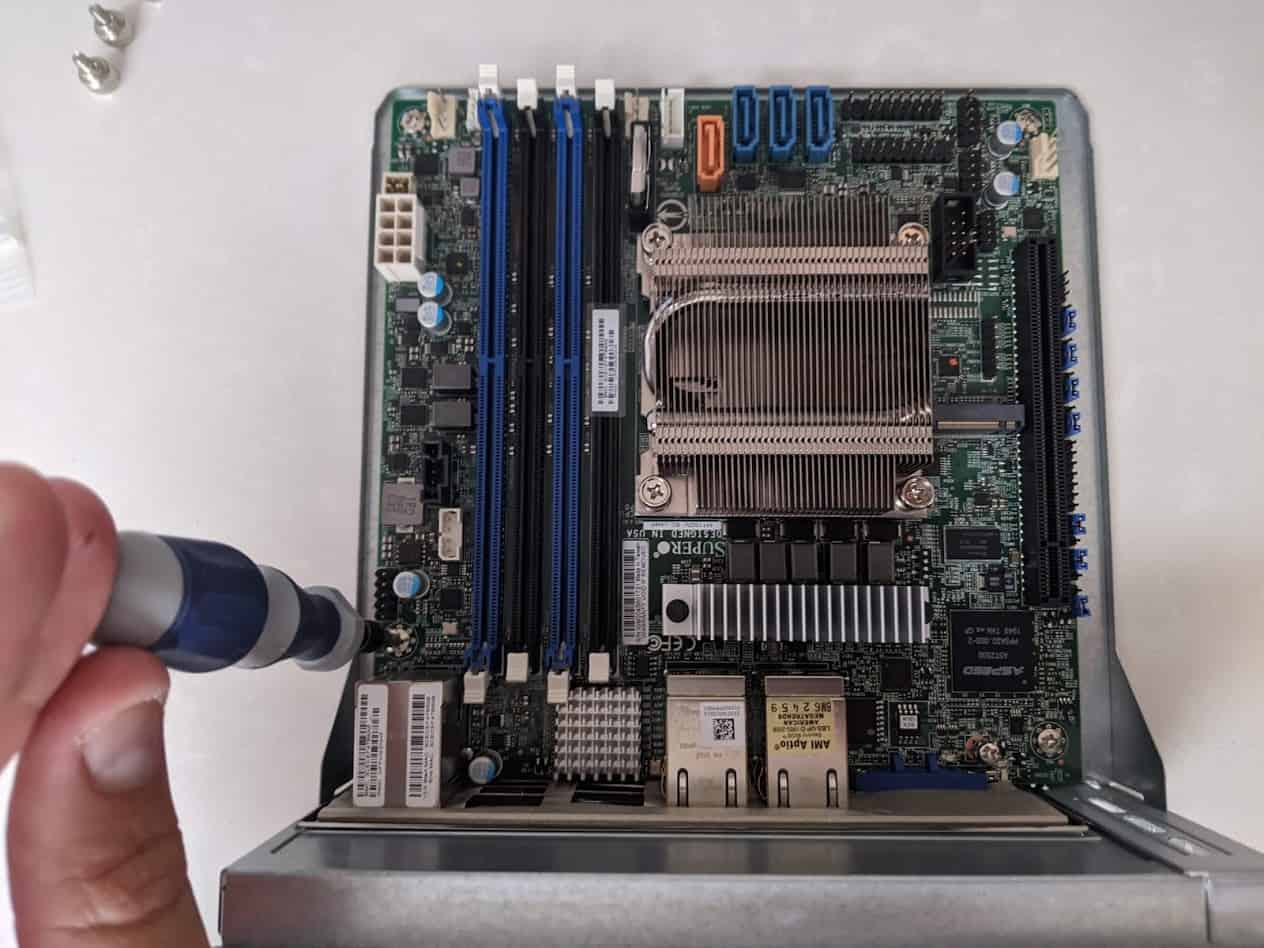 For the power, we will use the Supermicro adapter, which is included in the package, I am talking about the part CBL-PWEX-1063:
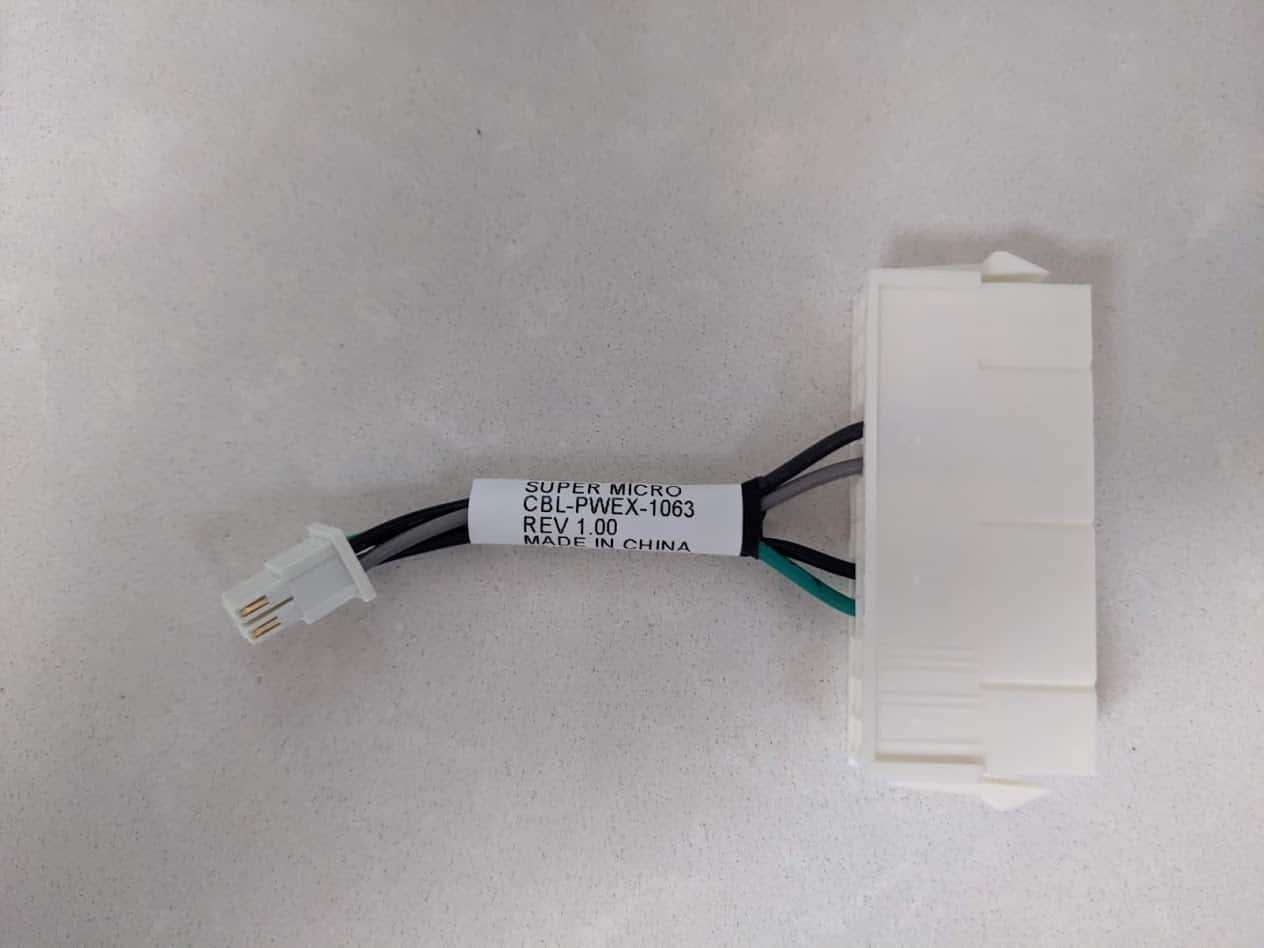 In addition, part of the list of material includes a 32GB SATADOM, where we will install our ESXi 7, is much more elegant and secure than connecting a USB of those that get at tradeshows:
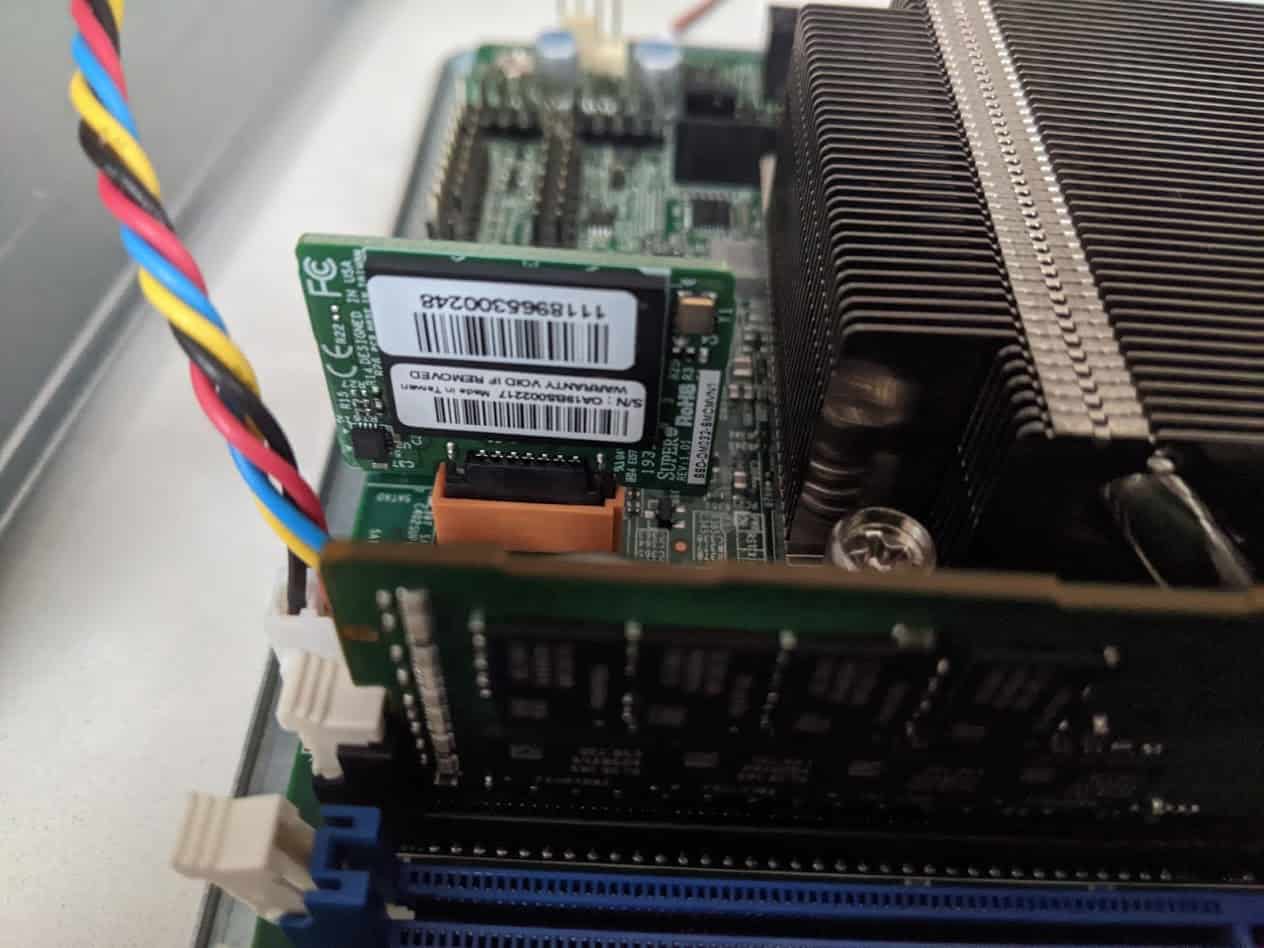 The connectors on the motherboard will be such that, on the left the power of the motherboard, on the right we see the front USB 3.0:
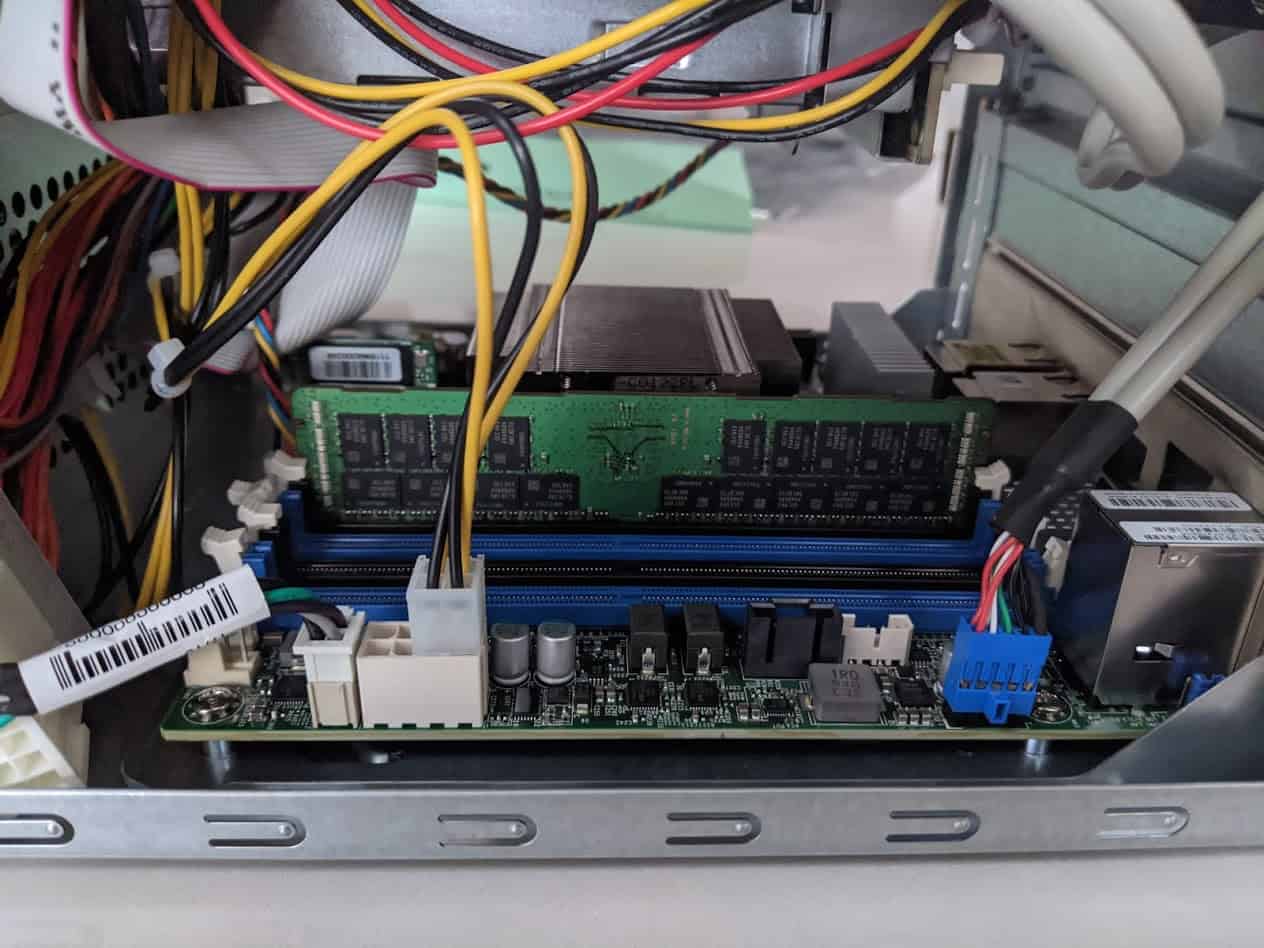 If we had an m.2, on the other side of the motherboard we could place it, it hasn’t arrived yet so I can’t show you a picture:
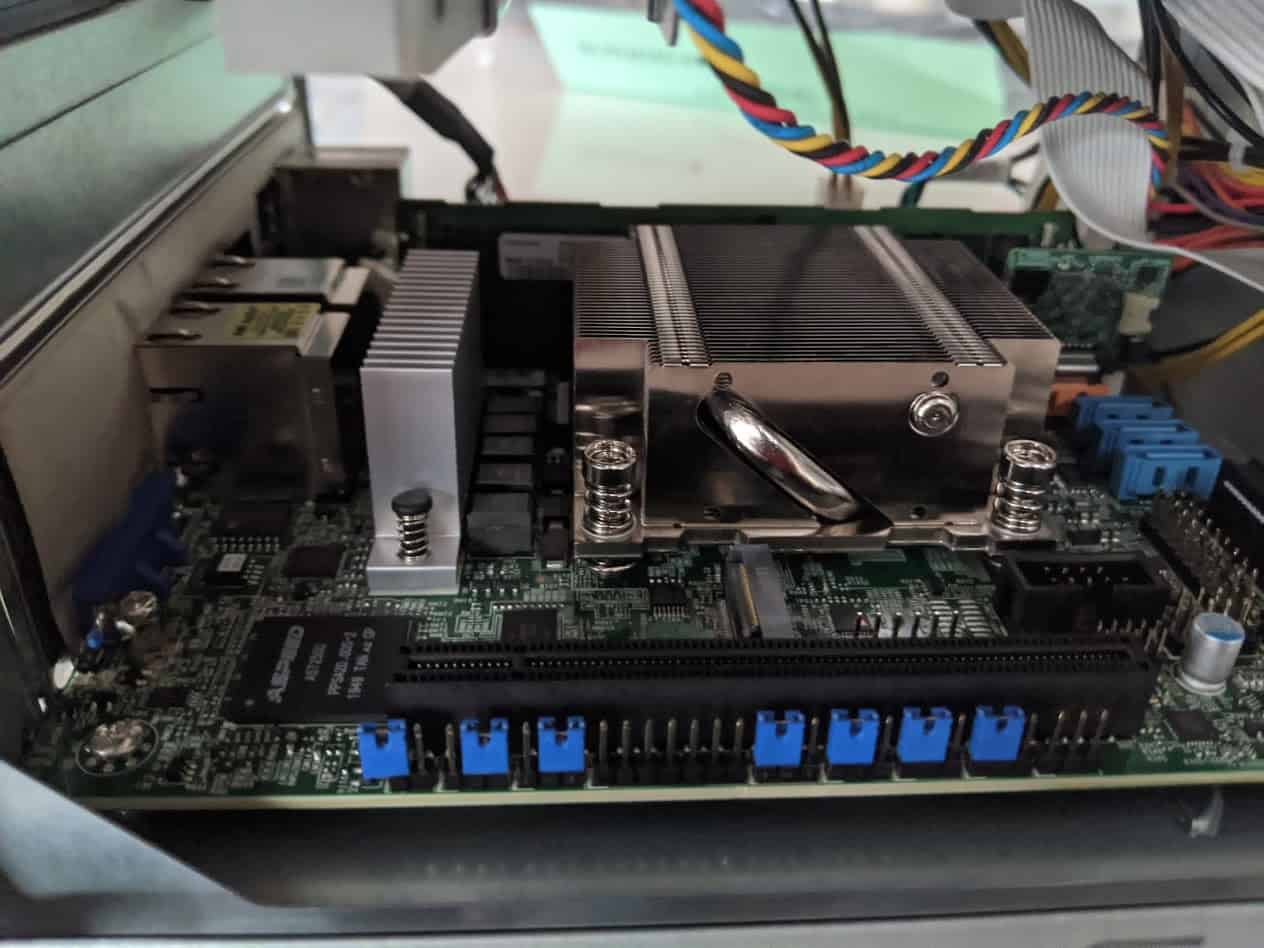 And that’s it! We have our AMD Ryzen 3251 Homelab ready to install our ESXi 7 and start using it:
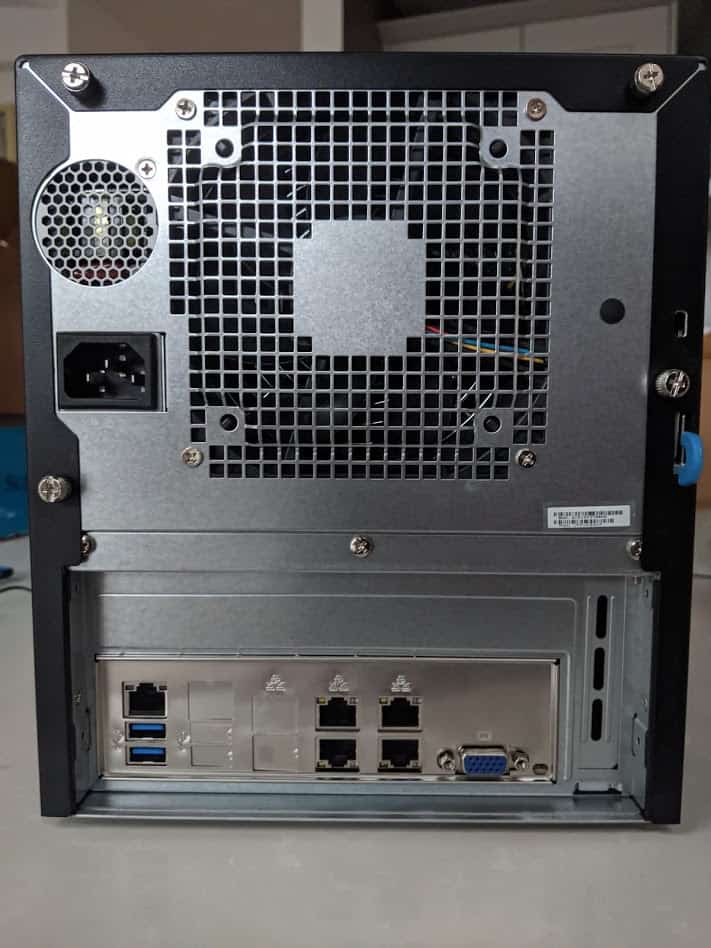
All in a Rack? Why not?
I’ve had the servers lying around on IKEA shelves for a long time, on my desk, where I can really, and it’s really uncomfortable, so after so long I thought it would be a good idea to put everything in a 19″ 9U Rack, where having done the calculations everything should fit.
After looking around, the best Rack that I could find is that Sabrent’s people sell, I leave you the link, along with the other two components that I added:
The Rack, the fans, and the tray arrived the next day, already assembled, without any tare, nor anything is broken, which is always the fear when acquiring something with glass: Once placed on top of my IKEA shelves, I added two 12CM USB fans to remove the heat that the future tenants will generate:
 In addition to the fans, I purchased a 19″ tray to hold the Supermicro E-300-9D and the QNAP I have, the link to purchase is above.
You can see the final result, elegant, well organized, with cable management from behind, along with the switch: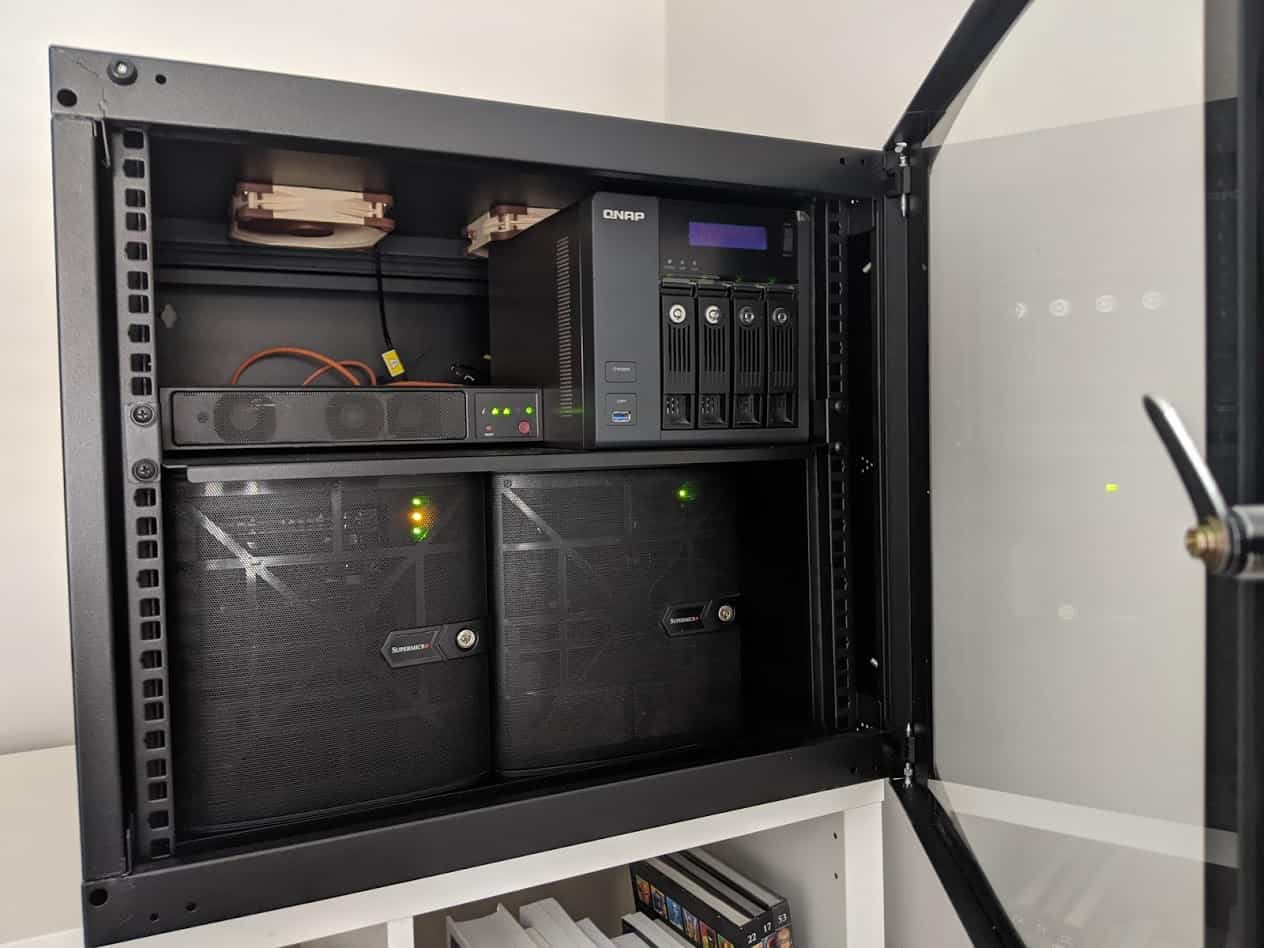 With everything closed, and with Grafana’s Dashboard with the IPMI of all the equipment, we see that the airflow is very good and the temperatures are kept low, to monitor everything, I have a 22″ HPE monitor and an arm to hold everything:
 Just that for now, I hope you liked the blog, you will find it useful, and if you acquire the equipment, leave your feedback here in the comments.
Hi,
Good read, thanks for sharing, just a quick question though, you mentioned you used the EXSI7 on it. How did that go, as this series is missing from VMware HCL?
Hello Shaf,
Now just ESXi7, but even the latest 7.0U2. It went well, detected everything and working like a charm, not issues so far.
Hi there
Very interesting. Right now I’m in the process of buying a homelab server and I chose exactly the same mobo and chassis.
I have a couple of questions regarding the cpu fans… How do you attached them to the motherboard? Are you perfectly happy with the results?
Thanks for your post 😉
Hi Javier,
There are a few fans here, the ones on the chassis, all good and no problem, the one on top of the CPU, I am just using the flexible plastic screws that came with the fan, and using them like that. It can be unstable if you move the server a lot, but as it is just on top of the heatsink, so far, so good, I have done that with my old Supermicro and it is here with me for years, no issues so far.
The server is amazing, the speed is great, the only downside is the lack of 10GbE, which you will need PCIe for it, and that some virtual appliances are meant to work only on Intel, like Nutanix AHV CE, Dell EMC Unity, etc. The rest, it is the best server on my cluster without a doubt and keeps much cooler than the other Supermicro with Intel.
Hallo. Your build interested me a lot. But I have one important question. What about the noise? Can you hear the server ? Due my old house limitations, I need to put the server to my bedroom. So, is possible to sleep with this server on ? I’m afraid that fanless run is not possible here…
Thank you a lot for the answer
Hello,
Is this the only server you will get? If so, plenty of space to expand, etc. With the Noctua fans, and this AMD, you will not hear a thing, as the temperature control is amazing. A tiny small humm but nothing for real. I have it now with other servers on a rack, so I can not take it out and show you, but the Noctua fans are great.
Best regards