
 Greetings friends, back in March 2020 I was telling you that Veeam had taken a very important step announcing Linux Proxies, a component that certainly makes all the sense in the world to select Linux for it, as it just moves information from one place to another.
Now with Veeam Backup and Replication v11, Veeam takes a leap forward and includes many improvements for Linux-based Proxies, for example, we can now use other backup methods, such as DirectSAN, DirectNFS, and Fibre Channel. And save on Windows licenses, and increase security.
In this fantastic post, we are going to see the step by steps to use an Ubuntu 20.04 LTS in DirectNFS mode, to some disk enclosures I have serving NFS (it’s actually my QNAP, and my NetApp ONTAP, I told you how to enable VAAI here). This way the backup is going to fly, as well as freeing up the workload to the hypervisor.
Diagram of Linux Proxy operation using Direct-NFS
Data backup in the direct NFS access transport mode is performed as follows: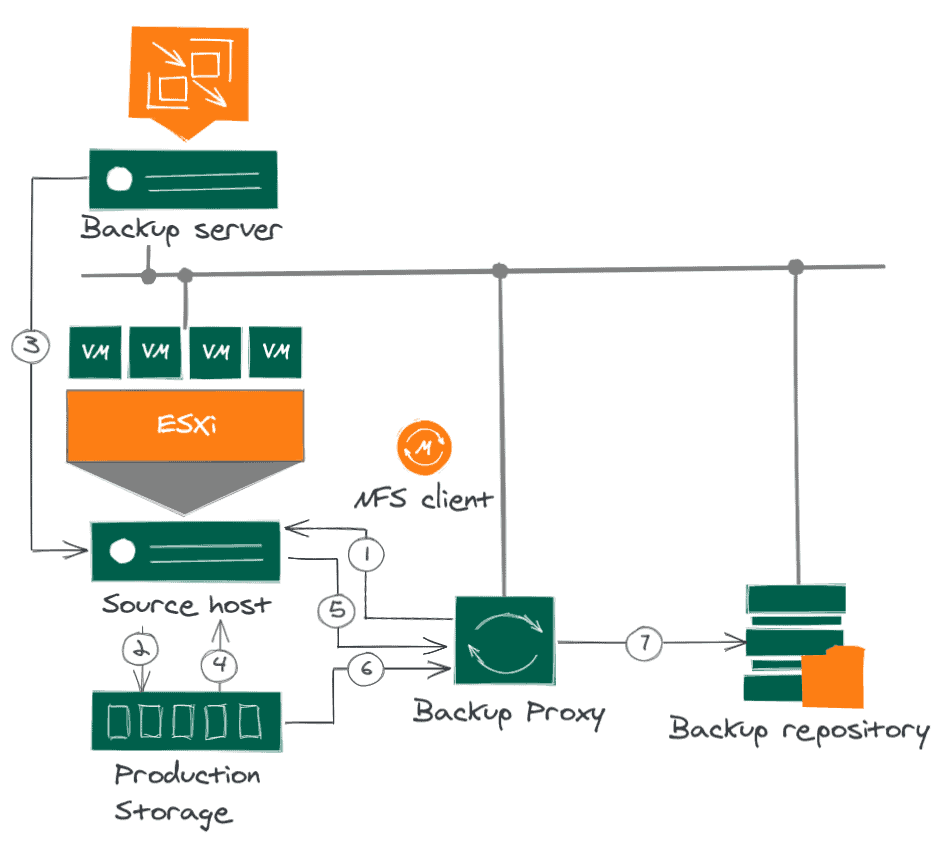
- The backup proxy sends a request to the ESXi host to locate a VM on the NFS datastore.
- The ESXi host locates the VM.
- Veeam Backup & Replication triggers VMware vSphere to create a snapshot of the VM.
- The ESXi host retrieves metadata about the VM’s disk layout on the storage (physical addresses of the data blocks).
- The ESXi host sends the metadata to the backup proxy.
- The backup proxy uses the metadata to copy the VM data blocks directly from the NFS datastore over the LAN.
- The backup proxy processes the copied data blocks and sends them to the destination over the LAN.
Fantastic, now that we know how it works and how it sends information from one location to another, let’s take a look at the steps to get our Linux Proxies up to speed.
I assume you are using dedicated networks. For example, all my NFS/SAN traffic goes over the 192.168.100.0 range, with a dedicated cable. Since my proxies are virtual, I have added a second network card that sees this network.
Configuring our NFS Client
The steps are very simple, in my case I have tried several times and in my lab I needed nfs-common installed (although I don’t see it documented in the Veeam helpcenter, maybe it’s my lab):
apt-get install nfs-common
For RedHat users:
yum install nfs-utils
Also, make sure you have a network that can connect to the NFS. Make sure you have pinged the NFS Server:
ping 192.168.100.50
PING 192.168.100.50 (192.168.100.50) 56(84) bytes of data.
64 bytes from 192.168.100.50: icmp_seq=1 ttl=64 time=0.200 ms
64 bytes from 192.168.100.50: icmp_seq=2 ttl=64 time=0.224 ms
64 bytes from 192.168.100.50: icmp_seq=3 ttl=64 time=0.220 ms
64 bytes from 192.168.100.50: icmp_seq=4 ttl=64 time=0.263 ms
Ensure that the NFS Server has our IPs allowed
To make sure that on the NFS Server, the IPs of the Proxies are allowed.
Allow NFS clients on QNAP
For example on my QNAP, it would be as follows. From our Control Panel, click on the Shared Folder we want, click on Edit Shared Folder Permission: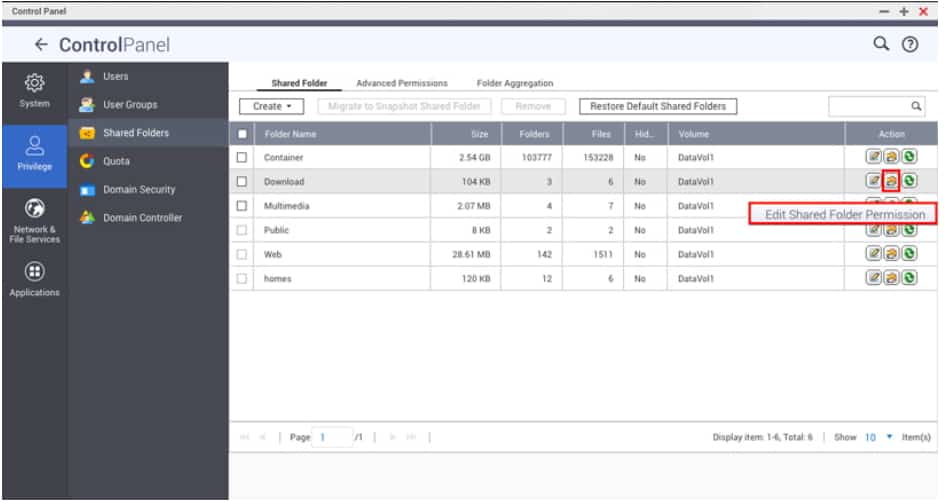 Click on the drop-down menu, and NFS host access:
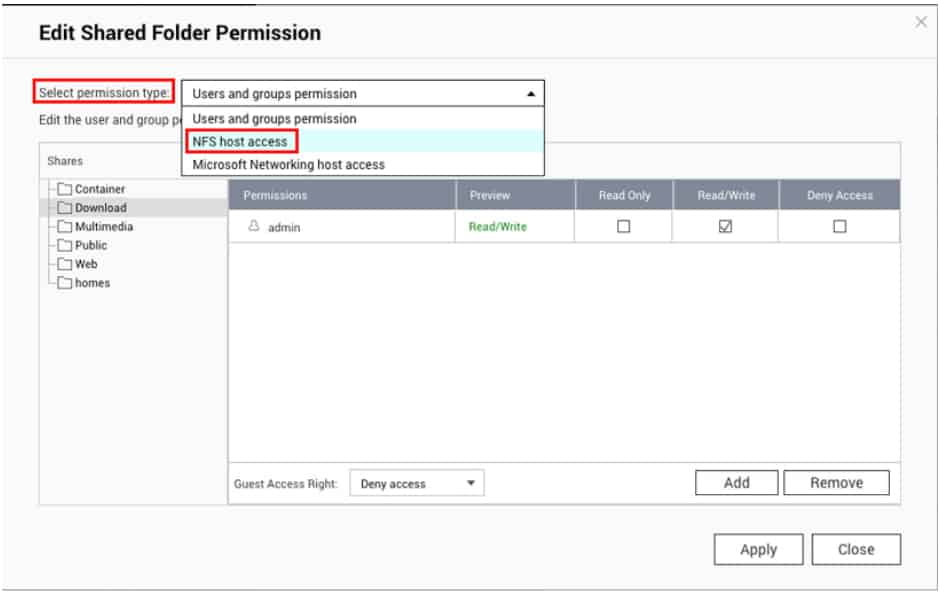 Finally check that we have the range, or if not add the IP of our Proxies:
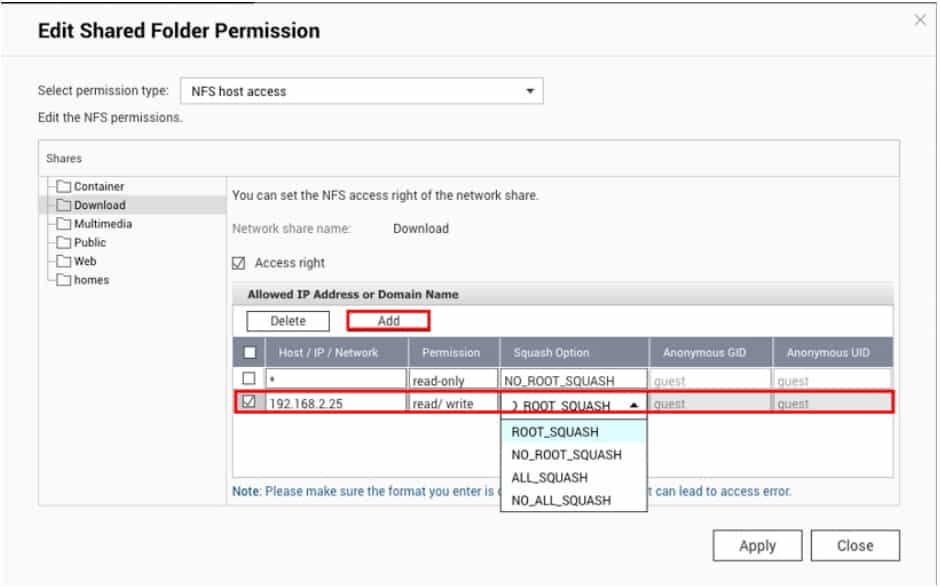
Enable NFS clients on NetApp ONTAP 9.8
For example in my ONTAP 9.8, it would be as follows. From our ONTAP, we will go to volumes, click on the volume we want, click on Edit, and then Export Settings, we can see the policy: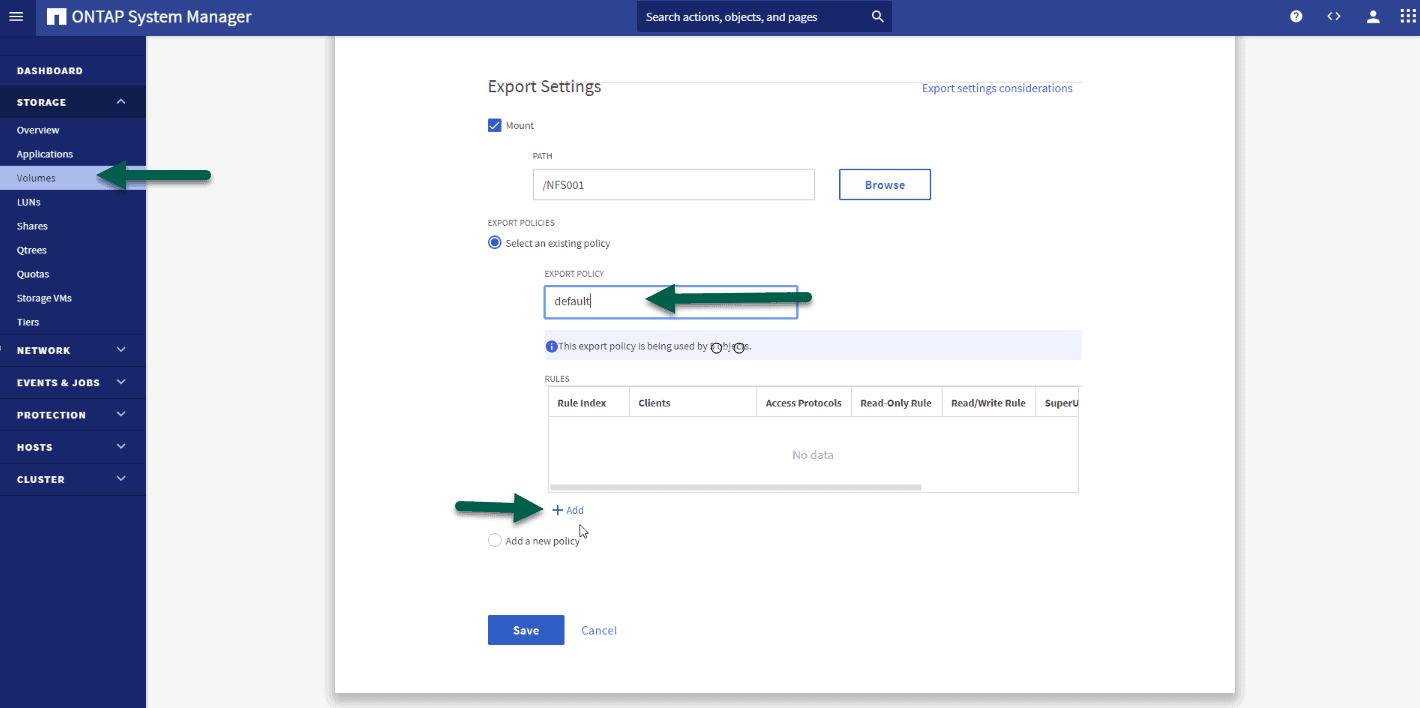 We will have to add our Proxies, or all its range, whichever you see more secure, and give it the permissions we need if you have NFS 4.1 Kerberos is also needed:
Final configuration in Veeam Backup and Replication
We have little left, to force the traffic to go through DirectNFS, I like to change the transport mode and launch the job, in the proxy, or proxies that we have configured we will do the following: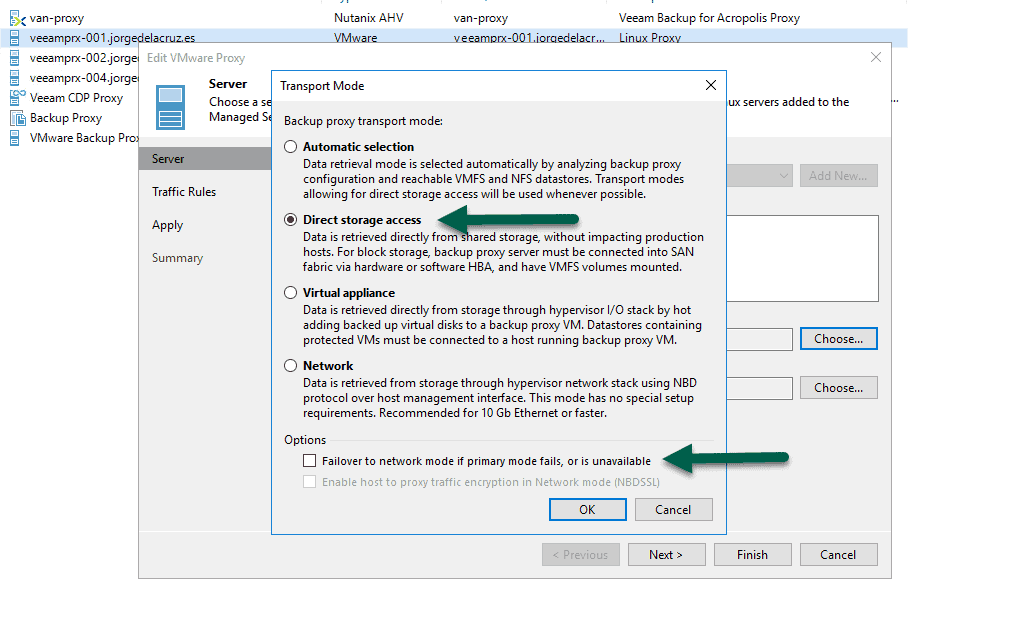 If we want, optionally, we can also tell it to only process VMs that are in the datastores we want, this would be perfect if we have dedicated proxies for these workloads that we know only process VMs from certain datastores:
 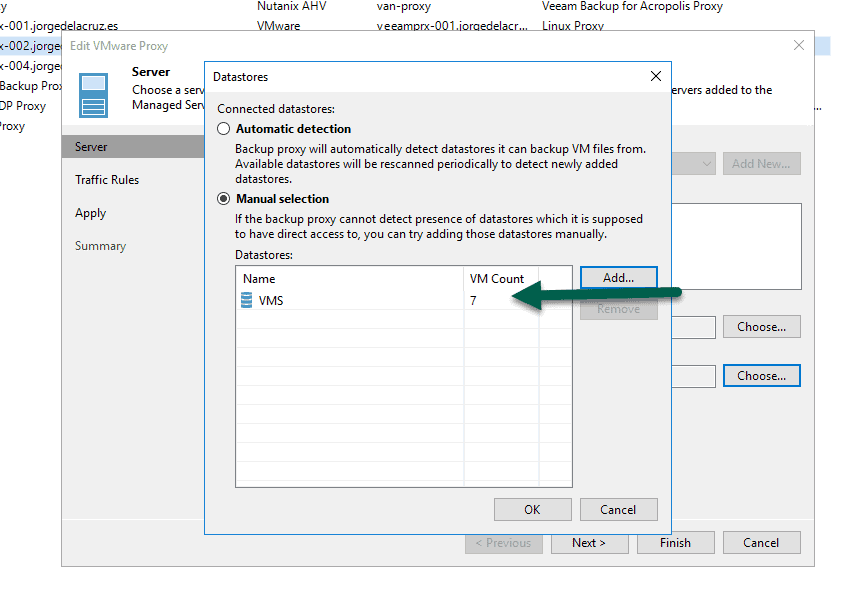 Before we run the job, it will be important to run a Proxy rescan so it does rescan all NFS mount points:
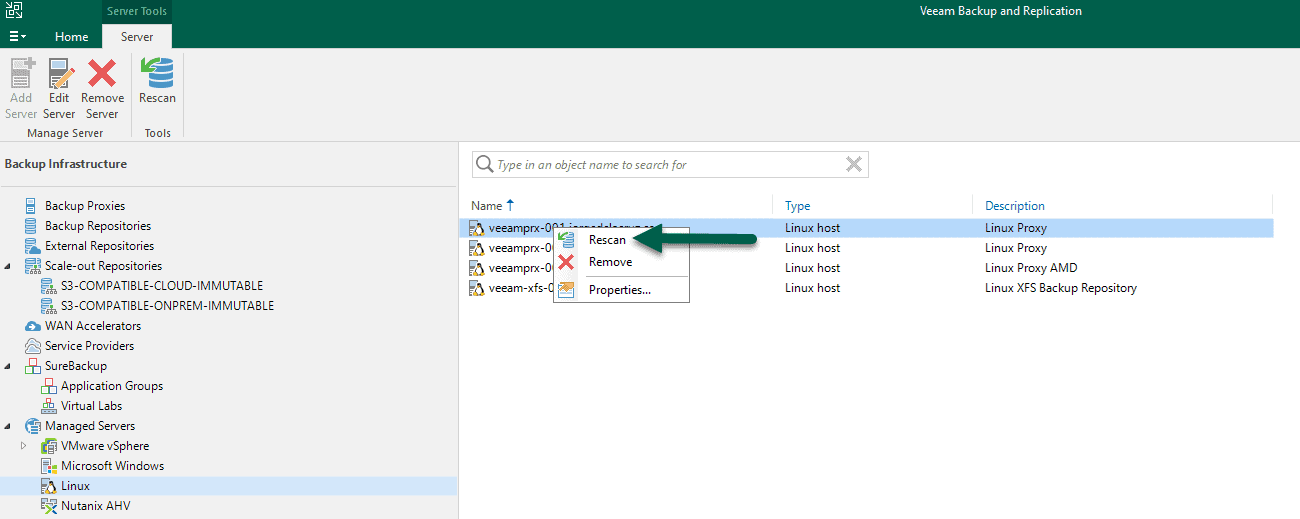 We will see something like the next:
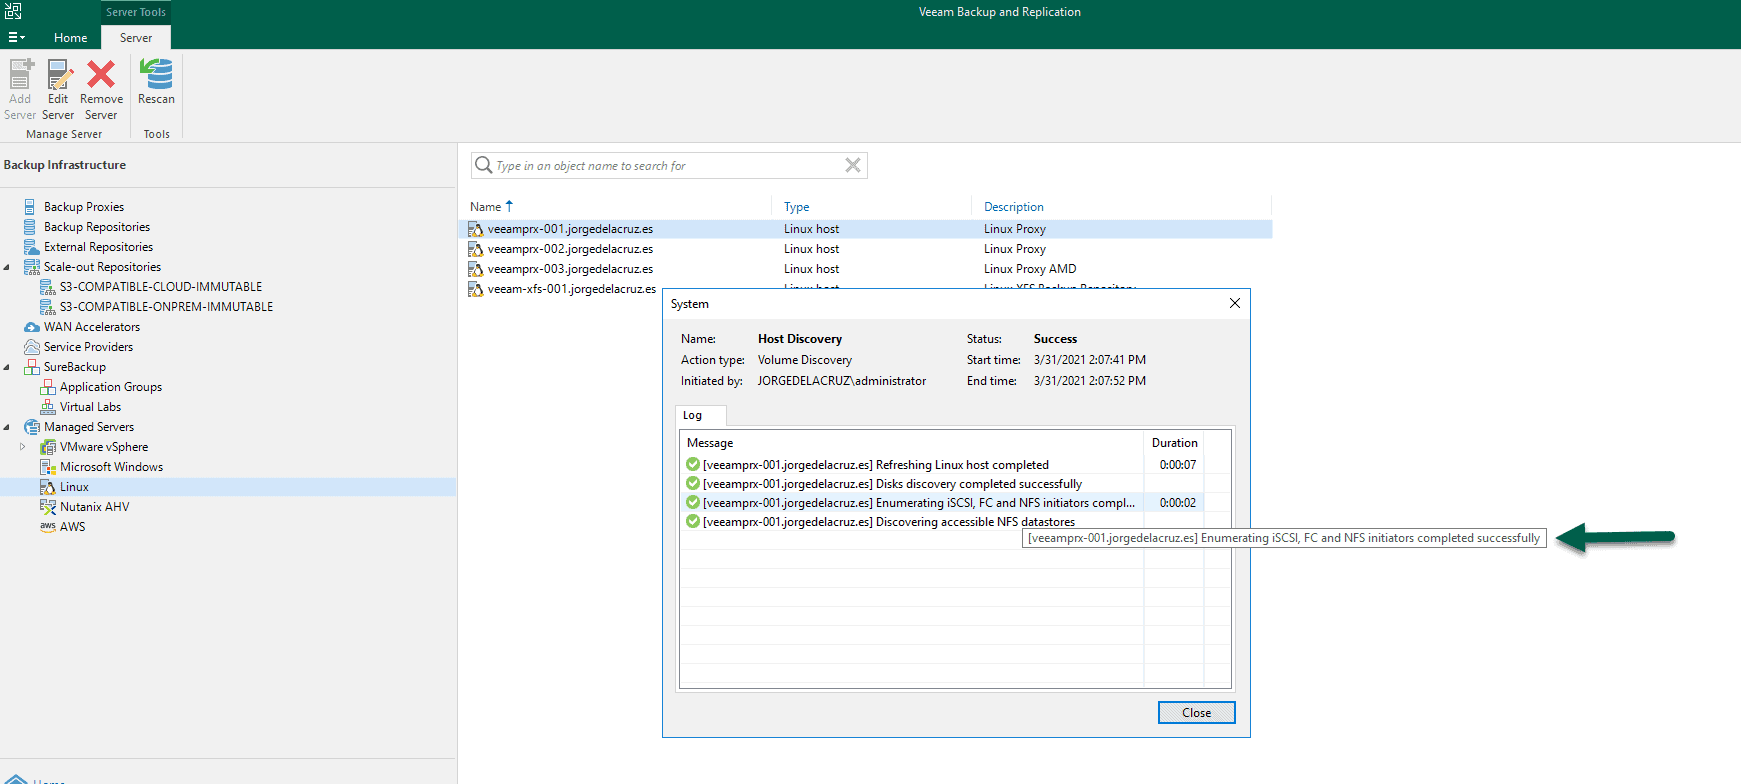 We launch the job and see that it uses [nfs], and generally, the speed should be very good:
 That’s all friends, take a look at the entry on how to create the Linux repository, which has a video also in Spanish and much more information to get started. I hope you like it.
Fast? Hardly… 69MB/sec? Is your storage connected by gigabit links? Not even a very good test backup since it looks like an incremental and only actually transferred 300mb over the network.
Well, that specific VM comes from a 7.2K SATA QNAP NFS, going to a Linux backup repo, on another 7K SATA on an ESXi. But yes, usually DirectNFS backups should be faster than other transports, same as DirectSAN, maybe same or a bit slower on some cases when everything is 10GbE.
I do not have better hardware to try with proper NFS on faster disks. If you try it, share your results, please.