 Greetings friends, today I bring you a very interesting entry, it is about how to create a Virtual Tape Library or VTL, so we can use it virtually with for example Veeam. And thus be able to emulate a real tape library.
The objectives of installing a VTL in these modern days can be: or simply to learn how to manage, perform tests and so on in our labs, could also be considered a safer way to save Veeam files (.vbk) flat on a disk, because with the VTL, creates that tape emulation that is more difficult to access and break, and finally could be used to re-use for example those old servers that we have and we want to give a last use as an archive repository using this safer VTL methodology.
For this lab I am going to use QUADStor, which is a product that I think is brilliant, besides being free and available for CentOS and Debian, among its functionalities I would like to highlight:
- Emulate tape libraries such as ADIC, HP, IBM and many more
- Emulate tapes from HP, IBM, Quantum and many more
- Access Fibre Channel, iSCSI, Infinibandy of course local SCSI
- Data deduplication
- VTL Replication
- Import/Export physical tapes
- Tape Encryption
- Linear Tape File System (LTFS) Support
How to Install and Configure QUADStor VTL, plus Configuration on Veeam Backup & Replication in video (Spanish)
As I know that many of you like videos, I leave you the whole process so that you can see step by step how to create the VM, installation, etc:
How to create the QUADStor VTL virtual machine
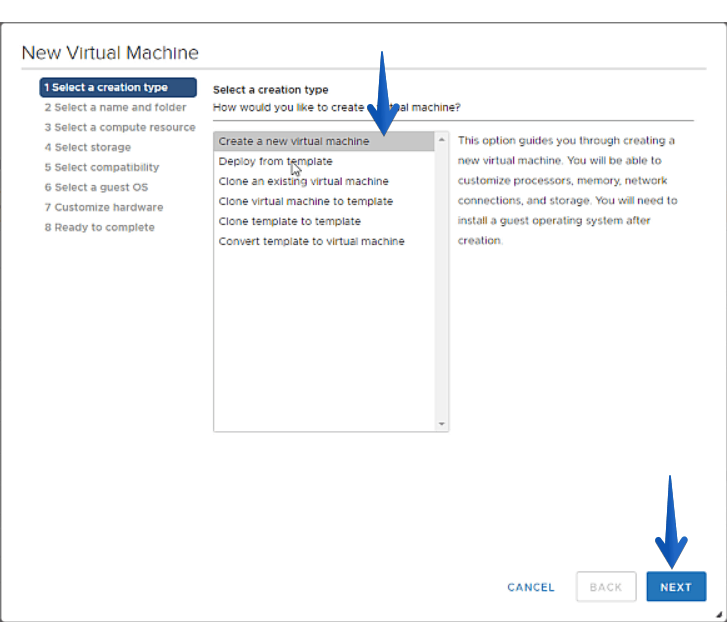
We are going to create a new VM that will have 2vCPU and 8GB of RAM, and as many disks as we want virtual tapes, let’s go there, the first thing will be to select that we want to create a new VM:
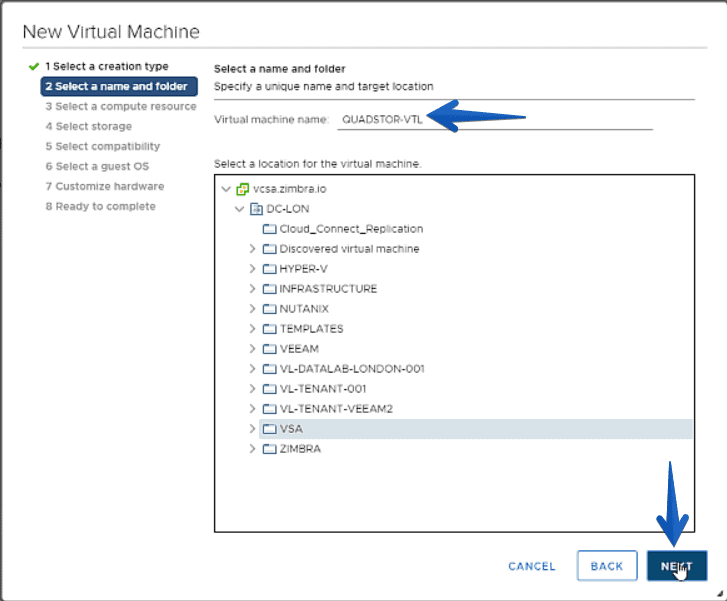
 We will select the name of the same one and in which folder we want to keep it:
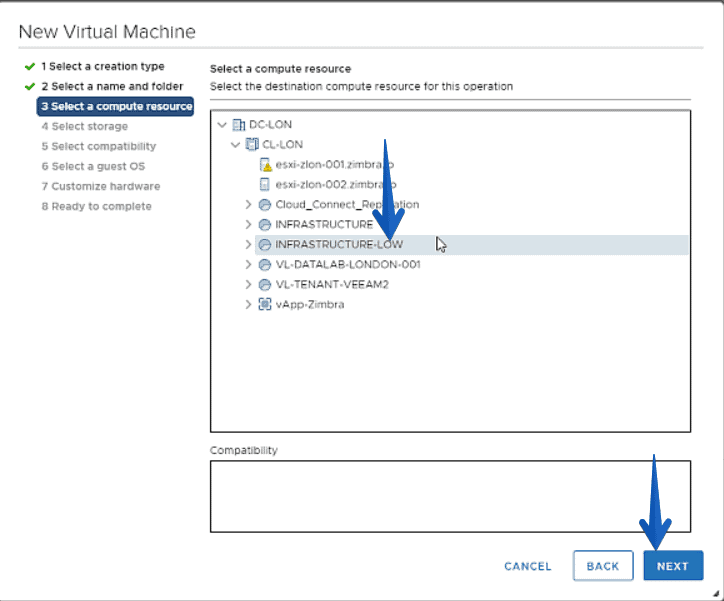
 Select the cluster, host or resource pool where you want to deploy the VM:
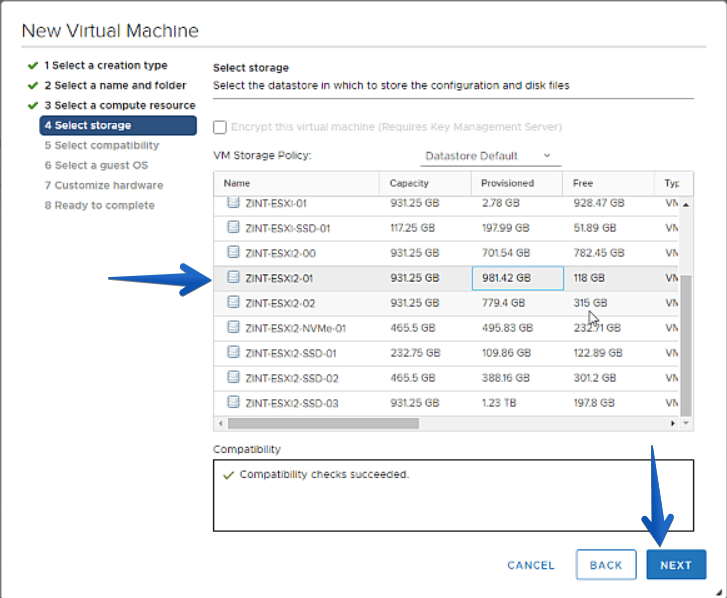
 Now select the Datastore for the system partition:
 We will select compatibility with the environment you have, in my case 6.7 or higher:
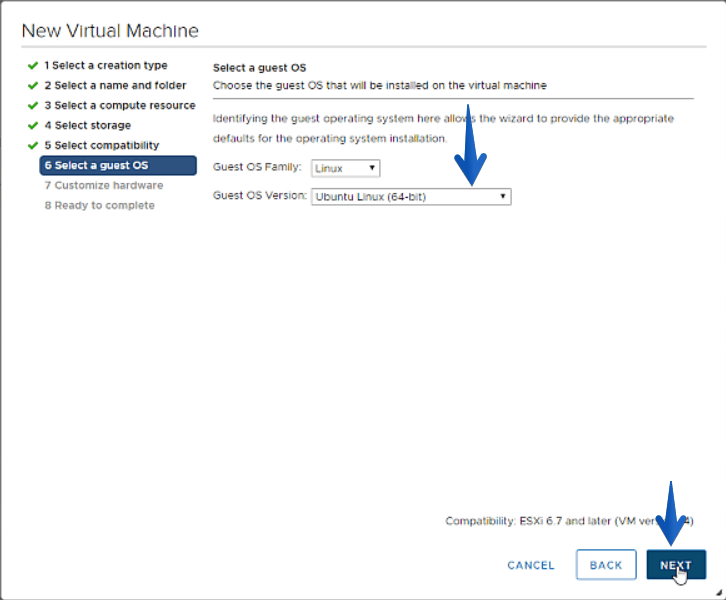
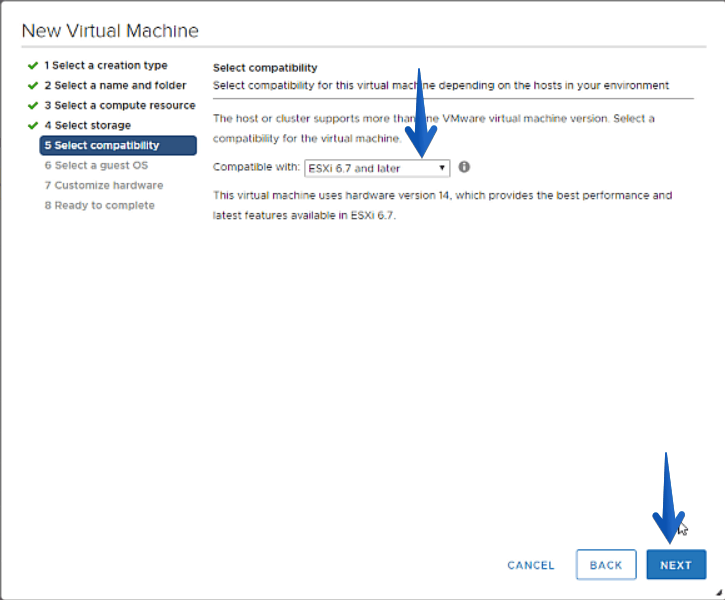 In GuestOS, I’m using Ubuntu so I’ll select Ubuntu Linux 64-bit:
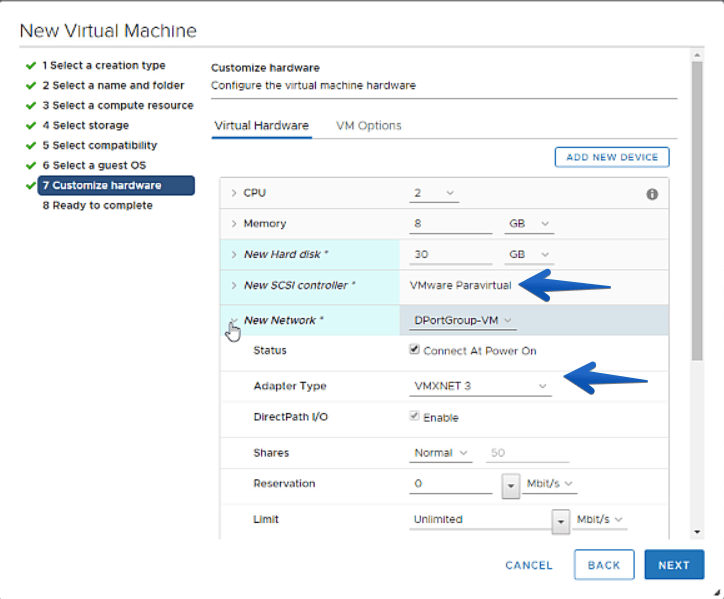
 Finally, we will make sure that we put the 2vCPU, the 8GB of RAM, that VMware Paravirtual is the controller and VMXNET3 the network card:
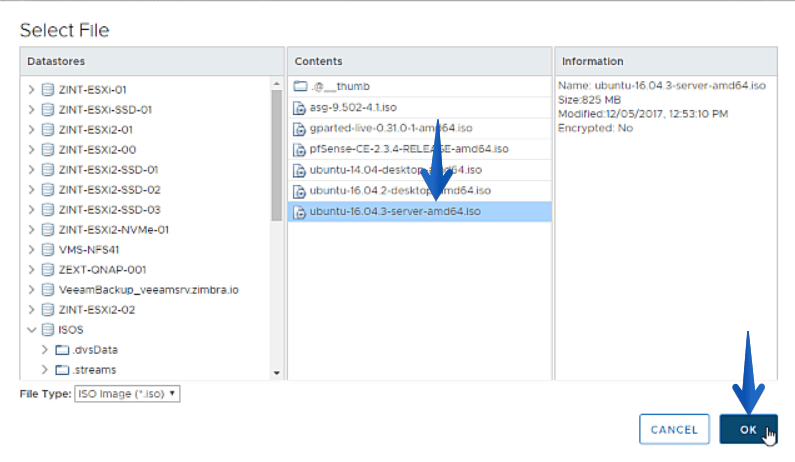
 We’ll add the Ubuntu ISO and connect it:
 Press Finish for the VM to be created:
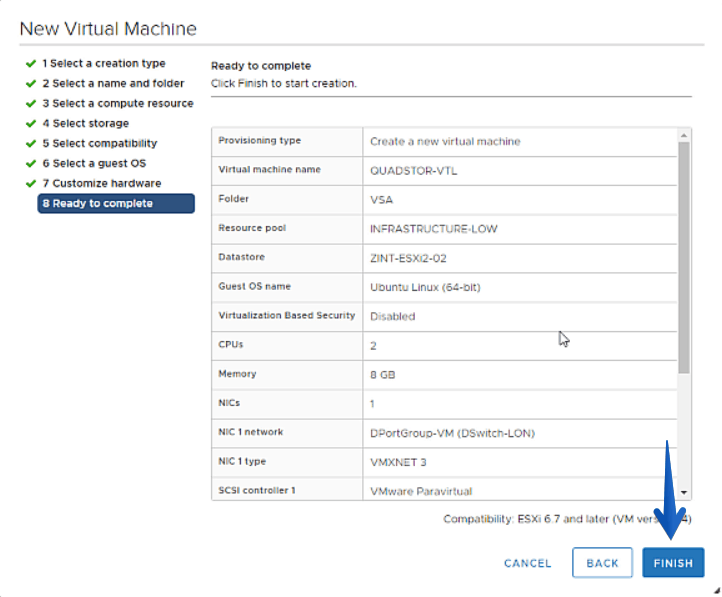
I don’t put you screenshots of the Ubuntu installation process, as you have it in detail in the video above.
How to install QUADStor VTL on Ubuntu Linux 16.04 LTS
Before installing the QUADStor package, we have to install the dependencies of it, as always, we will do an update of the packages before:
sudo apt-get update && apt-get upgrade
We will now install the necessary packages for QUADStor:
apt-get install uuid-runtime
apt-get install build-essential
apt-get install sg3-utils
apt-get install apache2
apt-get install psmisc
apt-get install firmware-qlogic (for FC access)
apt-get install linux-headers-generic
a2enmod cgi
If everything went well, we can now download and install the QUADStor package:
wget https://www.quadstor.com/vtldownloads/quadstor-vtl-ext-3.0.28-debian-x86_64.deb
dpkg -i quadstor-vtl-*.deb
This process does not take more than 2 minutes, once everything is ready, we will have finished the installation process, simple right?
Configuration and first look at QUADStor VTL
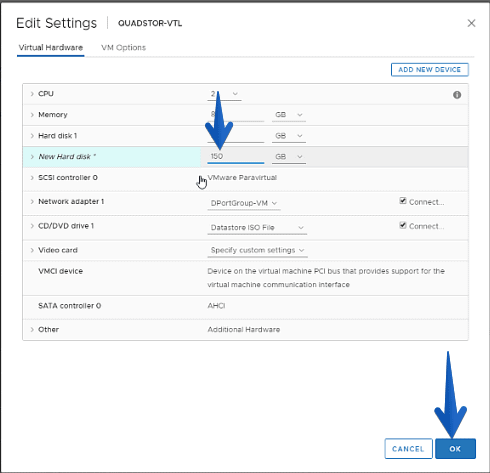
Once we have installed QUADStor VTL, we will go to the IP of the VM, where we will access and see something similar to this, with the version installed: We will add now the additional Disks that we want as virtual Tapes, in my case only one of 150GB:
 In the tab of Physical Storage we will be able to see the new disk, we will click on Add:
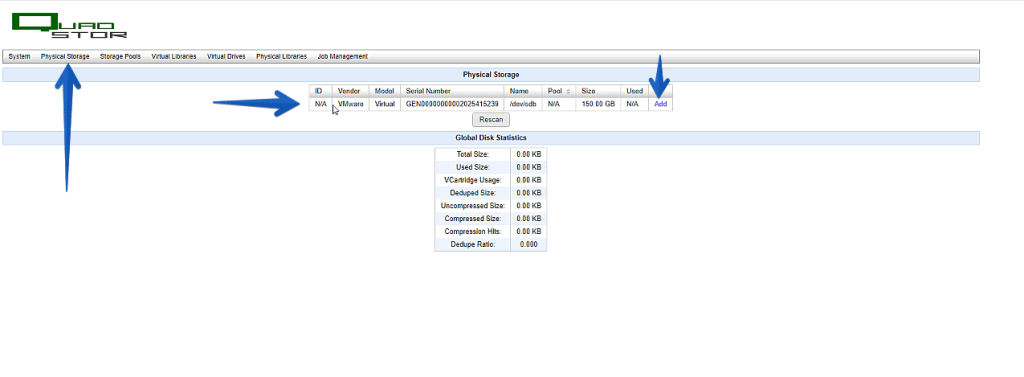 We only have one Storage Pool, so select it by default and click on Submit:
 The disk will start to initialize as Virtual Tape:
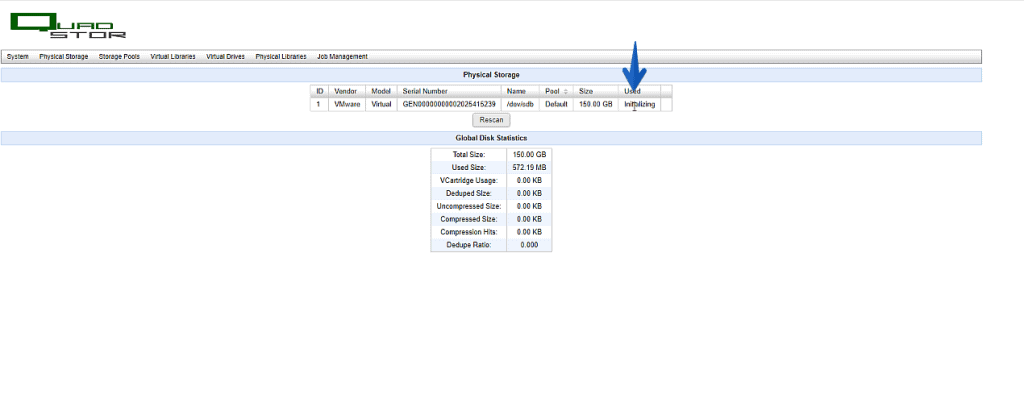 After a minute or less, we will have our virtual Tape ready:
 From the Virtual Libraries tab, click on Add VTL:
 Select the name of the VTL, the vendor we want to emulate, the type of library of that vendor, and the tapes we want to emulate:
 Once we have the VTL created, we’ll see the disks that are now virtual Tapes, click Add VCartdridge to emulate a tape library:
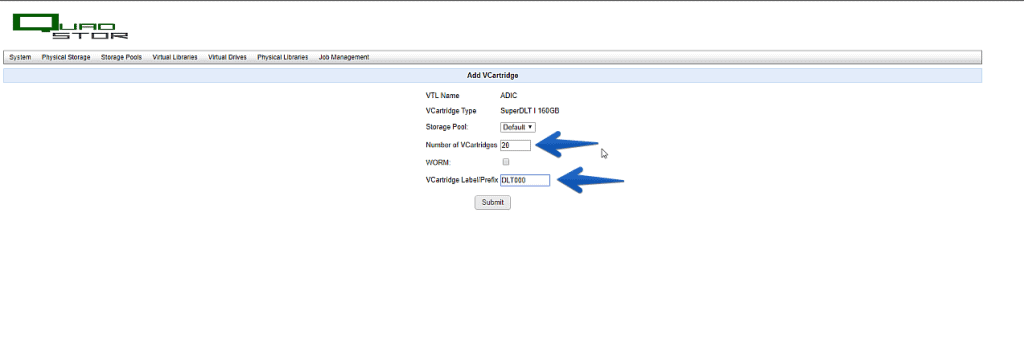
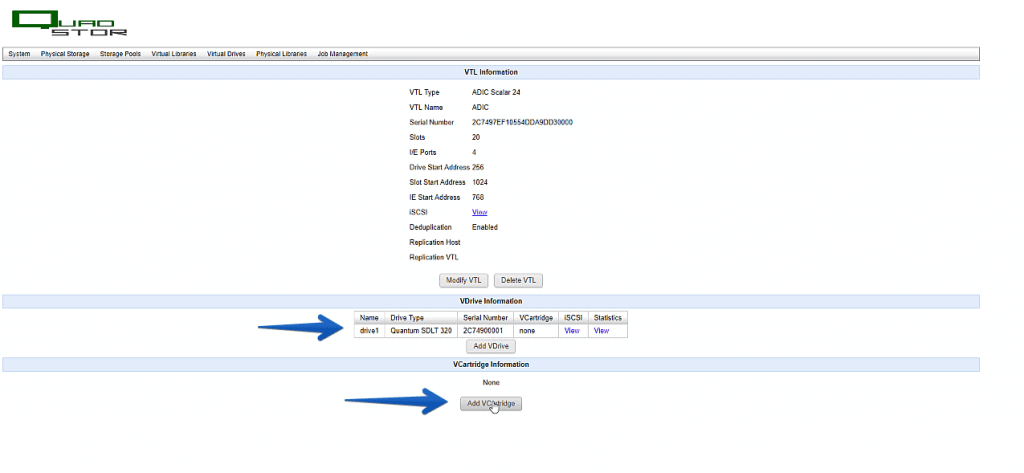 In my case I said that I want to emulate a library with up to 20 tapes and that the prefix of the tapes will be DLT000:
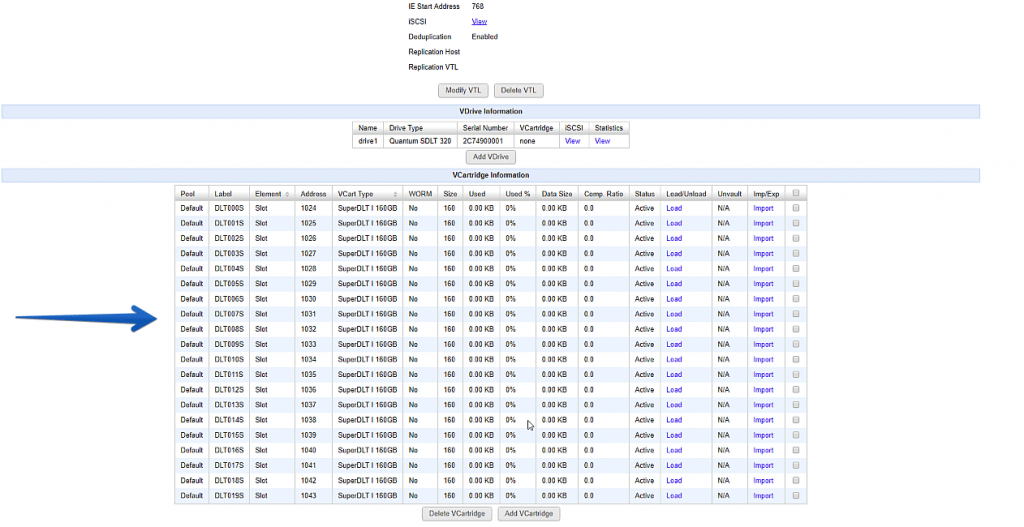
 The process takes a few seconds, and we can see that we have our virtual library of virtual tapes ready to be used:
Configuration of Veeam Backup & Replication with this new QUADStor VTL
It’s time to connect this virtual library with the server we want to use as Tape Proxy for Veeam, in my case is the same Veeam Server, we will search and run the iSCSI Initiator:
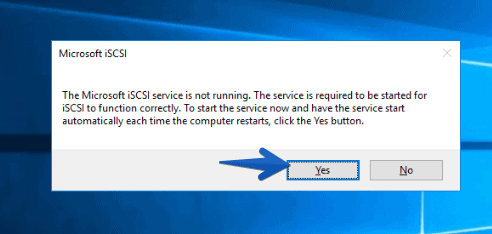
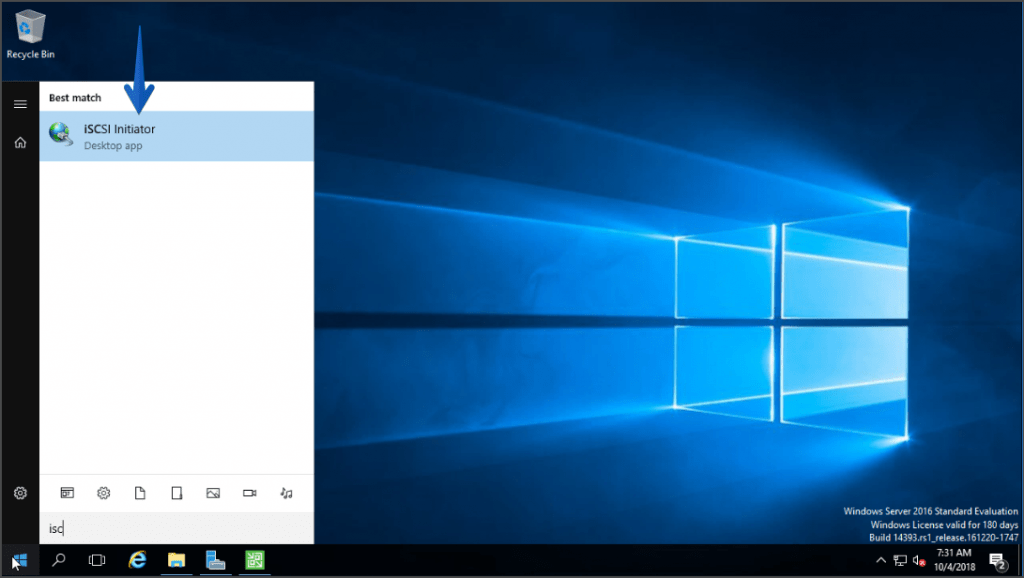 The service would surely be stopped if we hadn’t started it before:
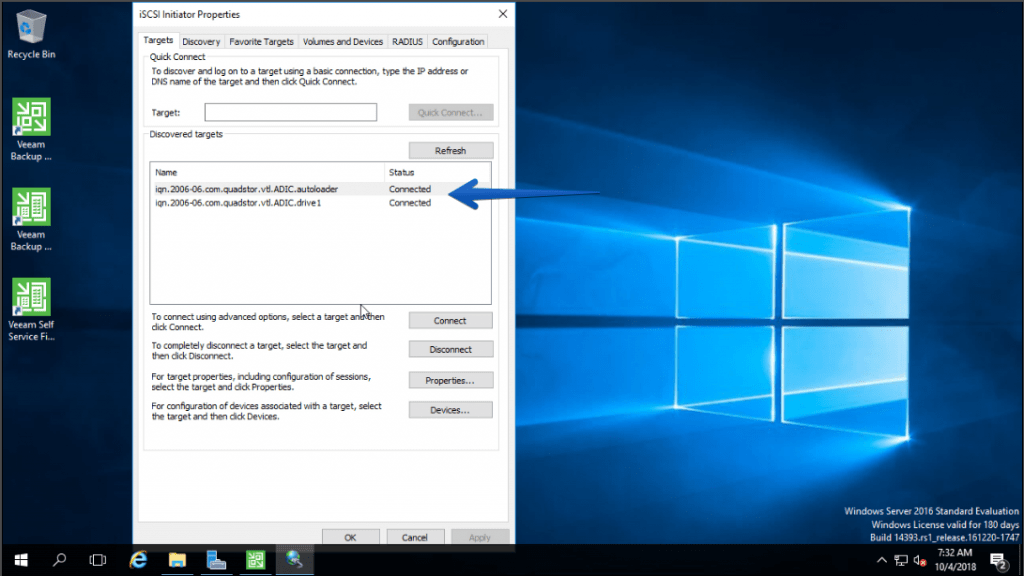
 We will add in Target the IP of our QUADStor VTL, that will detect us the Autoloader and the different virtual tapes, we will have to put them in Connected mode:
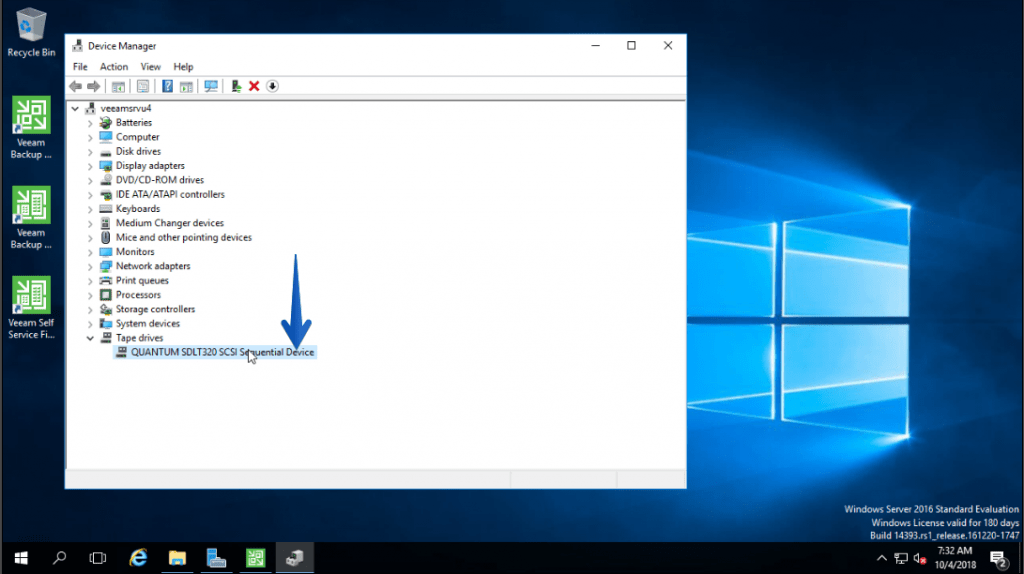
 In the Device Manager we can see the virtual tape, which as we see Windows believes is a QUANTUM SDLT320:
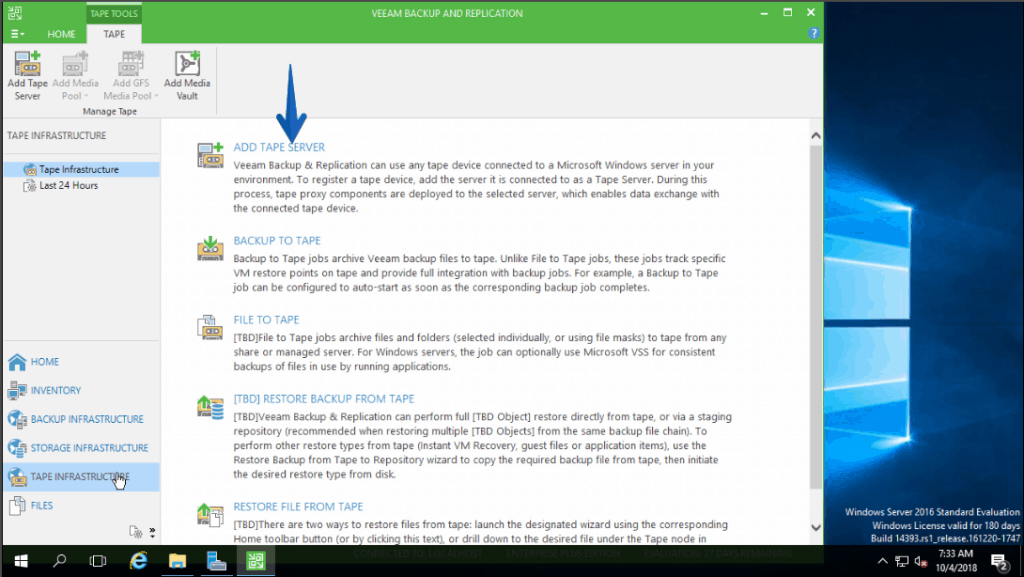
 From the Veeam Backup & Replication console, in the Tape Infrastructure section, click on Add Tape Server:
 In my case I’ll use the same Veeam server as I told you, we’ll click Next:
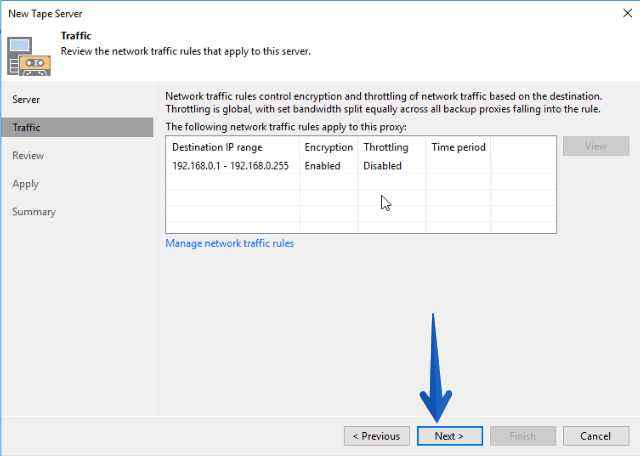
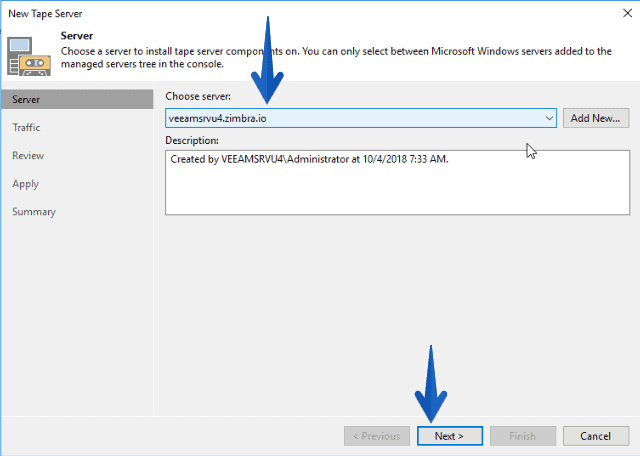 If we had some Networking rules, here we could apply them:
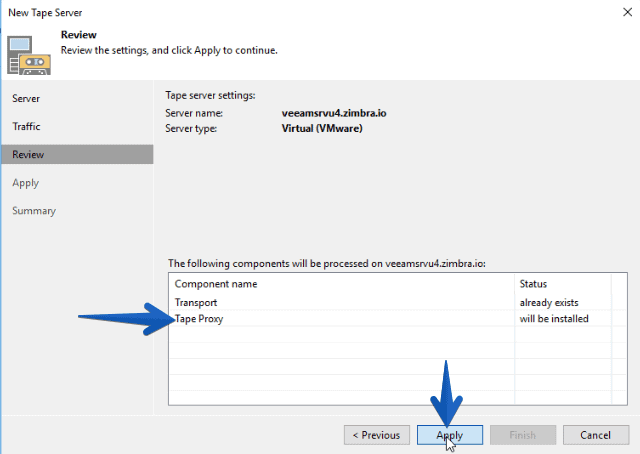
 We see that the process will install the Tape Proxy, which will become the server where it is installed in charge of communicating with the virtual library and write the information on the virtual tapes:
 The summary of the tasks running, surely everything will go well and this will take about 10 seconds:
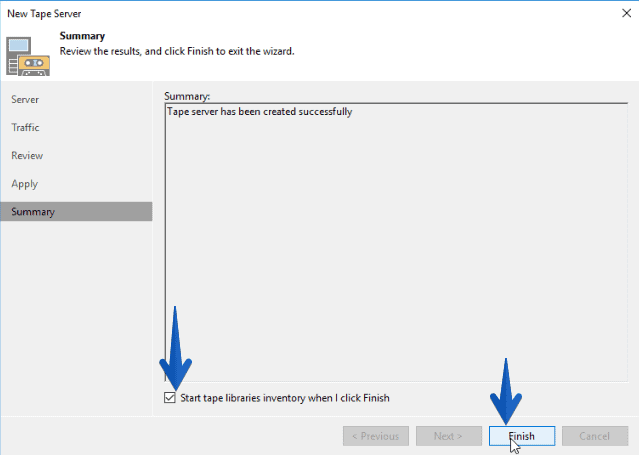
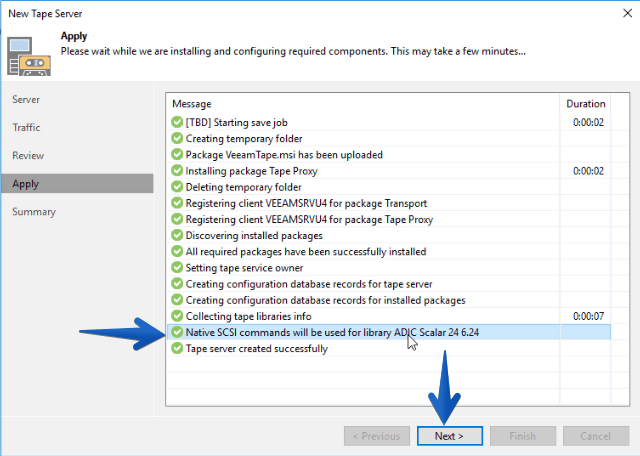 Once we have everything ready we will click on the checkbox, and Finish:
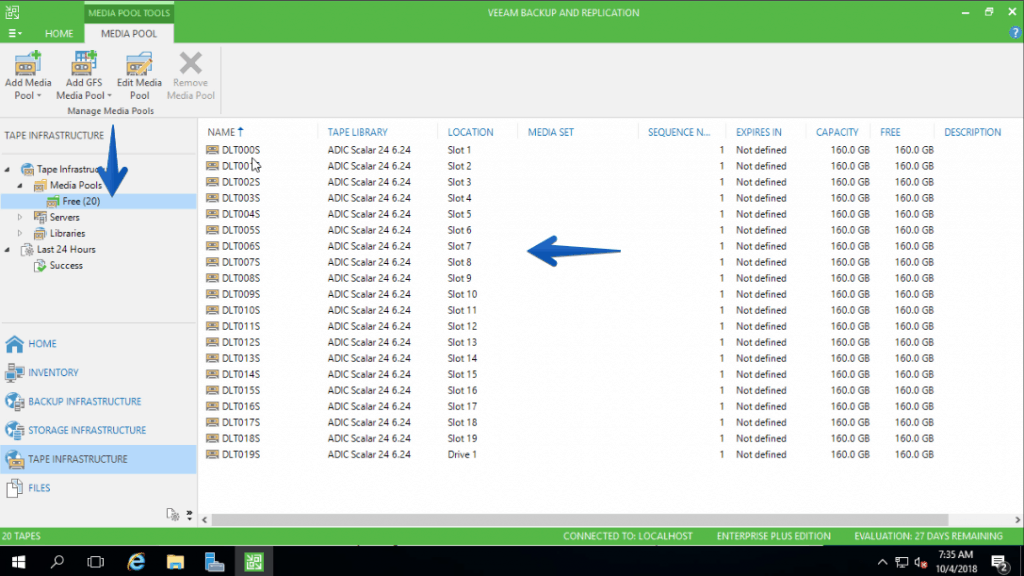
 Once the Tape Proxy discovers all the infrastructure of the QUADStor VTL, we will be able to see for example that we have a Media Pool called Free with all the free Slots:
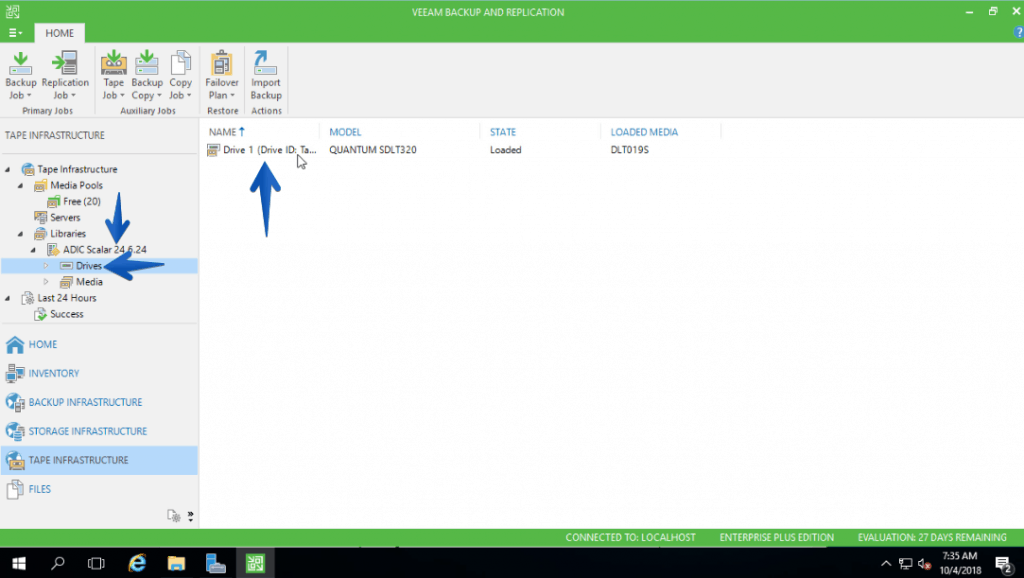
 As if we investigate the library, we can see that we have a virtual tape connected:
Nothing more friends, from here we just have to start launching backup jobs or backup copy to our VTL tapes, safer and perfect for long-term archiving.

Leave a Reply