 Greetings friends, we have already seen in the previous post that Veeam had launched Veeam Backup for AWS Free Edition, the solution to protect workloads on Amazon AWS without the need for agents. In addition, and as we all like, with a free version of up to 10 Instances. Also, we have seen how to deploy it step by step, today we are going to see how to configure and create policies in Veeam Backup for AWS.
First look at the new Veeam Backup for AWS Free Edition
Once we access by HTTPS for the first time we will be asked to accept the EULA of the product: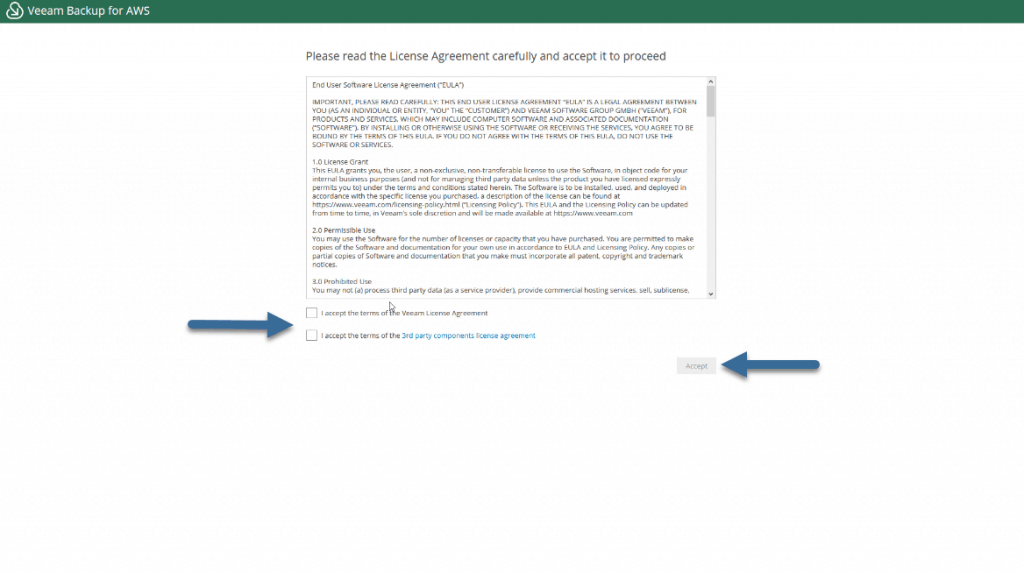 In addition, we will have to enter the name of the AWS instance as a security measure, this is only done once:
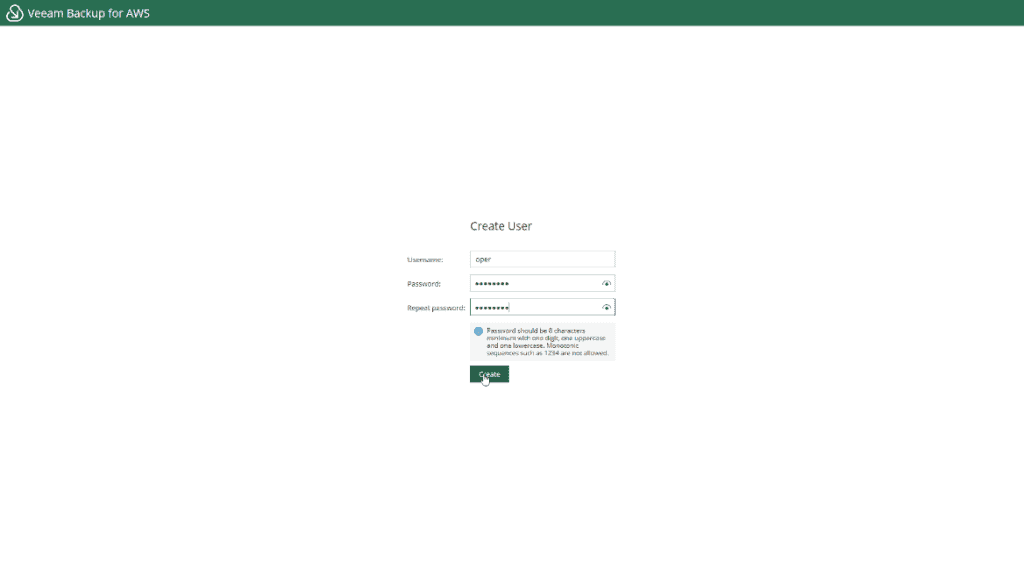
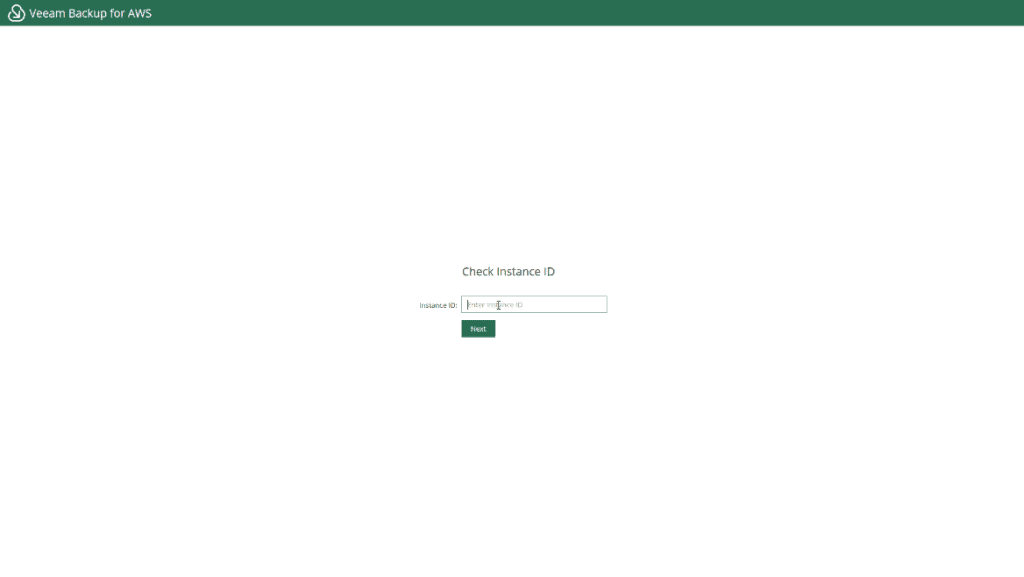 Now, for the security issue, we will have to enter a new username and password, I recommend avoiding the typical administrator:
We are ready! We log in with our new user and the first thing we will see is the following, a fantastic Dashboard with a summary of everything we are protecting: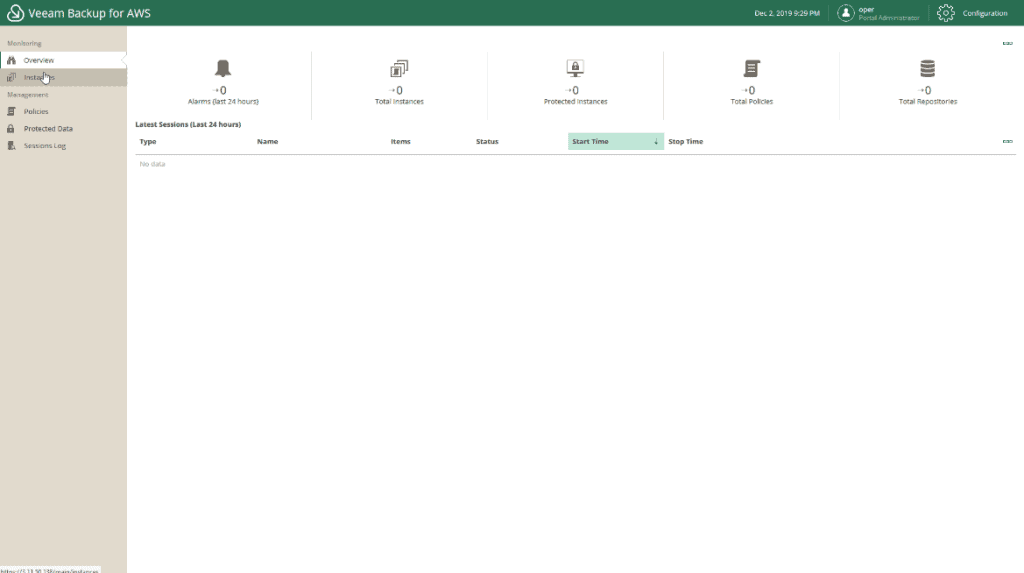
- In the Instances section, we will be able to see the Instances/VMs we are protecting.
- In Policies, we will be able to see all the policies, or works, that we have created, besides the state of them, and the programming of them.
- In Protected Data we will be able to recover Instances or entire volumes
- In Session Log we will be able to consume the state of our works, statistics, etc.
Within Configuration, the option at the top right, we can, for example, activate MFA for users who connect to the portal: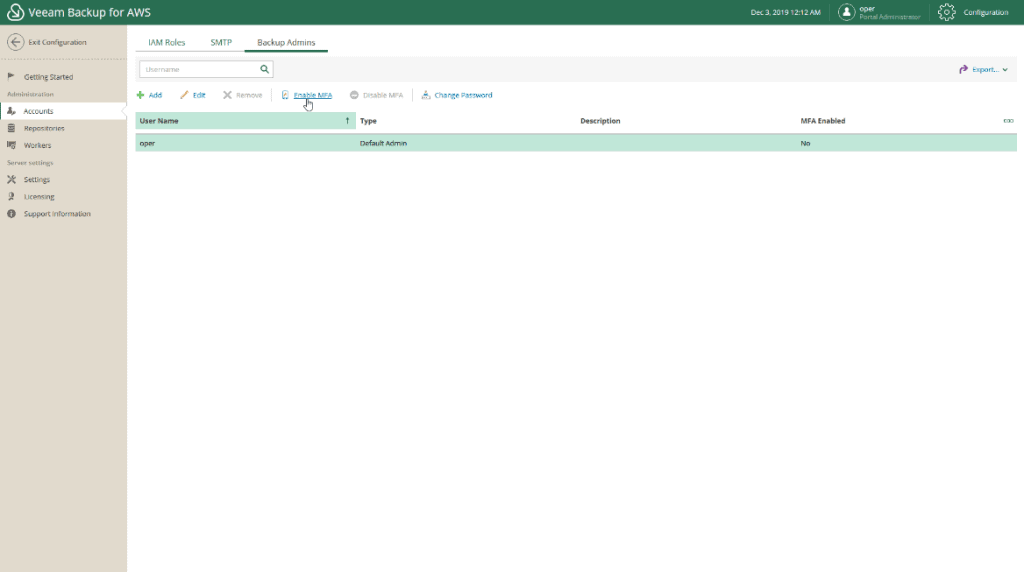
- Create Backup Repositories to send copies of our works to S3 buckets.
- Create Workers, which are instances that are raised to perform backups and restore tasks and then destroyed
- In addition to being able to add our own SSL certificate
- And of course, configure our SMTP to receive job notifications by email
- In addition to being able to review and apply licenses, when the option is available
With this simple first glance, we should have everything ready to start creating backups, restores, etc..
Create a Backup policy for our EC2 instances with Veeam Backup for AWS Free Edition
The policies in Veeam Backup for AWS are what we know from work on other products, let’s see how to create a policy, from the Policies menu click Add:
In the first step we will specify the name of the policy: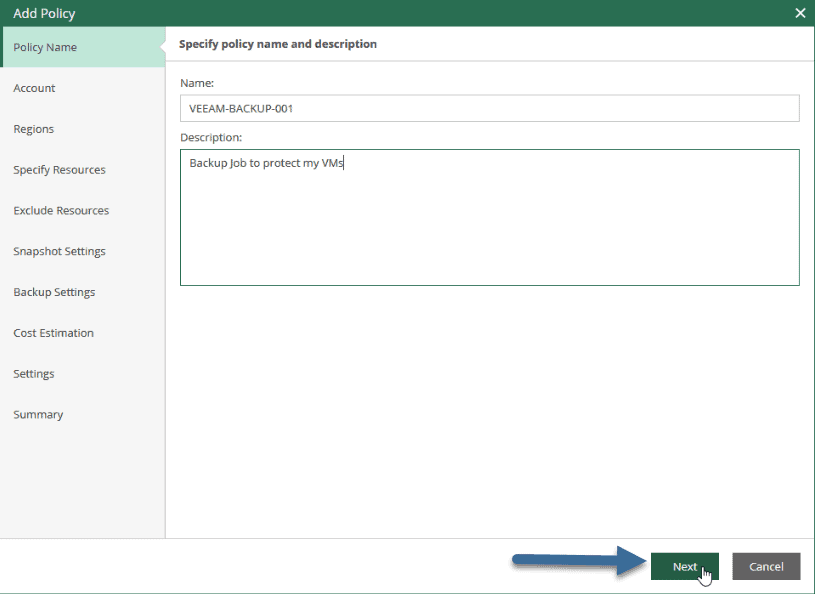
In Account, we will select the account that has access to the resources we want to protect, in my case I am using the default account that has access to all my resources, but I suppose you want to be more granular, there is a KB to create accounts: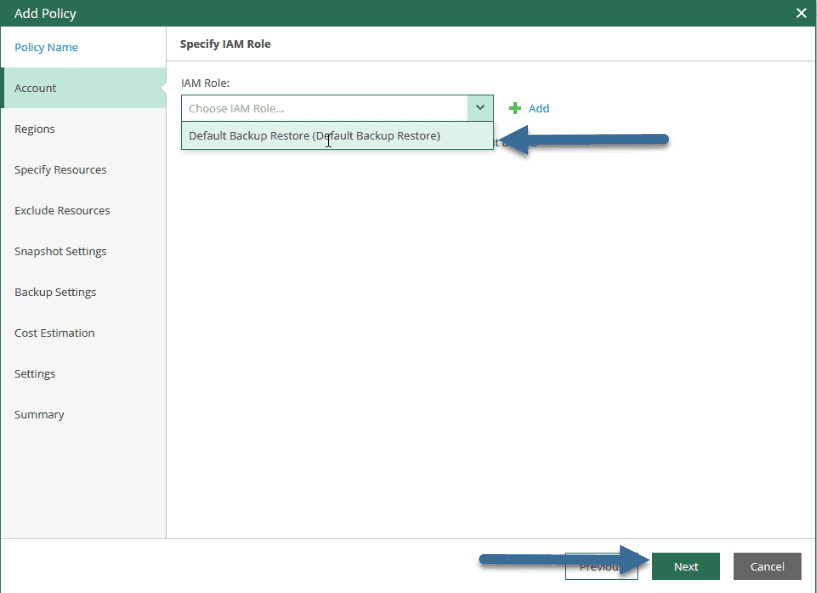
In Region, we will be able to limit to which region we are orienting this policy: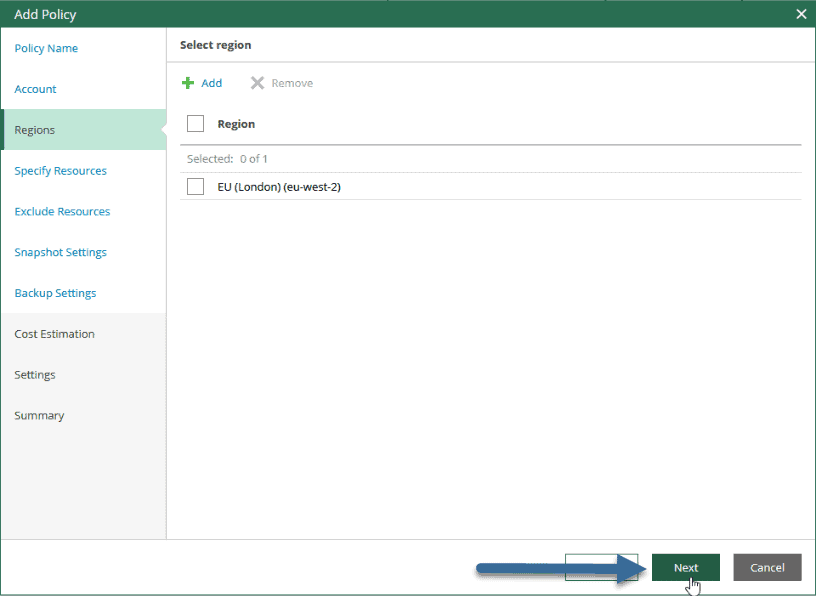
In Specify Resources, we will be able to select the resources we want to protect or all the ones we have access to: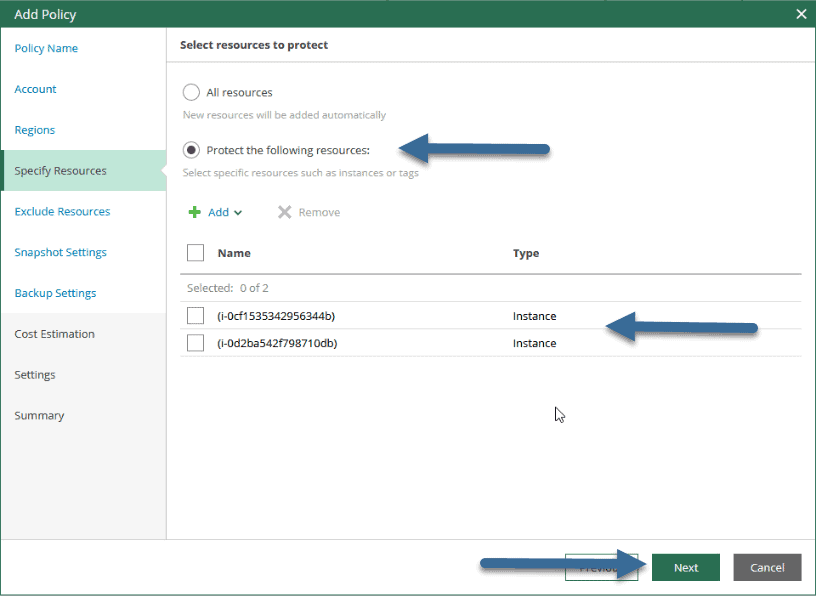
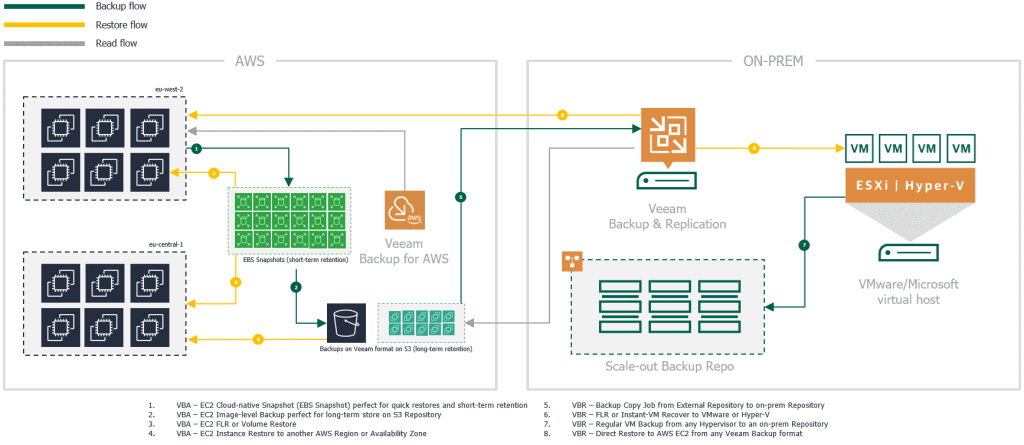
In Veeam Backup for AWS we have two ways to protect the Instances, with Snapshots that we can enable here, in addition to creating them automatically, with the number of the same that we want: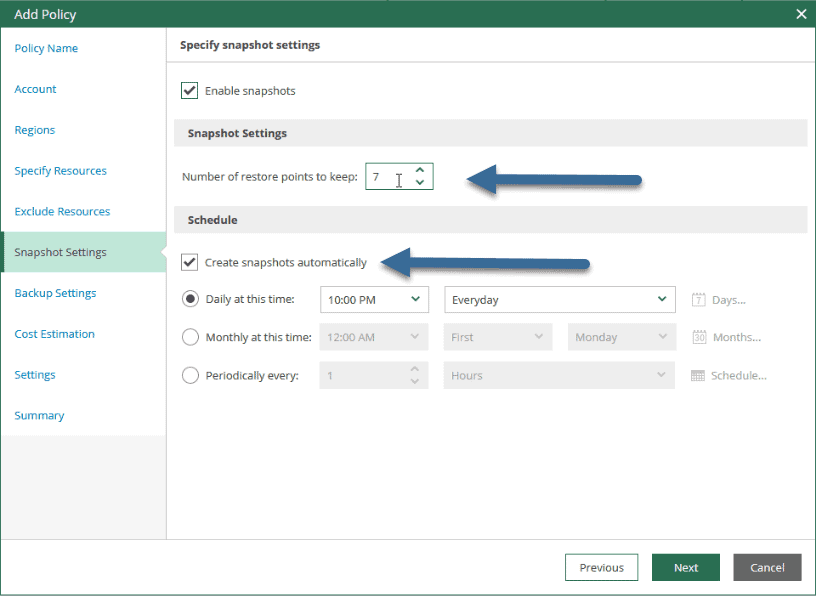
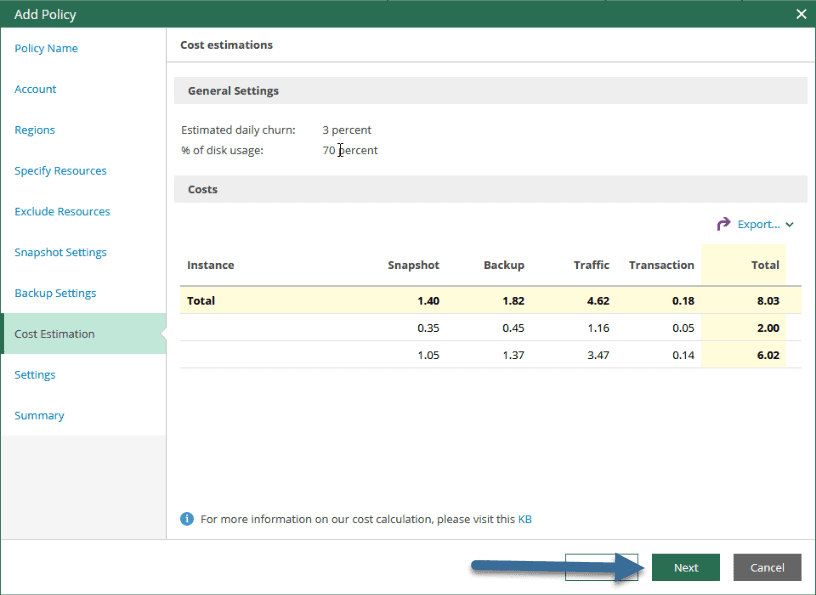
And the Backups part, which will send a copy from our Snapshots to an AWS S3 Repository, with an image of the Instance in Veeam format, which we will be able to deal with later, we can also configure the retention and programming: Veeam Backup for AWS will show us an estimated cost of our protection policy:
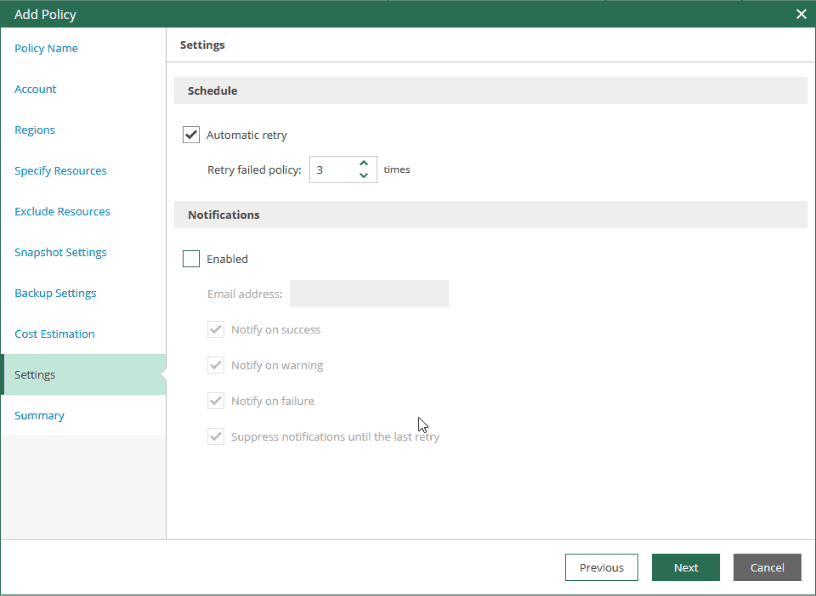
 Finally we will be able to mark the times we want the policy to be launched in case of failure:
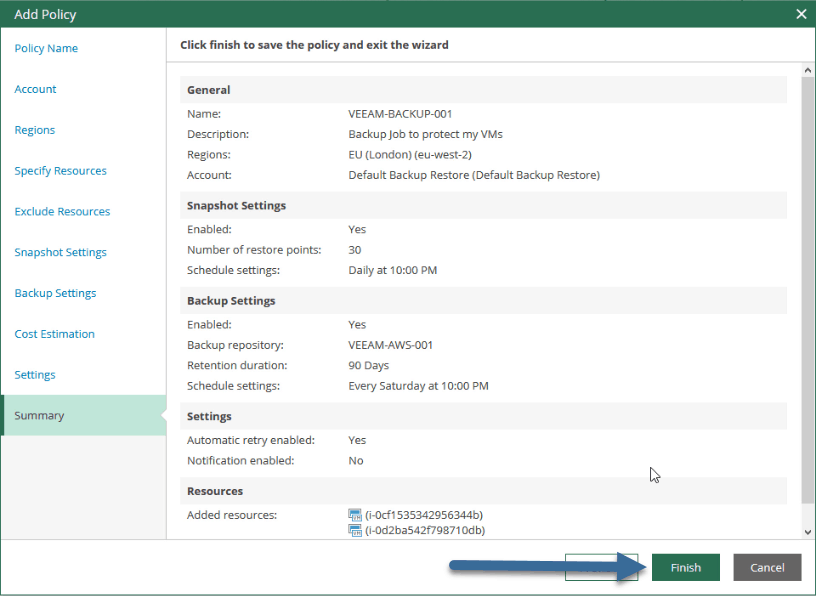
 If everything is to our liking, we will already have our policy ready, we will click on Finish.
Restore options in Veeam Backup for AWS Free Edition
To recover data from the backup, at Veeam Backup for AWS, we can perform the following operations:
- How to Restore full instances of EC2
- How to Restore EC2 Instance Volumes
- How to Restore files and folders of the EC2 instance guest OS
How to Restore files and folders of the EC2 instance guest OS
In this case, I went to the option called Protected Data, selecting the Instance from which I want to restore information, and selecting File-Level Recovery: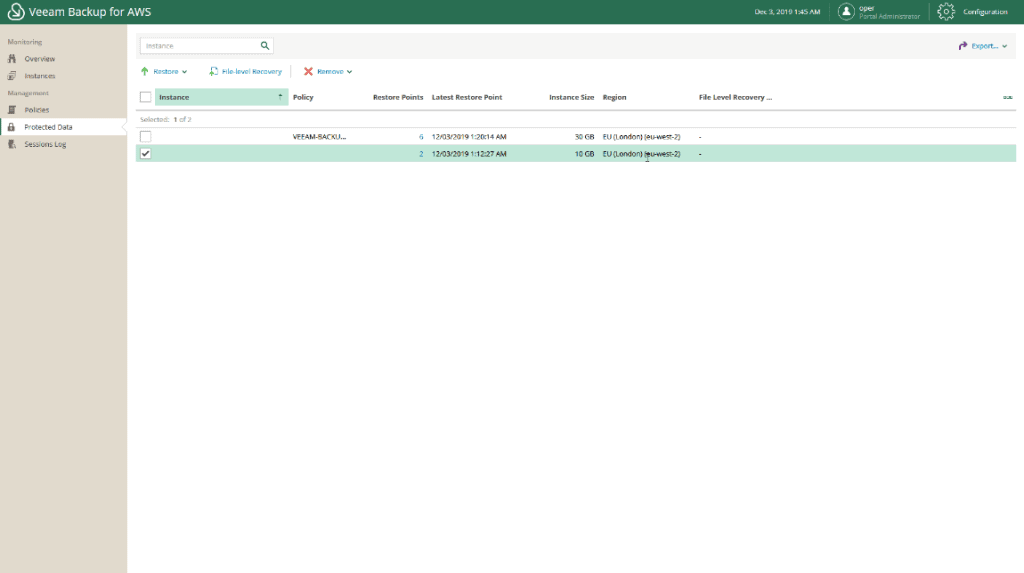
Thanks to the policy that I have created, I will be able to restore information in a granular way from the Snapshots or from the backups in S3: 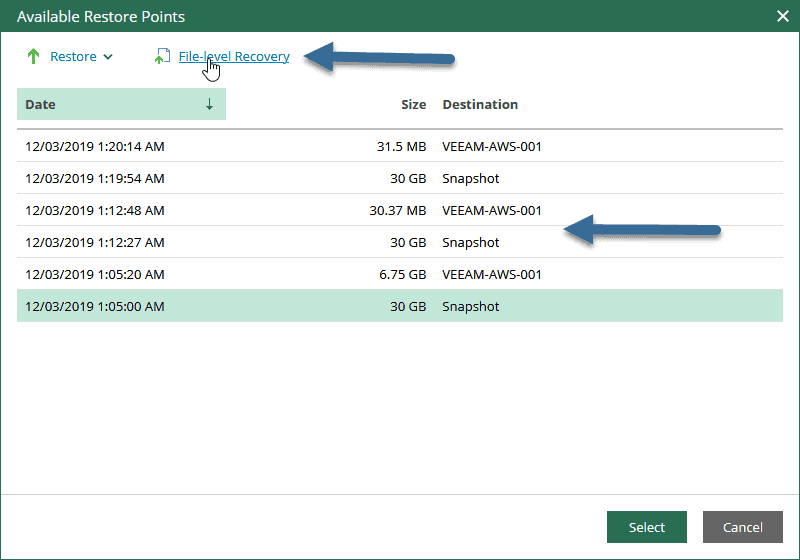 That’s all, we will be able to recover the files that we want from the backup.
How to Restore complete instances of EC2
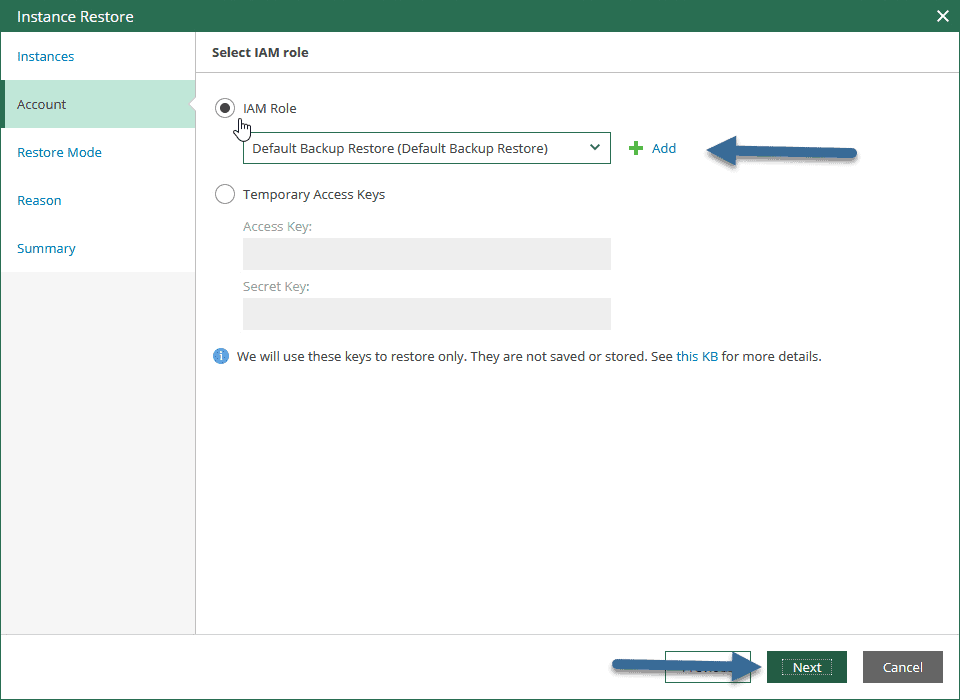
The wizard will show the instance and the size of it: When restoring we can enter a Role IAM, or directly a temporary Access Keys, perfect for restoring to other regions or AWS accounts:
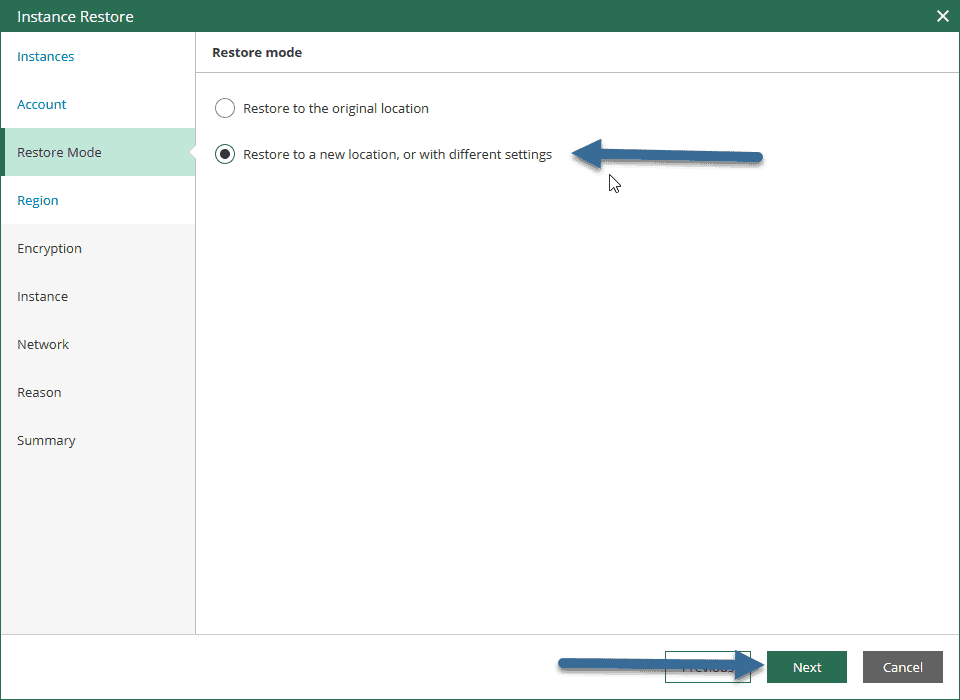
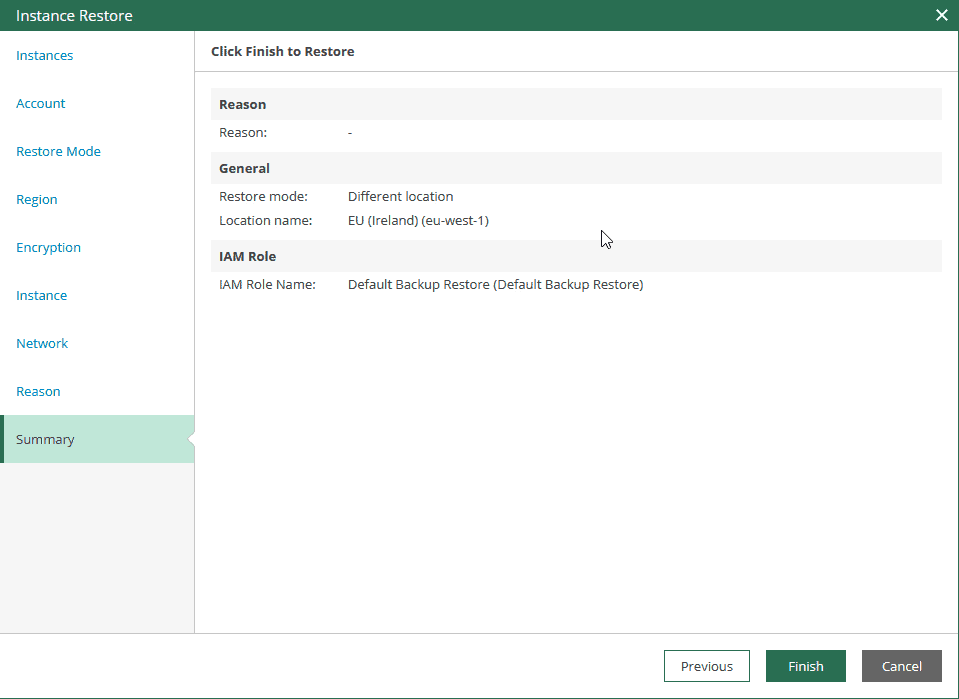
  We can restore to the same location, in case we want to restore from an attack of malware or similar, or restore to another location or geolocation:
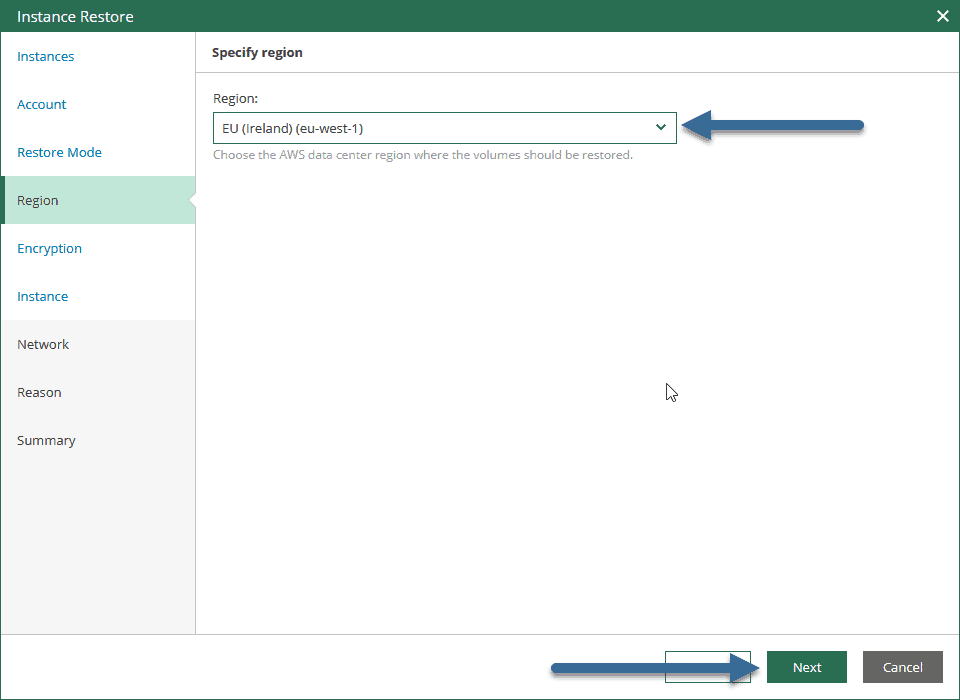
  For example, my production instance was running in London, and I’m restoring a backup to Ireland:
 We could select the volumes we want to restore, but in this case I’ve selected all:
 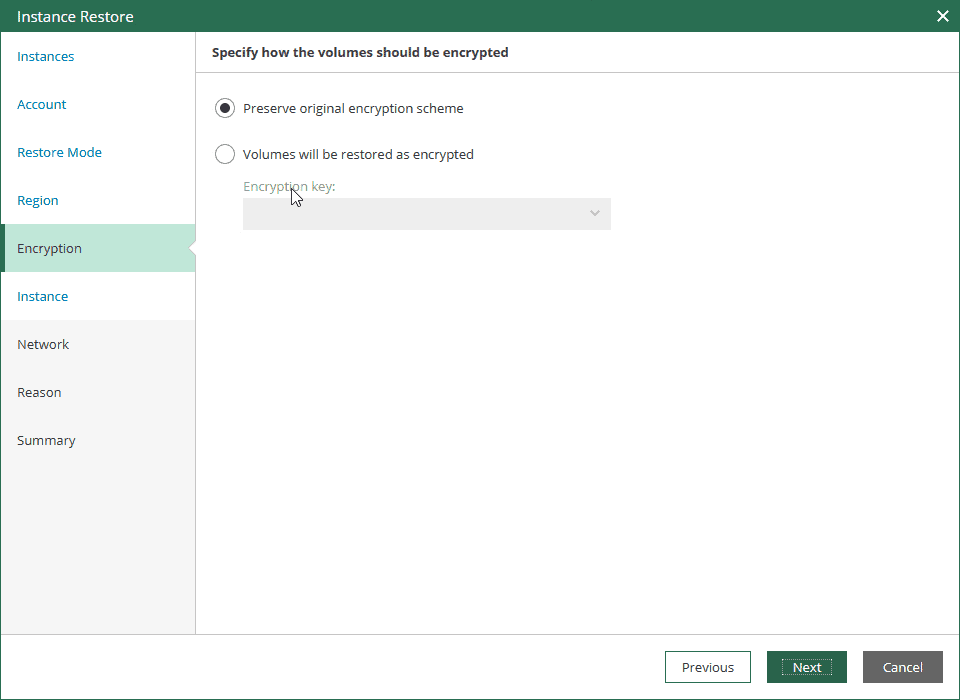 I’ve selected the size of the same, in addition to give it another name:
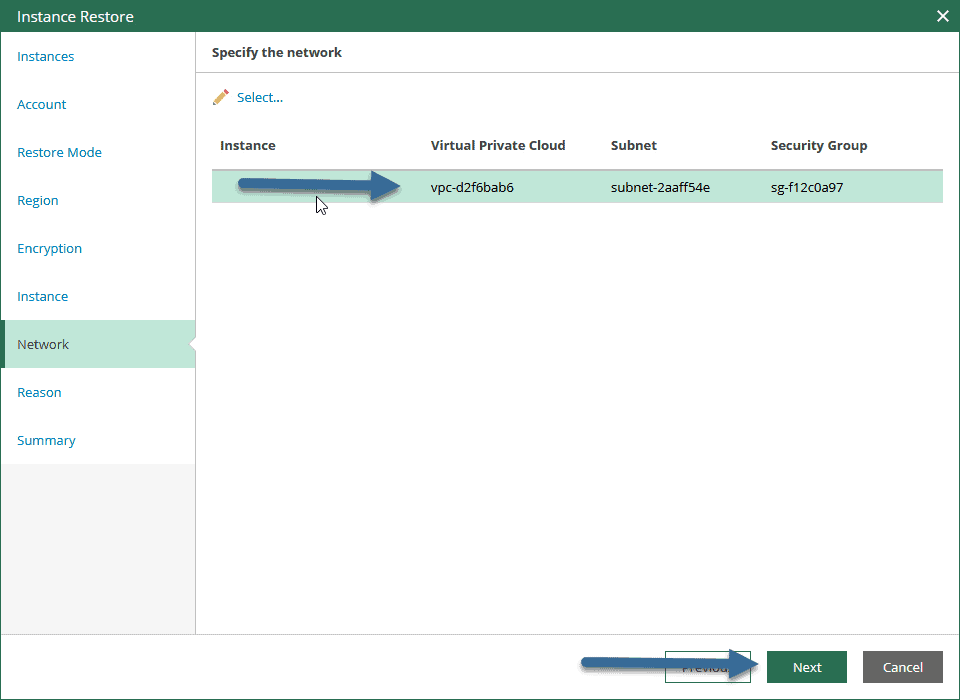
  We will be able to select the VPC, Networking, subnet and security group that we want for this new Instance:
  We will be able to introduce a reason, but if everything is ok, we will be able to click on Finish:
 The restoration process will begin, we will be able to see it from Overview, the tasks that are being executed at the moment:
 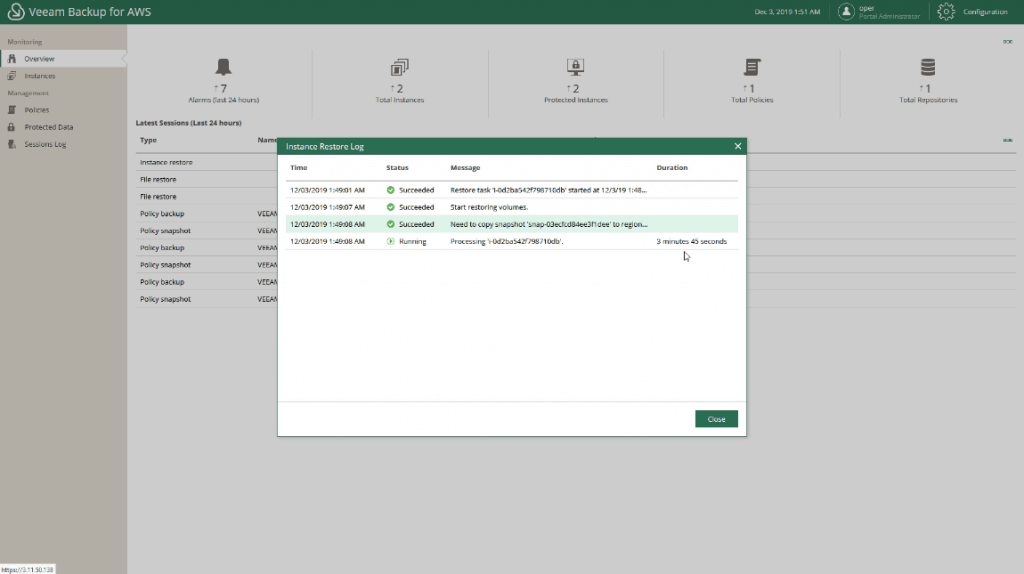 Once it is being restored we will be able to see the Instance and in the other location waiting for it to be finished restoring:
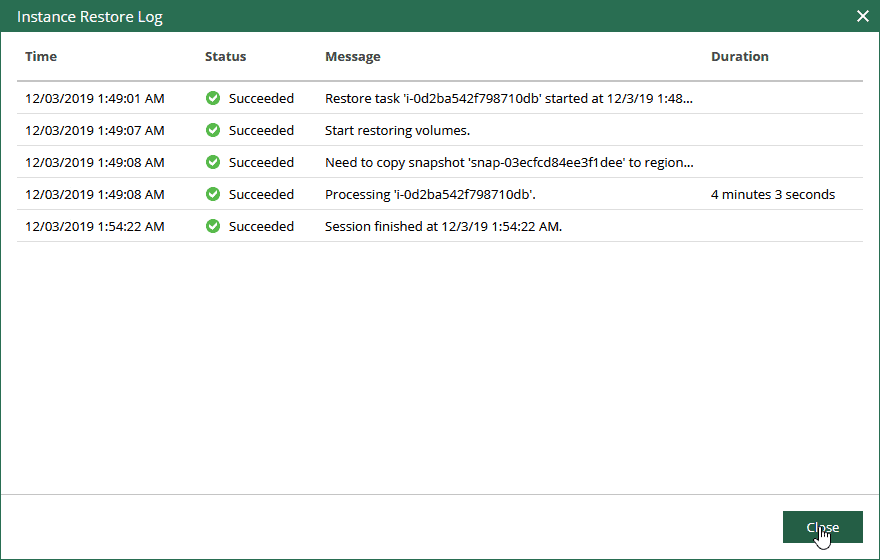
  When everything is finished, we will be able to see the final result of the restoration, as we can see, it has only been a few minutes, to restore from a backup to another region, great!
  Finally, I wanted to show you all the workers that Veeam Backup for AWS creates and destroys to support the operations of creating and restoring backups:
  As Veeam Backup for AWS is a very complete new product, I have prepared a series of blogs about the product, I hope you like them:

Leave a Reply