
 Greetings friends, Veeam Backup for Microsoft Office 365 v5 was released a few months ago, among many new features like Microsoft Teams Protection, and Scalability enhancements, I have seen that there are great new capabilities that can be performed using RESTful API.
In particular, the one we are going to focus on in this blog post is a functionality that has been requested for a long, it is about receiving an email notification for each restore operation that is performed on the elements where the audit is enabled.
Audit Diagram in Veeam Backup for Microsoft Office 365 v5
Before we start with the subject, I think a diagram about how all these works can help us better understand what we are going to do, and activate: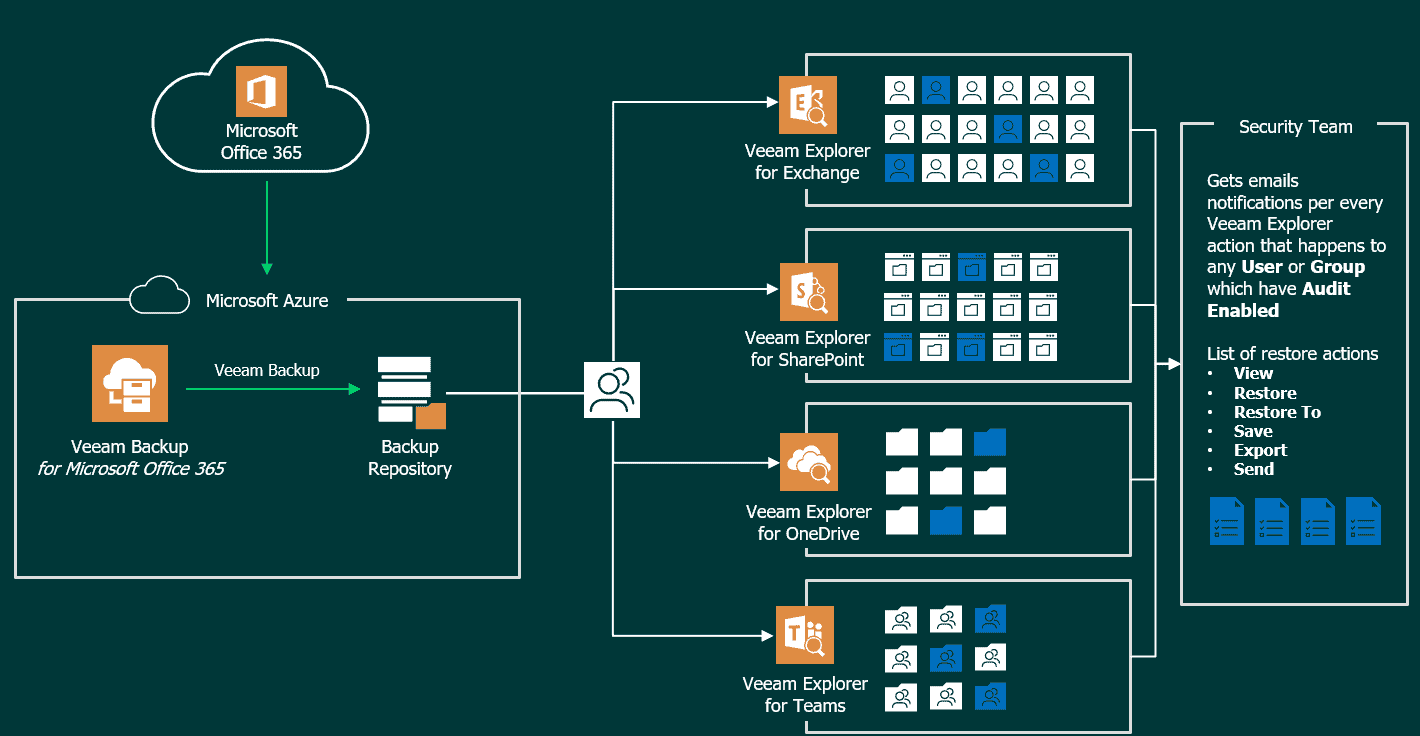
Chalkboard session – Enhanced audit for Veeam Backup for Microsoft Office 365
If you prefer a video to follow all these steps and to get more information, please find the next recording:
How to Enable Auditing of protected items with Veeam Backup for Microsoft Office 365 v5
We have all the help and official information in the following link, but it is really very simple, if we look at the diagram above, we will see that to receive notifications, we must first select the items we want to audit. We have two types that we can audit, the Users (Exchange Mailboxes, Shared Mailboxes, OneDrive for Business, etc.), and the Groups (SharePoint and Teams).
To start making a deeper visualization of what happens of one or the other, we have to know the ID, and the name of what we want to audit, we will see the example with a User, we will have to go first to Organizations, since we need to know our Organization ID, from our swagger – https://YOURVBO:4443 and you do the Auth at the end of the page to obtain the token, then on the top to login, then you go to Organizations, expand the GET, and click on Try it out, you will see something similar to this: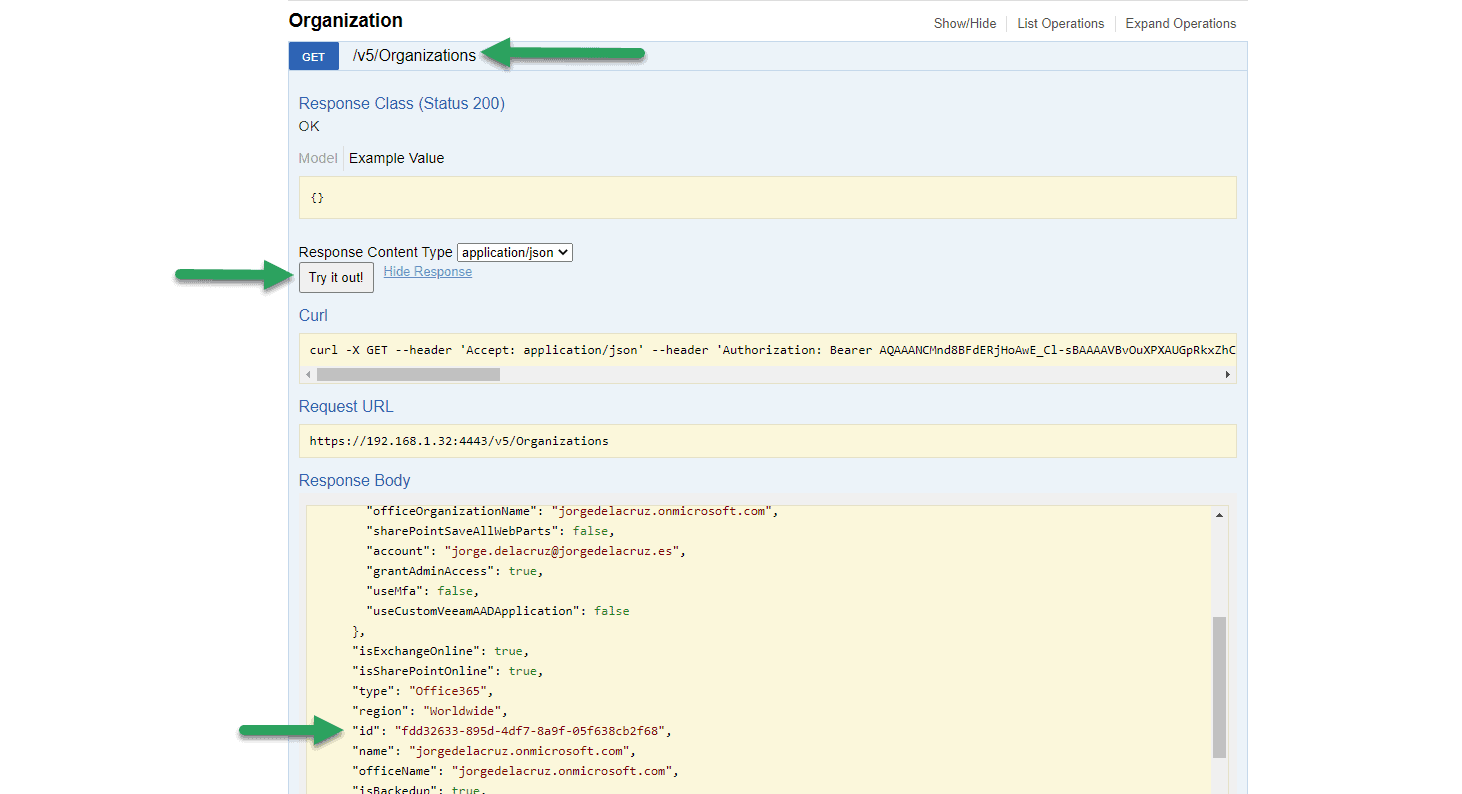
Now that we know our Organization ID, we will go to OrganizationUser and expand the GET, where we ask for the Organization ID, once we paste it we give Try it out!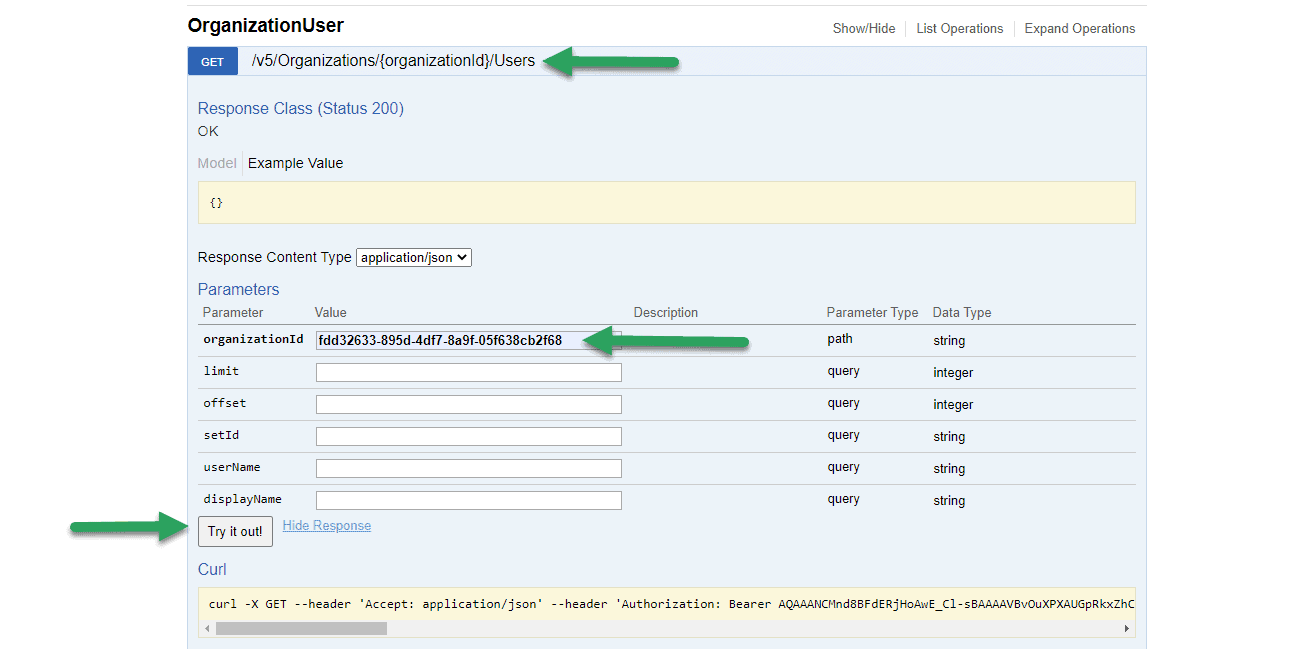
This will give us back all the users, in my case in which I want to enable the audit is Jorge de la Cruz, so the relevant data are the following: ID, displayName, and name
We are almost there! We will finally go to OrganizationAudit, and in the AuditItems POST, we will introduce our Organization ID, and the following code with the user, or users, or groups. It is a .json, so at once we can add as many components as we want:
[
 {
  "type": "user",
  "user": {
    "id": "291b10fd-bb83-4e51-9365-302f403234a800000000-0000-0000-0000-000000000000",
    "displayName": "Jorge de la Cruz",
    "name": "[email protected]",
    }
 }
]
The result would have to be something like this, we will hit the Try it out button as always, we will have to receive a 200 to know that everything has gone well: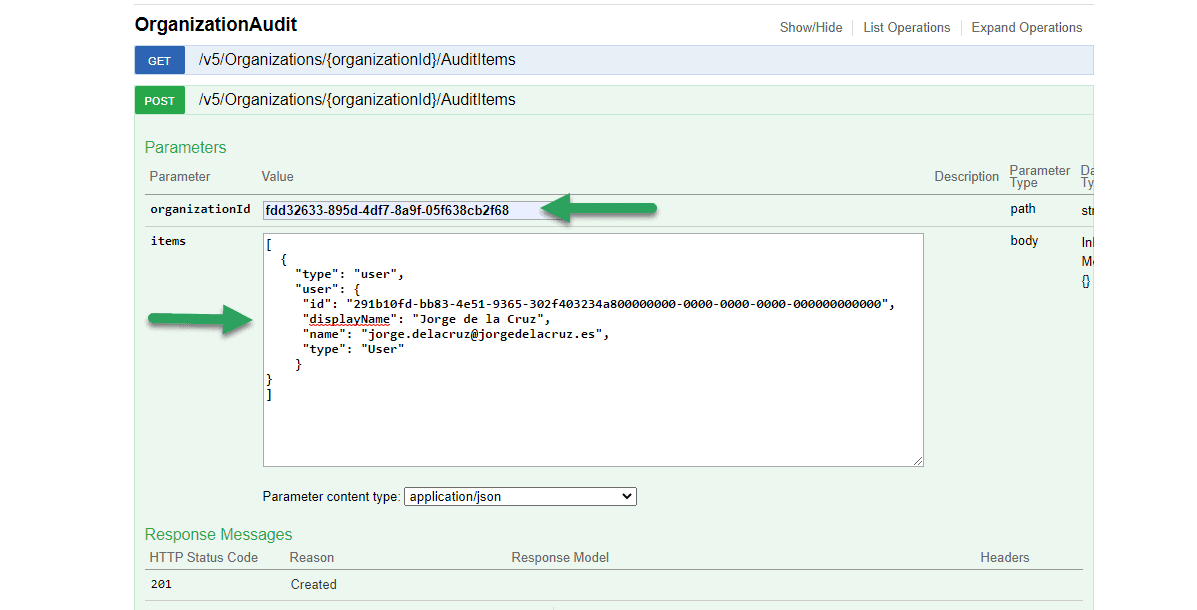
If we wanted to check that everything has been added in a satisfactory way, very quickly we go to the GET of AutidItems, and check what we have: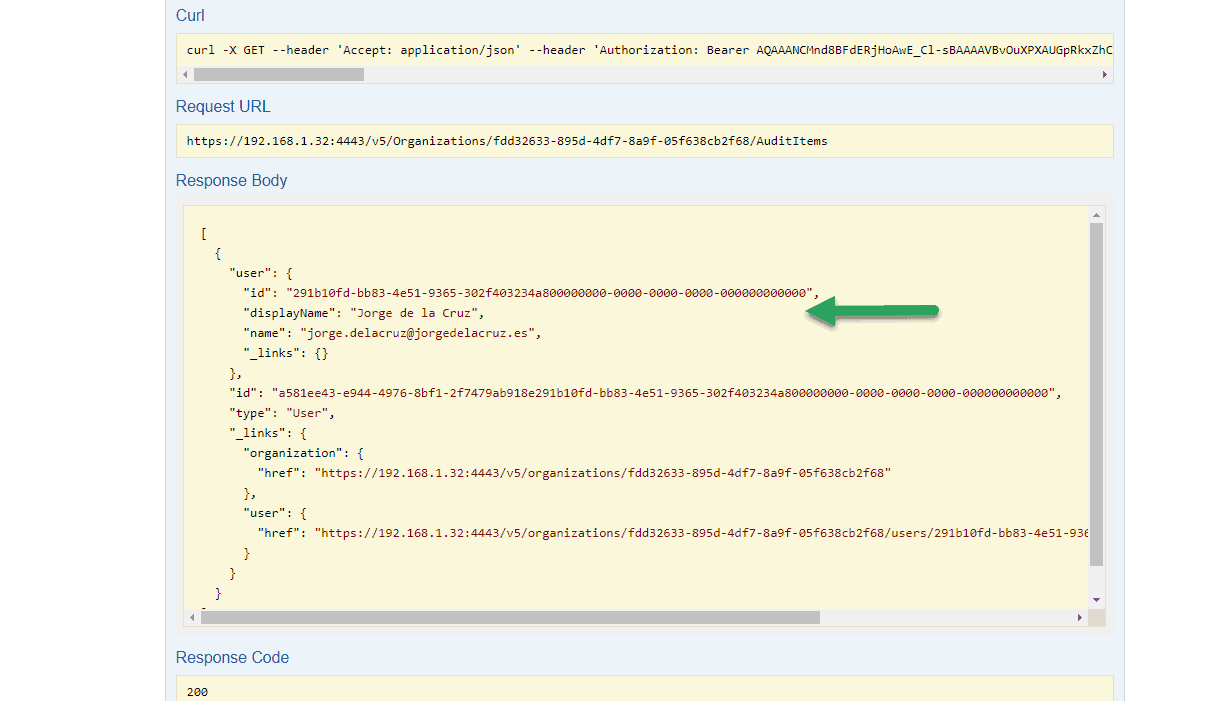
We see that everything has gone well and we have our users, this would help us to check which users and groups we are auditing.
How to Enable the notification of the Audited items
Now that we have one or more users and groups enabled for the audit, it is time to set up email notifications. My recommendation is that we select a Distribution List that will go to those responsible for backup, security, etc. Since there is no personal data in the emails sent, only who does what, and when.
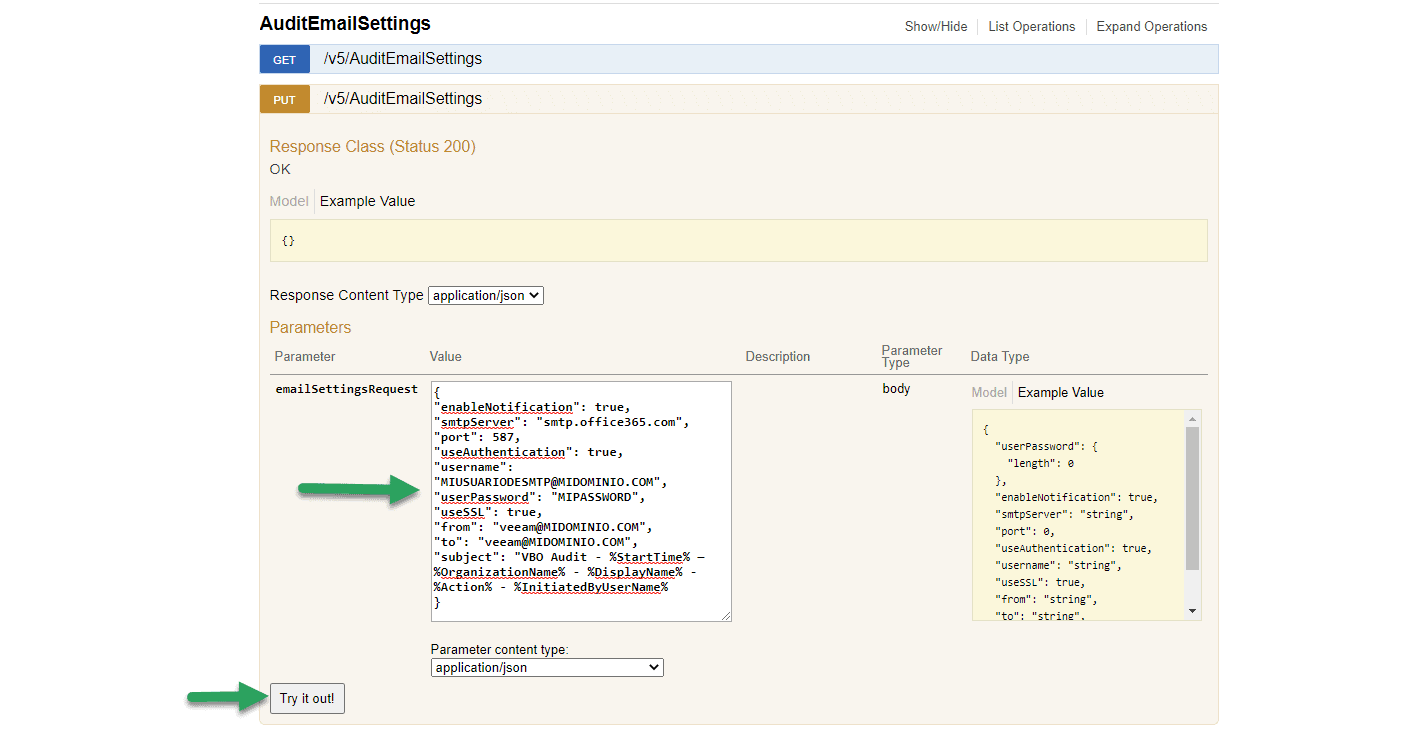
This configuration is done through RESTful API too, we will go now to AuditEmailSettings, and we will see three operations, we will select PUT:
In the configuration we will have to enter the following .json, which obviously you will have to fill in with your data, the password is then saved in encrypted form:
{
 "enableNotification": true,
 "smtpServer": "smtp.office365.com",
 "port": 587,
 "useAuthentication": true,
 "username": "[email protected]",
 "userPassword": "MIPASSWORD",
 "useSSL": true,
 "from": "[email protected]",
 "to": "[email protected]",
 "subject": "VBO Audit - %StartTime% — %OrganizationName% - %DisplayName% - %Action% - %InitiatedByUserName%
}
 Again, to check that everything has gone well, apart from the code 200 that we have to see, we can go to the TSG and check what we have:
We already have everything ready. What is left for us? Open the Veeam Explorers and start playing.
A Real-Life Example of Audit being sent in Real-Time
As I say, no matter if we open the Explorer from the server, or from a Tenant, or from another PC, any element that we open, restore, or export, the relevant security email will be sent so that everything is audited, for example, I have opened an Exchange Explorer, and in a user where the audit is enabled I have opened an email to browse it: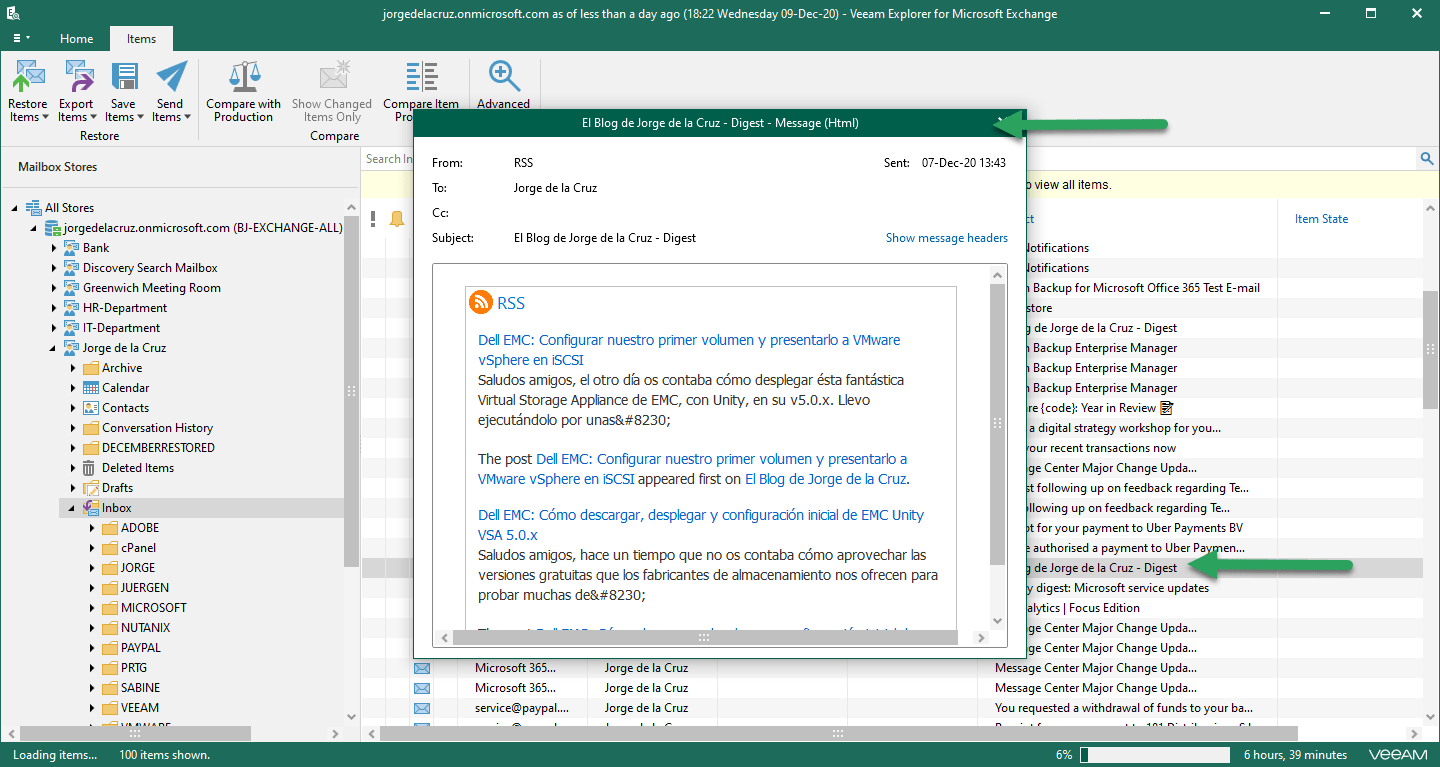
I immediately received this message on my security account where I am auditing who does what and when: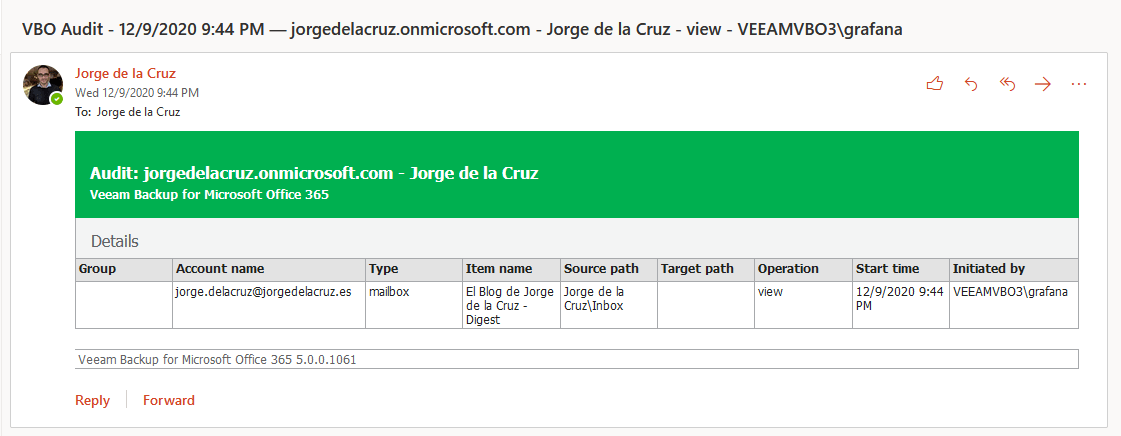
Now I have decided to export an email to my computer as .msg: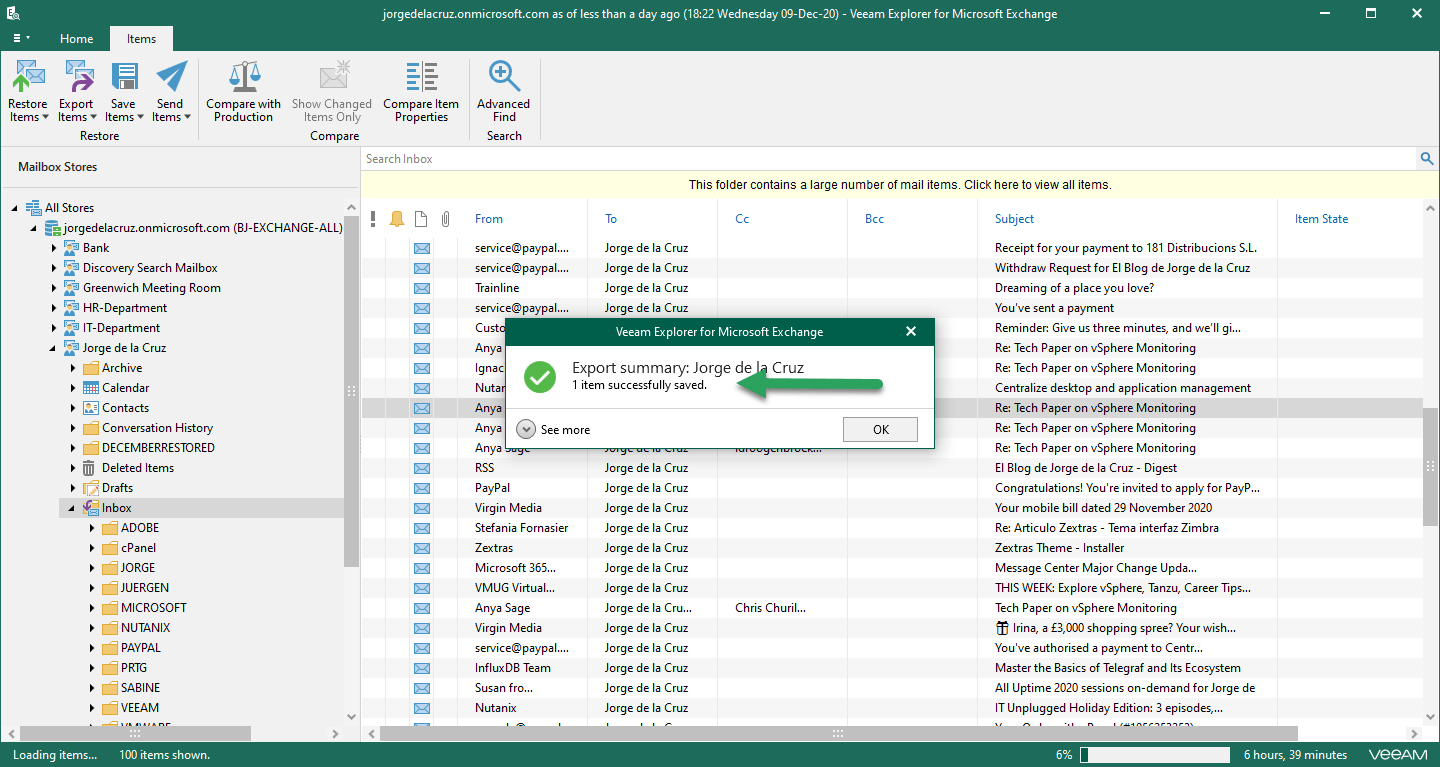
I have immediately received this message in my security account where I am auditing who does what and when, and in this case where I have exported the item: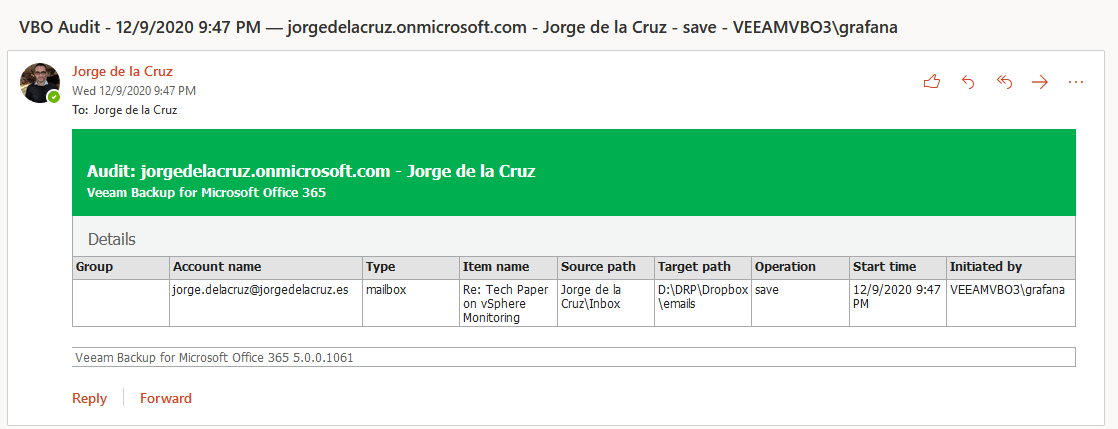
I leave you another example, this time of restoration of OneDrive for Business: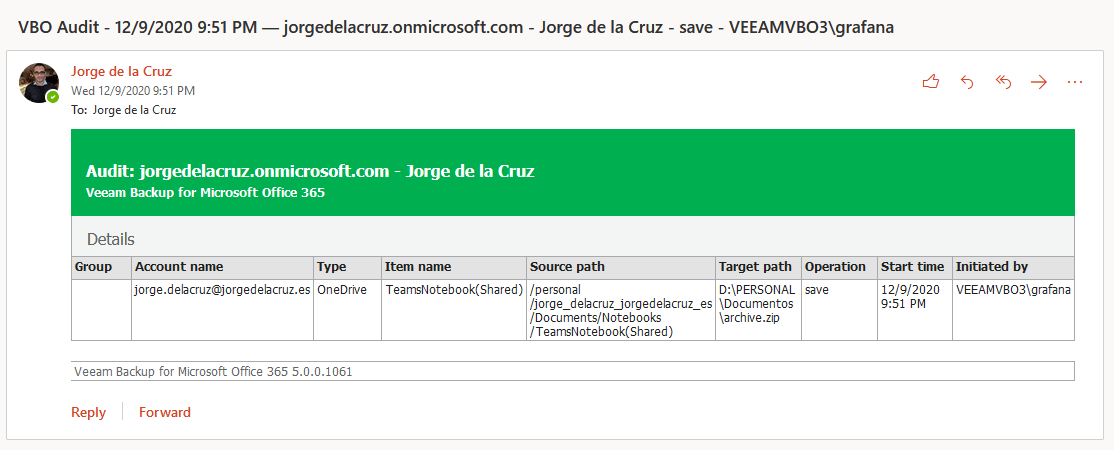
This is very, very powerful, and will surely give us a lot of play in the near future. I hope you find it useful, thank you very much for reading.
Leave a Reply