
 Greetings everyone, from time to time it is better we go back to basics, especially if an easy task has not been done for years. For example, VM Templates, a really basic component that we keep using day to day, most of the time we will rely on that old great Template we produced years ago, as it was my case, still deploying and relying on my good old Windows Server 2016 Template.
How to create a Microsoft Windows Server 2022 Virtual Machine Template on vSphere 7.x
As I am aware a lot of you prefer a video with the step-by-step, I have recorded a 20-minute video with the whole process, comments, tips, etc. Hope you like it and find it useful.
NVMe Controller vs PVSCSI
I have received great input from al Qamar (Karl Wester-Ebbinghaus), if you have modern Hardware already, with NVMe, and RAID SSD, please make sure you select the new NVMe Controller instead of PVSCSI, it will give you the very best performance:
Hi Jorge I am not a VMware expert at all but happy to see that I follow your recommendations since Server 2016.
2 addemdums:
– consider to activate VBS with Windows Server 2022. This will inherit UEFI and secure boot enabling with a single click
– consider to use NVMe Controller— al Qamar (Karl Wester-Ebbinghaus) Ⓥ (@tweet_alqamar) November 25, 2021
Quick What’s New in Windows Server 2022
First of all, this beast runs fast, compared with the boot time of a Windows Server 2016 I am used to, Windows Server 2022 boots extremely fast, and that is always good. Besides this, all the latest updates of Veeam Solutions include support for Windows Server 2022.
Microsoft Edge as a default Web Browser – Thank you!
Microsoft Edge is included with Windows Server 2022, replacing Internet Explorer. It is built on Chromium open source and backed by Microsoft security and innovation. It can be used with the Server with Desktop Experience installation options.
Nested Virtualization for AMD processors
Nested virtualization is a feature that allows you to run Hyper-V inside of a Hyper-V virtual machine (VM). Windows Server 2022 brings support for nested virtualization using AMD processors, giving more choices of hardware for your environments.
Security, like a ton of improvements
Microsoft Windows Server 2022 brings Security to another level, some of the functionalities will not be possible to achieve with normal server hardware we find today in the market, but will be extremely relevant from 2022 onwards. From the Security section on the Windows Admin Center we can see the next:
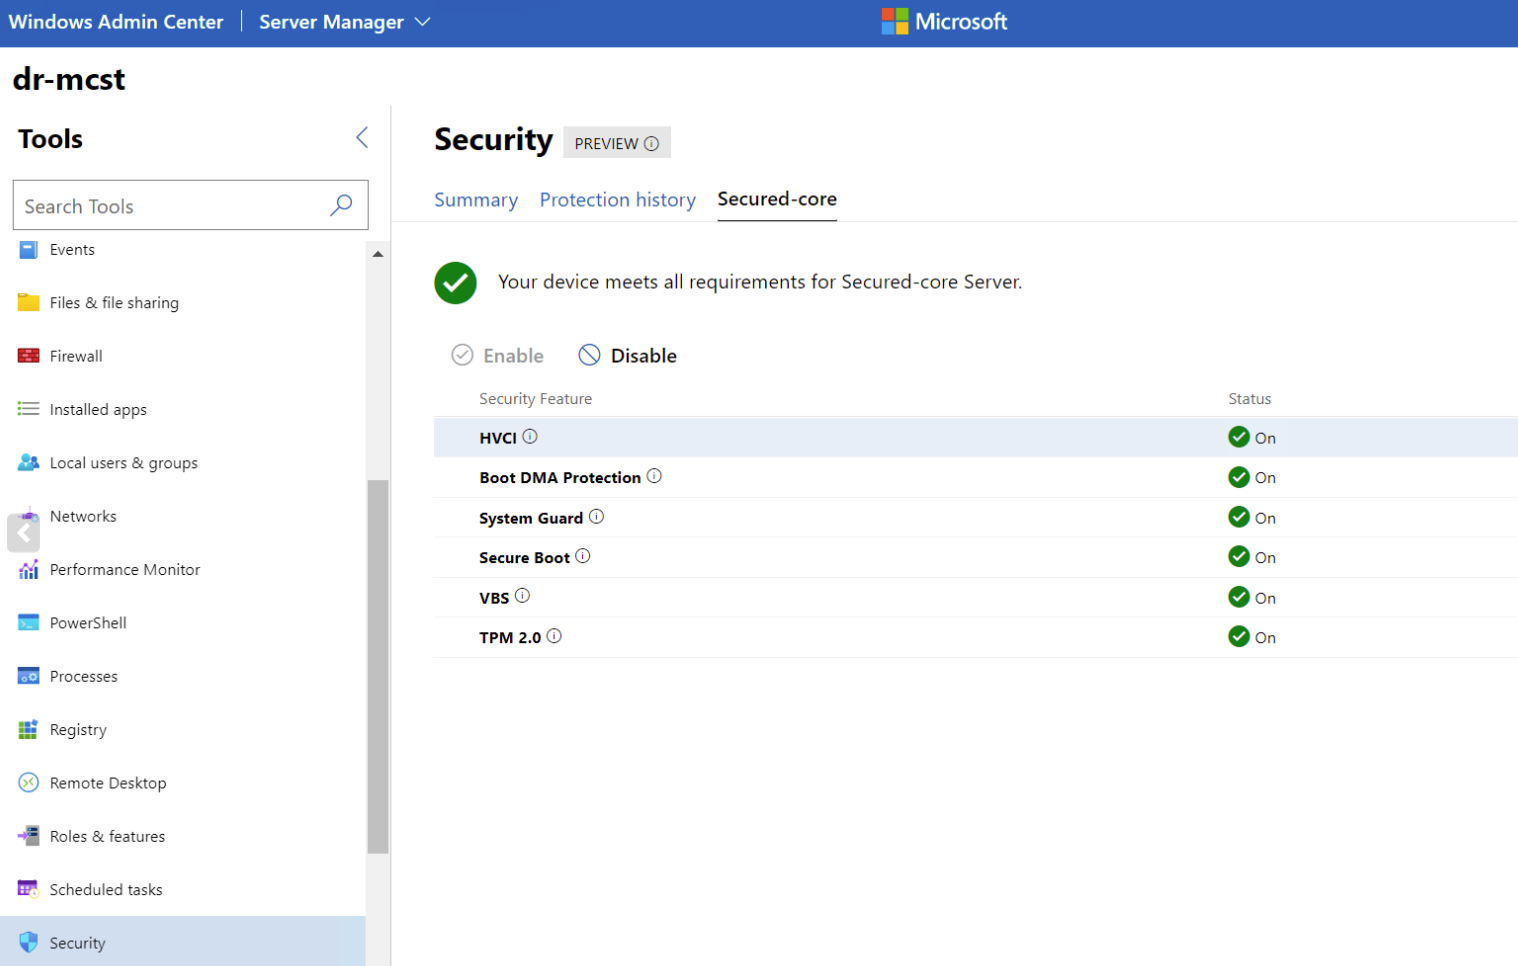 Secured-core server brings together powerful threat protection, providing multi-layered security across hardware, firmware, and operating system. It uses the Trusted Platform Module 2.0 and System Guard to securely boot Windows Server and minimize the risk of firmware vulnerabilities. It also includes virtualization-based security (VBS) features such as Credential Guard and Hypervisor Protected Code Integrity (HVCI). Credential Guard provides preventative defense for sensitive assets, and HVCI applies hardware-rooted security to prevent malware from tampering with the system.
Boot Direct Memory Access (DMA) protection is part of Kernel DMA Protection which protects Bitlocker keys and other secrets stored in memory while the operating system is running. The classic attack here is to plug a drive with malware into a port offering DMA on a running PC and read Bitlocker keys from memory. DMA offers fast data transfer, essentially directly into memory (as it says on the tin) but it also comes with this risk — Boot DMA mitigates it.
Better integration with VMware
These small changes started happening before, but I just noticed that Windows Server 2022 does not require the VMware Paravirtual, or the VMxnet3 driver, as it comes with them already, and btw, the whole driver update regarding VMware components, it will happen directly from the Windows Update.
Please let me know your comments, suggestions, and if this is useful to you.
Update August 2022
A comment by a fellow reader, Olaf. As we left the partitions to be created by default. Windows Server 2022 will create the Recovery Partition. I wrote an specific blog post on how to get rid of this (Spanish), as it has not much value on a Virtual Environment where you do backups anyways, and it is blocking you to expand C: drive correctly, and easily without gparted, etc.
But anyways, the process could not be simpler:
- Open diskpart with Admin privileges
- List all disks, usually you want to use disk0, so introduce select disk 0
- List then the partitions, by default should look like this, so please introduce select partition 4
- Now you are on the Recovery Partition, please type delete partition override
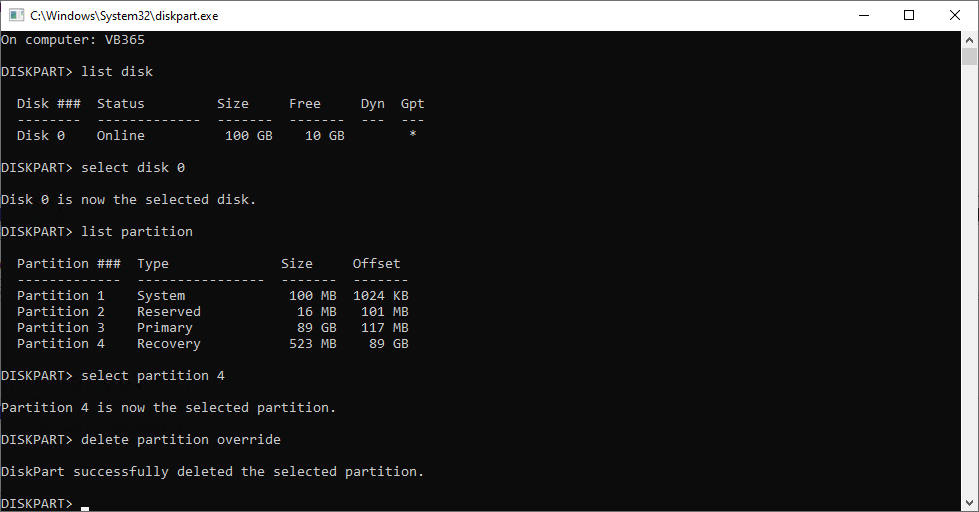 That’s it, now you can keep adding space to the disk on VMware, and expanding it easily on Windows, without downtime. Thanks Olaf!
Jorge, what about the recovery partition. Now you cannot extend c: without gparted
Hello Olaf, you are 100% right. I have updated the steps and mentioned you. Appreciated the extra step!
Thanks! For ultimate template fun have a look at packer.io I use it for all my Debian deployments and Windows templates. It’s awesome for keeping windows templates up2date in one click. A good starting point here. https://github.com/StefanZ8n/packer-ws2022 For vcenter the datastore var is missing but i’m sure you will figure out.
I found the following solution on a Reddit, this way you can keep the default partitions and have the OS partition at the end, so you can still expand your disk:
When you have booted into Windows Setup, Custom Setup and are at the disk/partitioning screen.
Press Shift F10 to open the command prompt and follow these steps (for GPT)
• diskpart
• list disk
• select disk
• Attributes disk clear readonly
• convert gpt
• create part pri size = 450
• create part EFI size = 100
• create part MSR size 16
• create part pri
• select part 1
• set id=”de94bba4-06d1-4d40-a16a-bfd50179d6ac”
• gpt attributes=0x8000000000000001
Close CMD and go through the install wizard, select the last partition for install.
Source Reddit post: https://www.reddit.com/r/vmware/comments/xvig5q/windows_server_2022_recovery_partition_how_did/