
 Greetings friends, today I want to share with you a very interesting topic. For years until today, since my very first days in IT, I always used and relied on RealVNC for my connections on my homelab. But suddenly and abruptly, in May 2024 they discontinued it, leaving thousands of users using the free version with a big dilemma and adding another unnecessary overhead, really.
Recently, I put my Raspberry Pi 4 back to work, I use it to monitor all my environment, and show it on a dedicated screen, like a NOC sort of, and man I am not gonna lie, what an absolute mess is connecting remotely from Windows to Linux. I am not a Linux newbie, and I am using standard Ubuntu 22.04 LTS on Raspberry Pi, so I tried to use XRDP, the drama was beyond my taste, I probably spent around 6 hours trying to troubleshoot everything, things (editing the /etc/X11/Xwrapper.config, the /etc/xrdp/sesman.ini, and so many others, nothing worked), then I tried the native option in Ubuntu 22.04 LTS, seems to be one click, didn’t work either.
Hence this blog post, please do not waste any more minute trying any of those, just go to NoMachine, give it a try and thank me later.
Quick intro to NoMachine
I do not get any commission or anything recommending this product, I just found it and I think it is the superior and clear RealVNC replacement. Also, one thing that I always like is when the product comes from Europe, due to regulations and compliance, surely has passed all the most strict testing.
The pricing options, always optional, are just to getting technical support. and software maintenance (this I expect to be priority resolving bugs, etc.) But anyways, using the free edition we will get those once hitting GA, etc.
NoMachine seems to have as well some Enterprise edition, which supports web access, cloud offerings, etc. But for my homelab use, I am more than happy with just being a standalone app. Another very interesting thing about NoMachine is to have a version for pretty much anything (Linux, Windows, Mac, iOS/Android, Arm)
How to Install NoMachine on Raspberry Pi
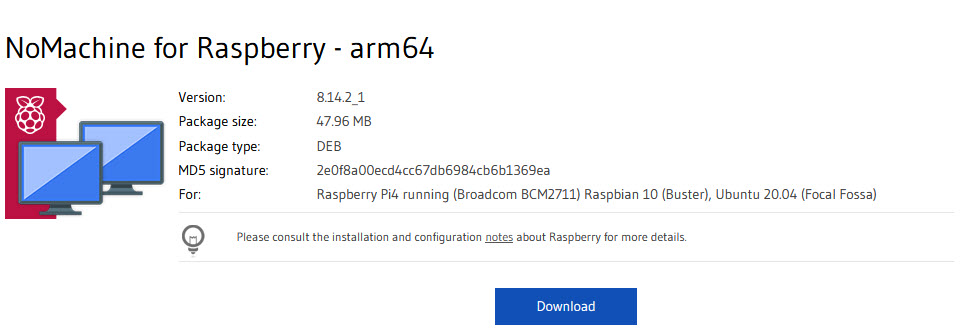
To install NoMachine on Raspberry Pi, we will need an specific version for this architecture, ARM, so the download is different from the usual Linux, you can find it here:
On my case, I have a Raspberry Pi 4, so I have chosen to download the one called NoMachine for Raspberry ARMv8 DEB:
 So the command to do this is the next:
wget https://download.nomachine.com/download/8.14/Raspberry/nomachine_8.14.2_1_arm64.deb
And now we will proceed to install it:
sudo dpkg -i nomachine_8.14.2_1_arm64.deb
If everything goes alright, we will see something like the next:
Selecting previously unselected package nomachine.
(Reading database ... 160178 files and directories currently installed.)
Preparing to unpack nomachine_8.14.2_1_arm64.deb ...
Unpacking nomachine (8.14.2-1) ...
Setting up nomachine (8.14.2-1) ...
NX> 700 Starting installation at: Sat, 04 Jan 2025 16:20:58.
NX> 700 Using installation profile: Ubuntu.
NX> 700 Installation log is: /usr/NX/var/log/nxinstall.log.
NX> 700 Installing nxrunner version: 8.14.2.
NX> 700 Installing nxplayer version: 8.14.2.
NX> 700 Installing nxnode version: 8.14.2.
NX> 700 Installing nxserver version: 8.14.2.
NX> 700 Installation completed at: Sat, 04 Jan 2025 16:22:01.
NX> 700 NoMachine was configured to run the following services:
NX> 700 NX service on port: 4000
Make sure at this point on, that you have opened, and secure the port 4000, which is what NoMachine uses.
How to connect to a Linux/Raspberri Pi using NoMachine
I have installed NoMachine on my Windows 10 now, following the next link, it is a next/next really:
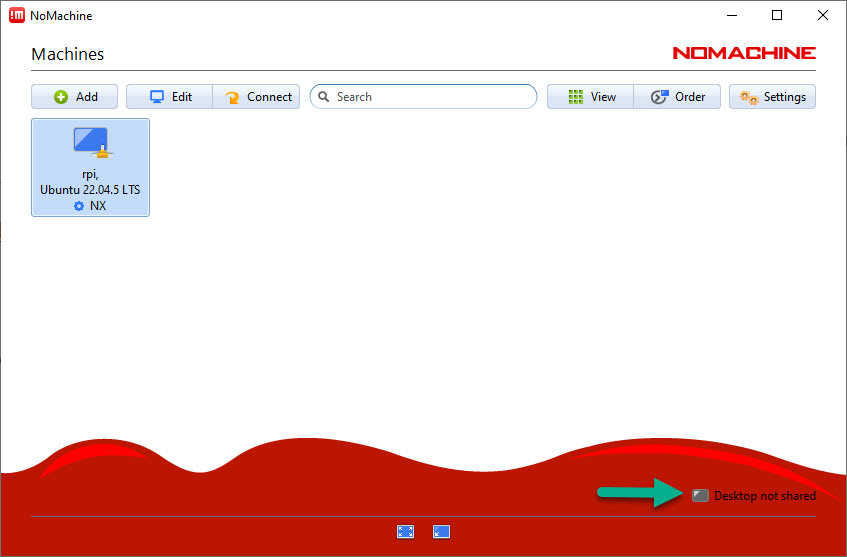
A few things to consider is to disable the desktop sharing on the Windows machine if we do not want other users from the network to access it, to do that you can either disable it from here:
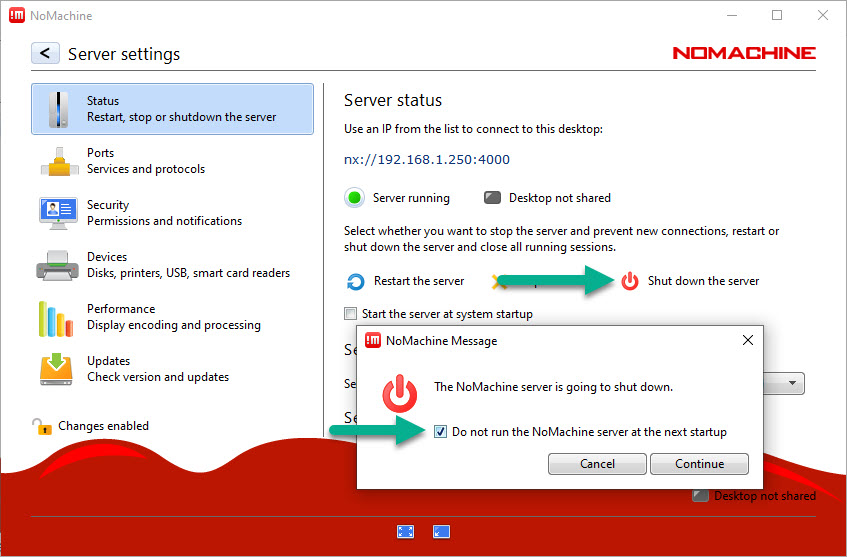
 Or we can directly go to settings, and disable the server option, if we are planning to never share this specific machine, and only use it as console to connect to remote NoMachine:
 Anyways, after this small tip, you probably have already saw that it detected the new machine on my network, the Raspberry Pi, let’s now double click on it:
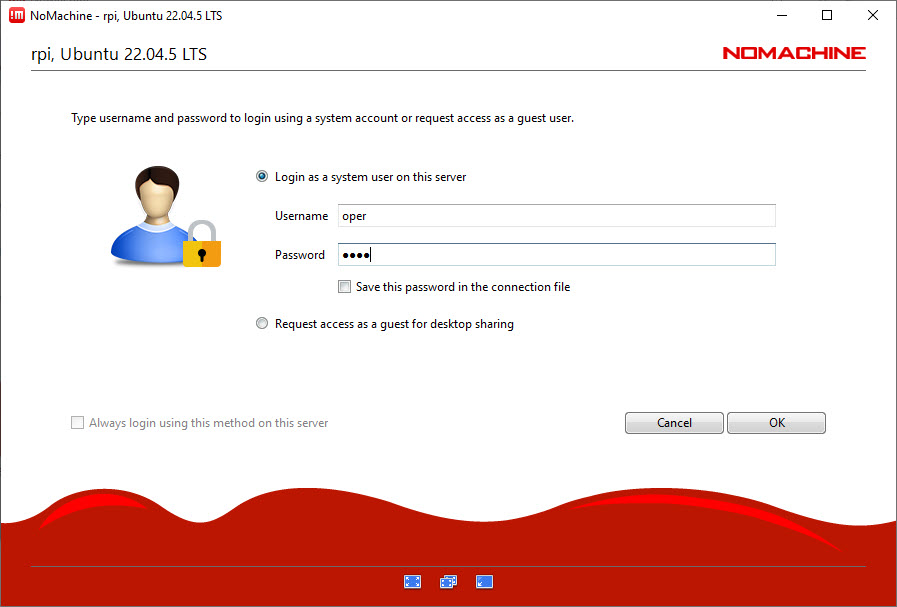
 Now it will ask us for the credentials, I will use the credentials the Linux desktop is now opened, you can also save those credentials to auto-login to this server always with the same user/pass, this is more up to you, on a homelab I guess it is okay, probably not recommended beyond that:
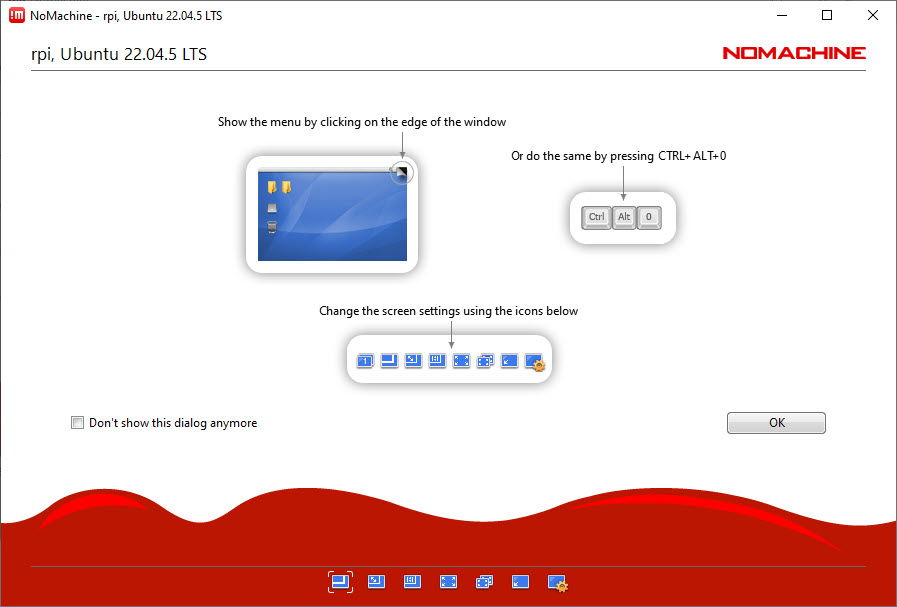
 From this point onwards, it has some questions that personally I would mark to not showing it anymore, very useful to get used to the app, like how to show the menu of NoMachine:
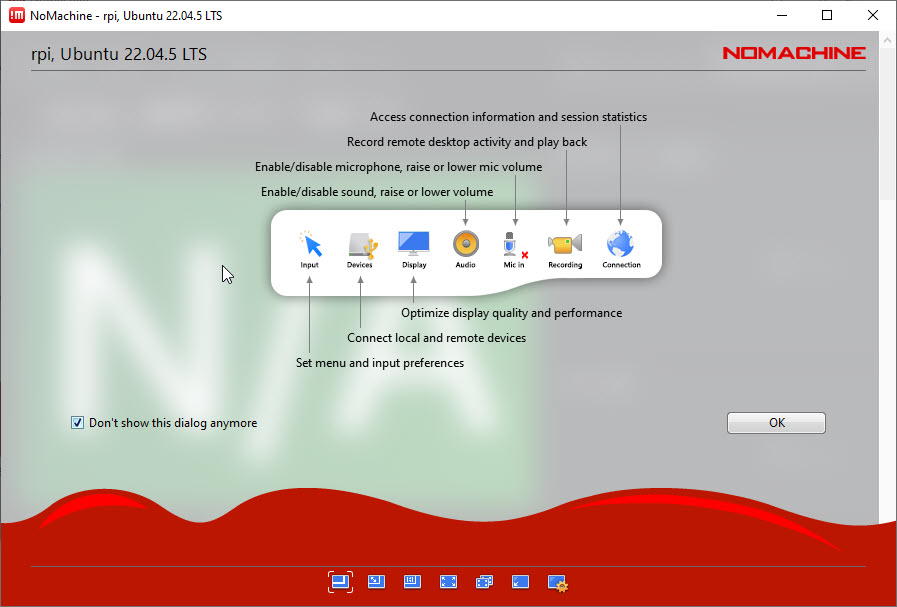
 Or, how to use the toolbar to action and use the different settings, like audio, mic, etc:
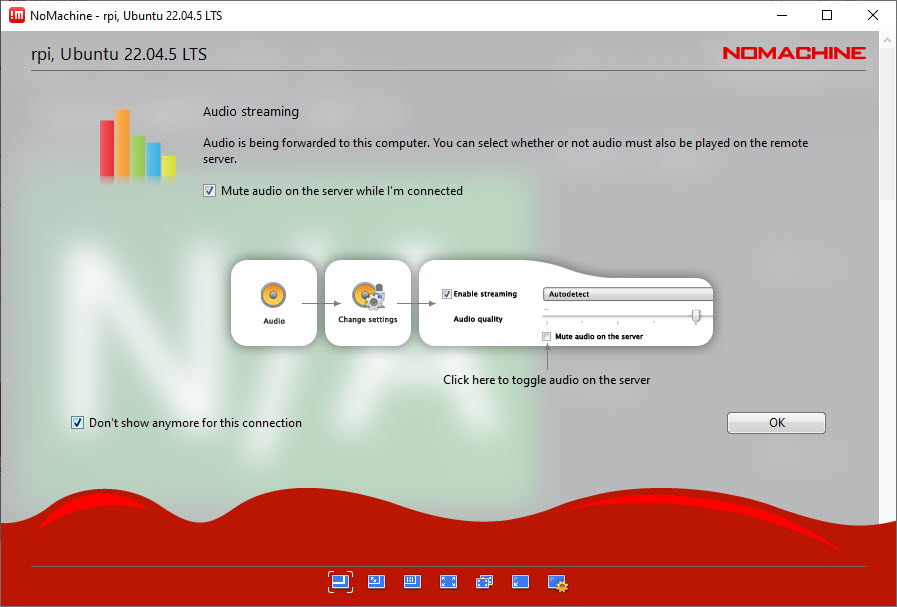
 On my case, I want the audio always to be disabled, but as said please choose according to your needs:
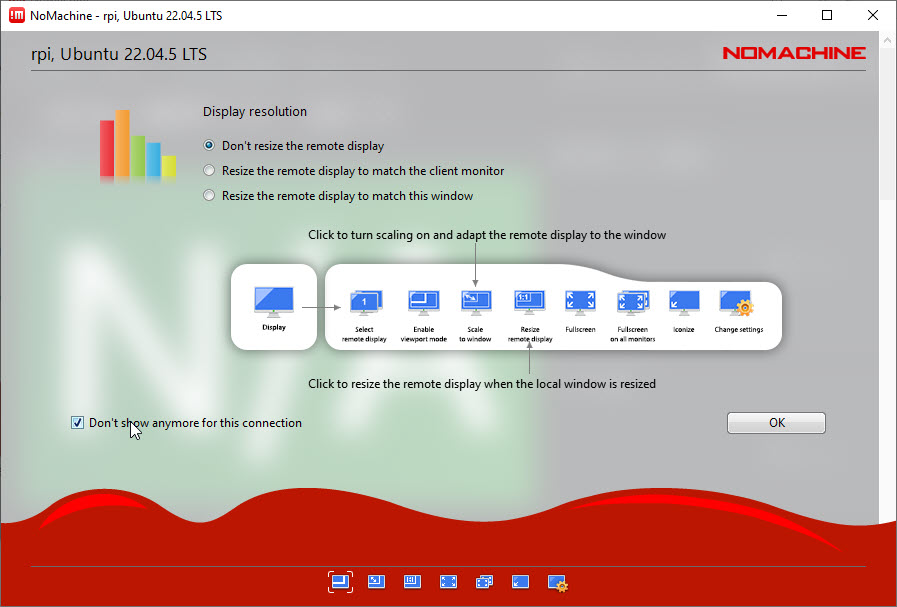
 As resolution, I always like to see what the user sees, on the other side, so my default option here is to “show the remote desktop at its resolution using the scrollbars”:
 And, another tip to make things smoother, keeping the “don’t resize the remote display” so we avoid any changes on the remote terminal:
 And oh my God, we are finally here, seeing my Ubuntu 22.04 running on my Raspberry Pi, on a terminal that is far from me, without any peripheral connected. Hallelujah!
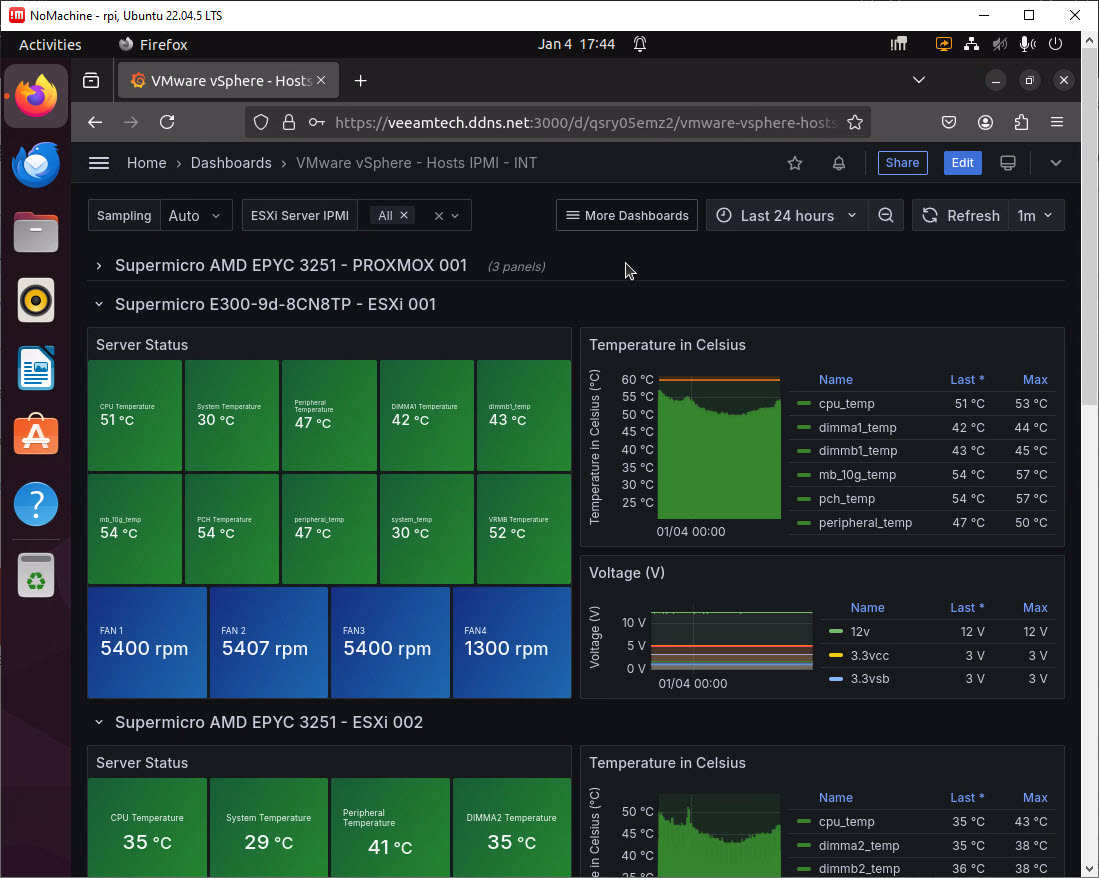 Now I can add some extensions to Firefox to rotate between tabs, put it on full screen, and kiosk mode etc.
As a quick summary, just saying that I am truly impressed with NoMachine, the easy to use, the up to date software, and the vast amount of platforms supported it is impressive. Without a doubt this is the tool I will use the most for the rest of the 2025. I really tried hard keeping the usual and native tools like XRDP, or the Ubuntu one, but I think we all have a limited time to use on our homelabs. If you like this post, please leave a comment, share your thoughts, your ideas, and feedback. Thank you!
Leave a Reply