
 Greetings friends, let’s continue with the series about NVIDIA Jetson Orin Nano Super. What a great device! It has become my daily private and secure LLM, but in order to do so, we will need to install Ollama, a truly revolutionary framework designed for us, as we want to leverage the power of large language models (LLMs) right on the Jetson Nano.
Why is Ollama unique?
At its core, Ollama is all about giving us full control over our AI models. Whether we’re running Llama 3.3, Phi 4, or even multimodal models like LLaVA, Ollama makes it seamless to download, run, and customize them locally. Here are a few standout features that truly excites me:
- Local First Approach: Ollama empower us to run state-of-the-art models directly on our machines, in this case the Jetson Nano but surely it does accept many other devices. Also it does eliminate the raising concerns about data privacy, latency, or recurring subscription costs (as it has become the new subscription nightmare with OpenAI, Claude, Bolt, etc.) It’s perfect for individuals or businesses that prioritise control and security over the AI applications. I have not scaled an Ollama for an Enterprise, but there are a lot of guides on how to make it more resilient for multi-users.
- Wide Model Library: Ollama supports a wide range of models, from lightweight options like Moondream 2 for simpler tasks to massive models like Llama 3.3:70b, which require robust hardware. The built-in model library offers something for every need: be it coding assistance, creative writing, or multimodal tasks like image analysis. That is the beauty of it, just pick the right model to your current needs.
- Customization at its Best: Ollama makes it incredibly easy to fine-tune models to your specific requirements. By editing a simple
Modelfile, you can adjust parameters like temperature or inject custom system prompts. We will see that on future posts. - Cross-Platform Compatibility: We have the Jetson Nano, based on Linux ARM, but of course Ollama works on any platform really, also it can runs on docker which then it makes it even easier and more agnostic.
- REST API for Seamless Integration: Ollama comes with a REST API, making it a breeze to integrate these local models into your existing applications. We will see in the future how to use these OpenAI-API-compatible with additional local tools and apps.
Now that we understand a bit better what Ollama is, we can go ahead and install it.
How-to install Ollama
You can always choose to deploy Ollama using a Docker container, but because on my case Ollama it will be persistent so I decided to just install it as a regular app. It is very easy, and the steps will always be up-to-date as we need to download an .sh file and execute it:
curl -fsSL https://ollama.com/install.sh | sh
We should see something similar to the next output:
>>> Installing ollama to /usr/local
>>> Downloading Linux arm64 bundle
######################################################################## 100,0%
>>> Downloading JetPack 6 components
######################################################################## 100,0%
>>> Creating ollama user...
>>> Adding ollama user to render group...
>>> Adding ollama user to video group...
>>> Adding current user to ollama group...
>>> Creating ollama systemd service...
>>> Enabling and starting ollama service...
Created symlink /etc/systemd/system/default.target.wants/ollama.service → /etc/systemd/system/ollama.service.
>>> NVIDIA JetPack ready.
>>> The Ollama API is now available at 127.0.0.1:11434.
>>> Install complete. Run "ollama" from the command line.
As we can see, the Ollama API it is not available on the port 11434, and of course Ollama is ready to be used.
Moving the Ollama models folder to a dedicated NVMe SSD
As said on previous blog post, last thing we want to do is to hammer the microSD which has limited lifespan, so let’s move the Ollama models folder to this new NVMe SSD, which although limited as well it has much more reads/writes, let’s go. Bear in mind your unique paths, mine it is ssd01.
sudo systemctl stop ollama.service
mkdir /ssd01/ollama
mkdir /ssd01/ollama/models
sudo rm -rf /usr/share/ollama
sudo ln -s /ssd01/ollama/models /usr/share/ollama
sudo chown -R ollama:ollama /usr/share/ollama
sudo chown -R ollama:ollama /ssd01/ollama/models
sudo chmod -R 755 /ssd01/ollama/models
sudo systemctl restart ollama.service
sudo systemctl daemon-reload
sudo systemctl restart ollama.service
Giving Ollama a quick run
Now that we have Ollama where it should be, let’s run it with some small LLM, like phi3, to do so, we should just do the next:
ollama run phi3
This will download the mode, to the folder we configured above, and execute the LLM for us. We should see something like this, and then we can go and ask whatever we like:
 We are so ready! I mean, having Ollama on CLI it is absolute magnificent, but CLI surely it is not the cup of tea of everyone, so let’s move into a more modern approach.
Introducing Open WebUI
I must admit, I am extremely pleased with Open WebUI. Open WebUI is an incredible self-hosted AI platform that operates entirely offline, giving us full control over our LLMs like Ollama or OpenAI-compatible APIs. It’s designed to make AI deployment easy and secure, whether we’re managing Retrieval Augmented Generation (RAG), building custom models, or simply running AI locally for complete privacy.
With features like role-based access control, multilingual support, and even image generation, this platform helps us integrate AI seamlessly into our workflows while keeping everything right where we want it, on our own infrastructure. Perfect for those of us who love flexibility and control!
How-to install Open WebUI
To install Open WebUI, let’s use the docker approach, it is truly easy
sudo docker run -d --network=host \
-v ${HOME}/open-webui:/app/backend/data \
-e OLLAMA_BASE_URL=http://127.0.0.1:11434 \
--name open-webui \
--restart always \
ghcr.io/open-webui/open-webui:main
And that’s it, we can now navigate to our http://JetsonIP:8080 and start with the great wizard to configure it:
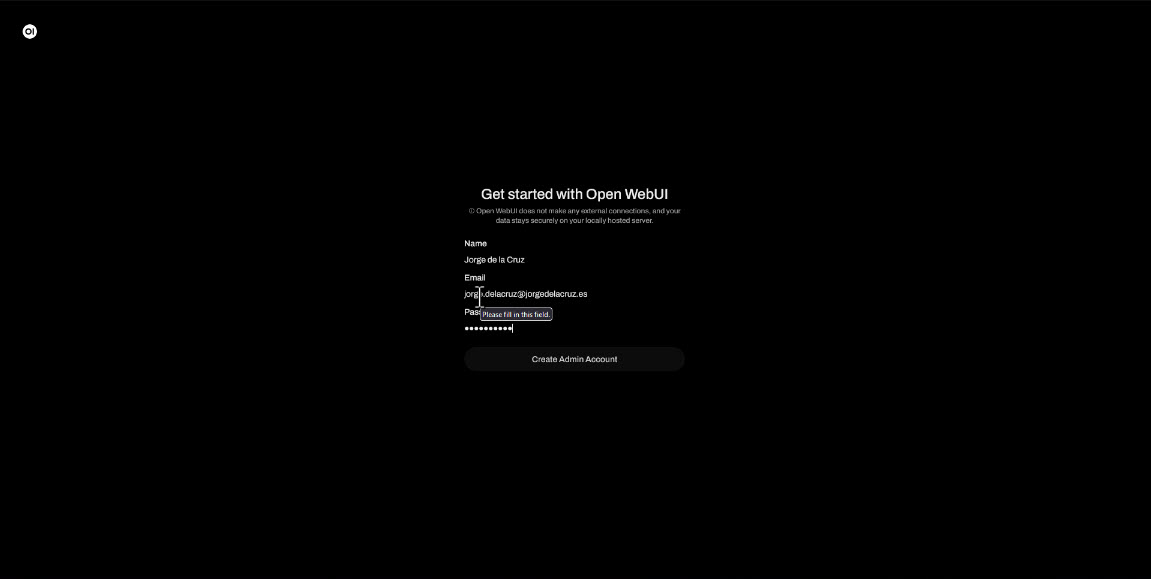
 We need to introduce an email and password. The email can be whatever you like, to the point to do not even exist as long as you remember so you can login later 🙂
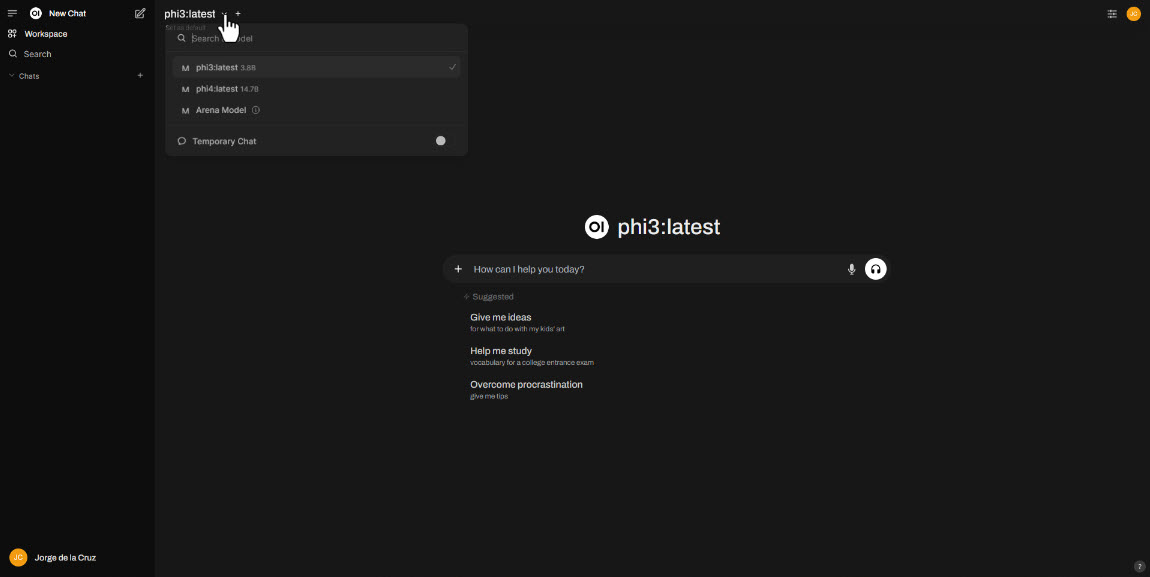
 And then, the grand finale. Look at that great experience, you can choose your models, you can have different conversations. I mean similar to what OpenAI offers, but all is free, open source, private, and on running on your own hardware, mind-blowing:
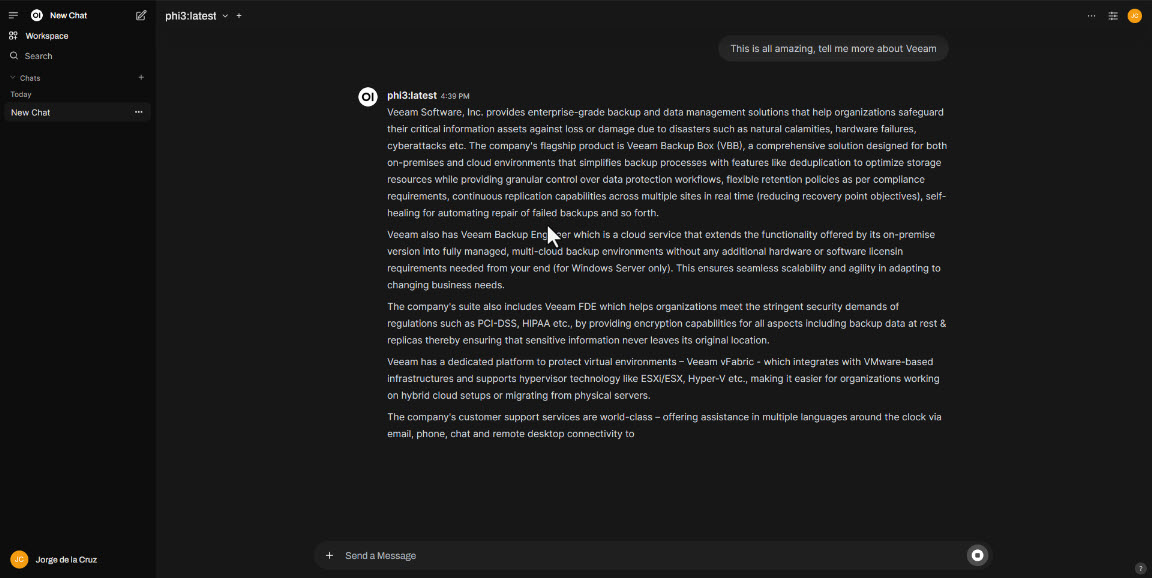
 Sadly phi3 does not have a great information about Veeam, but anyways the speed and experience it is insanely good:
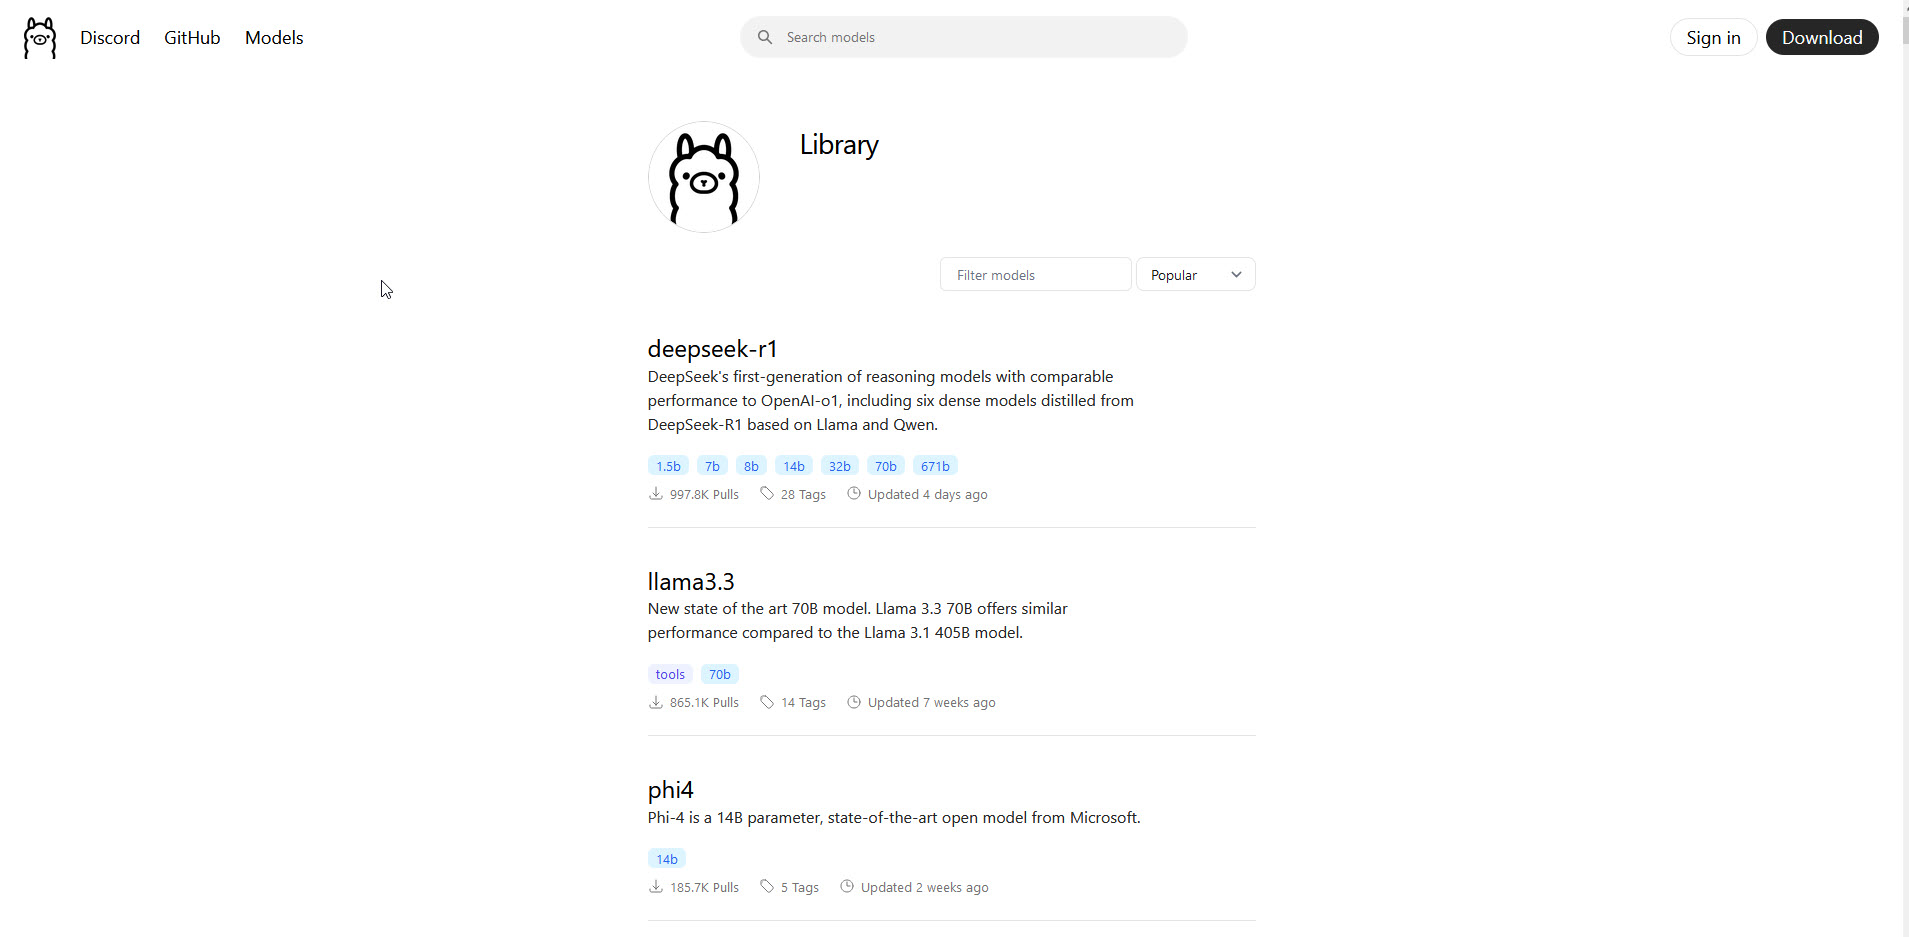
 And last but not least, I want to show you where to find models to download, considering this device has 8GB RAM, I would recommend those models that are not more than 7B parameters:
 That’s all, I hope you like this blog post, and the step by step. I am finding the Jetson Orin Nano Super one of the best purchases I have ever made.
Leave a Reply