 Greetings friends, the other day I demonstrated how we could configure the OAuth for the Veeam Backup for Microsoft 365 AuditEmailSettings. The manual process I must admit it can lead to so many mistakes taking some tokens, or querying some endpoints, it is very complex.
That is why I’ve created a simpled PowerShell script that will make your life much easier to configure OAuth on Audit operations for Veeam Backup for Microsoft 365. Let’s take a look at the steps once again, this time using the script.
Audit Diagram in Veeam Backup for Microsoft 365
Before we start with the subject, I think a diagram about how all these works can help us better understand what we are going to do, and activate: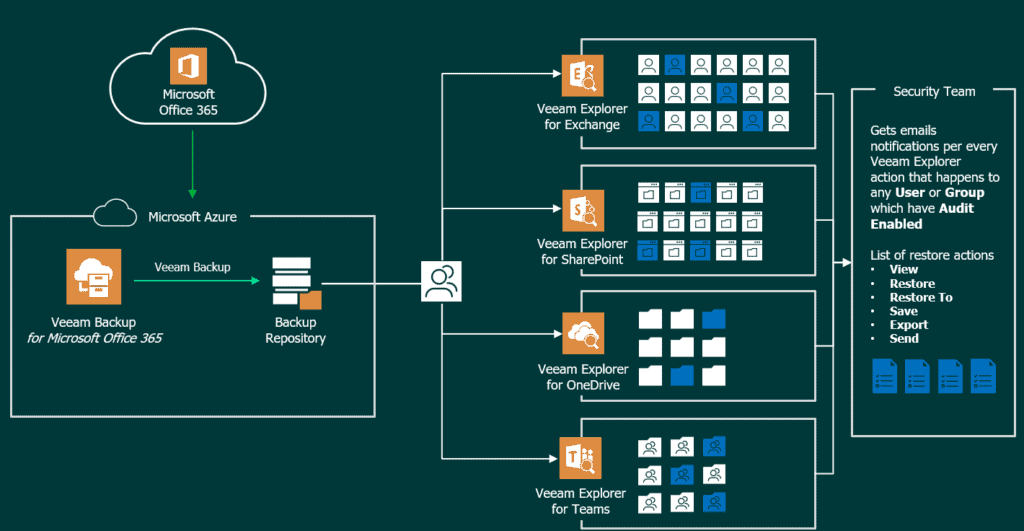
Script time, zero swagger or complexity
Download the script I’ve prepared fro you from the VeeamHub, remember that you can always edit and contribute here, we are always looking forward to improve or add new stuff here:
Once you have the script on your computer, you will need to edit somevariables, they are very self-explanatory:
# Variables to login on Veeam Backup for Microsoft 365
$veeamUsername = "YOURVB365USERNAME"
$veeamPassword = "YOURVB365PASSWORD"
$veeamRestServer = "https://YOURVB365IPORHOSTNAME"
$veeamAPIversion = "v7"
$veeamRestPort = "4443" #Default Port

# Variables to login and Auth in GoogleMail, or Microsoft 365
$ServerType = "Microsoft365"
$redirectUrl = "http://localhost"

# Variables to login and Auth in GoogleMail, or Microsoft 365
$mailFrom = "YOURMAILFROM"
$mailTo = "YOURMAILTOBETTERTOBEADL"
$subject = "VBO Audit - %StartTime% — %OrganizationName% - %DisplayName% - %Action% - %InitiatedByUserName%"
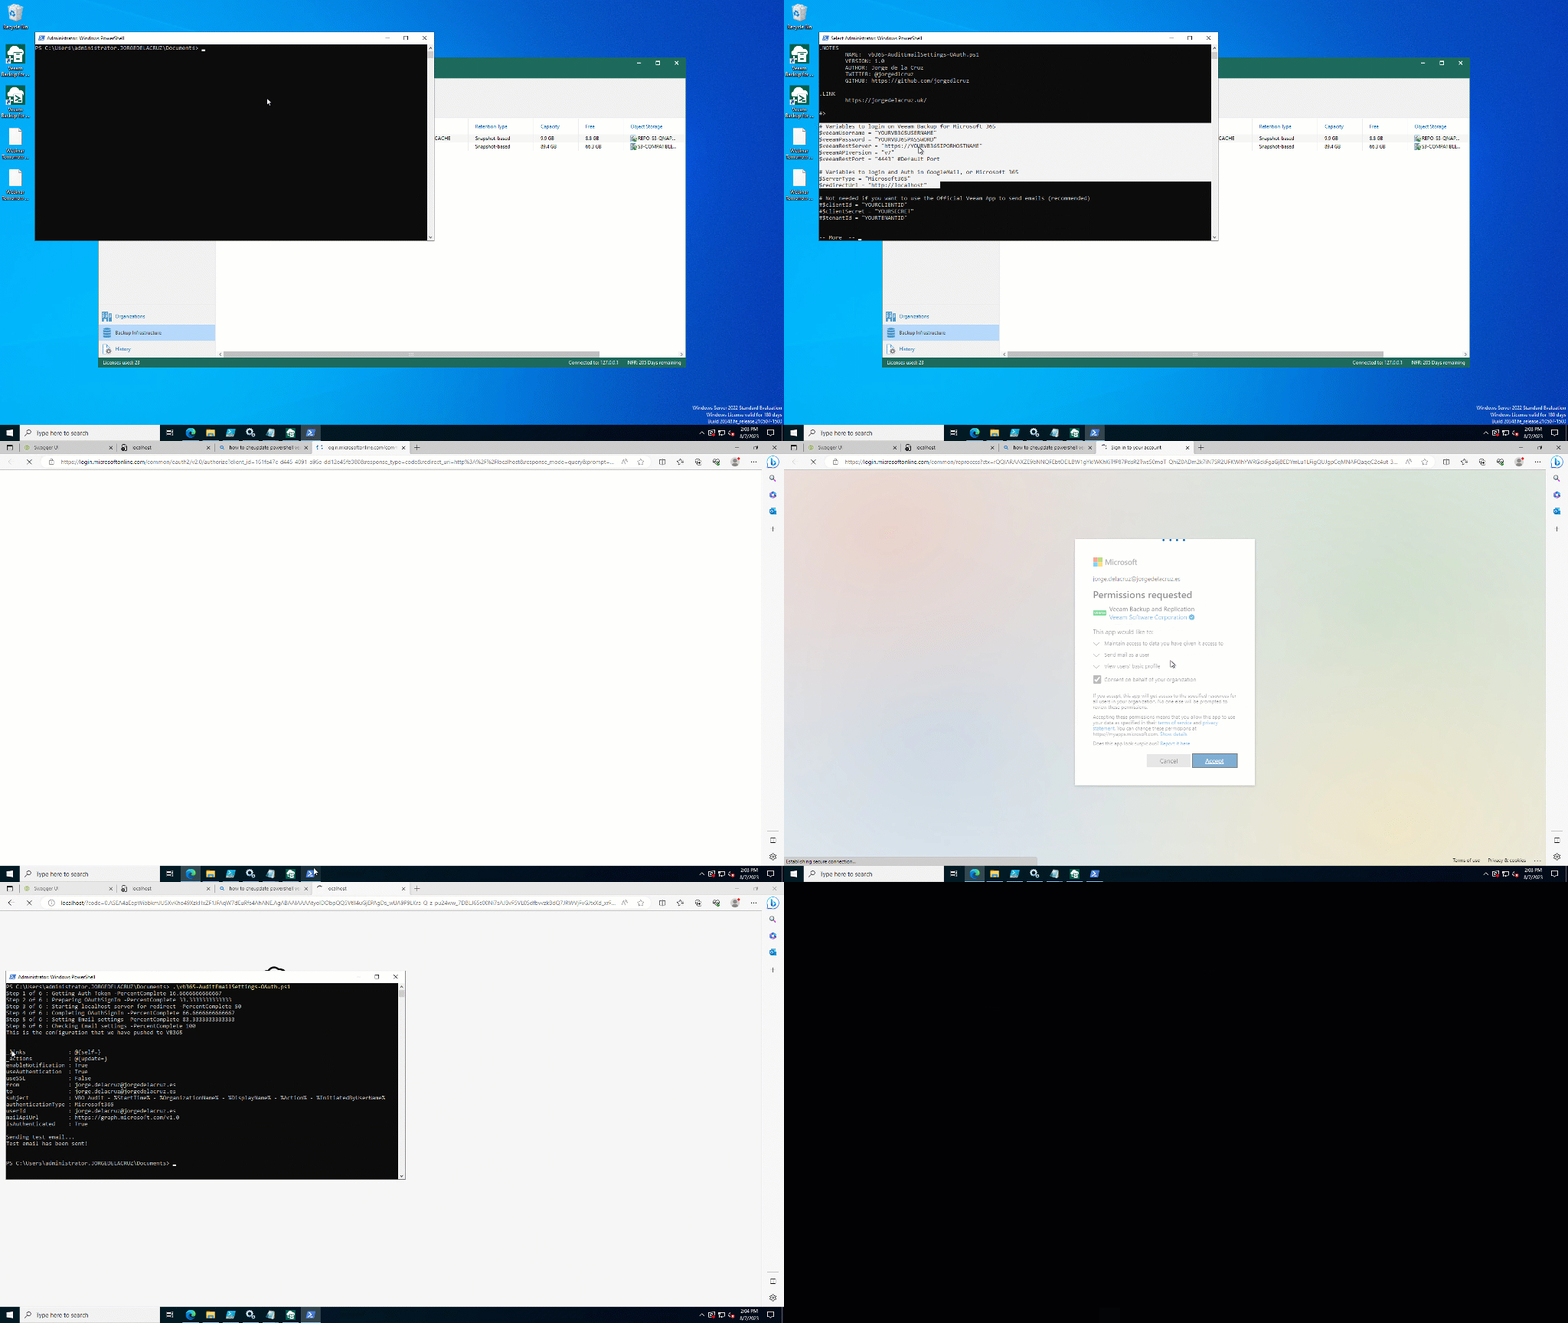
Once you have all of those variables filled, it is time to open PowerShell with administrator rights, and run it:
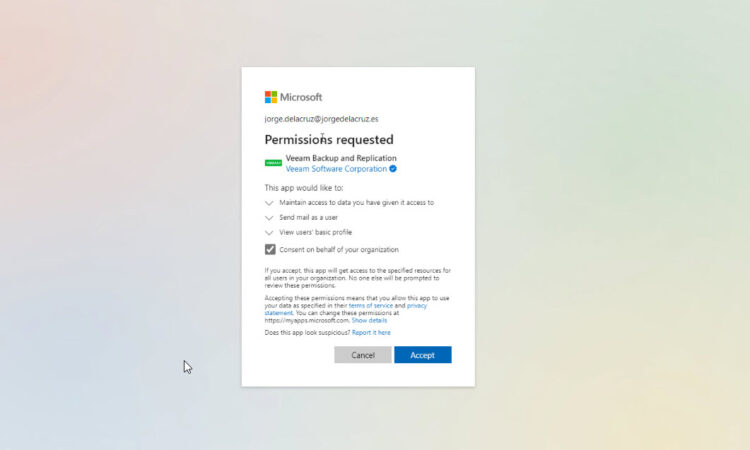
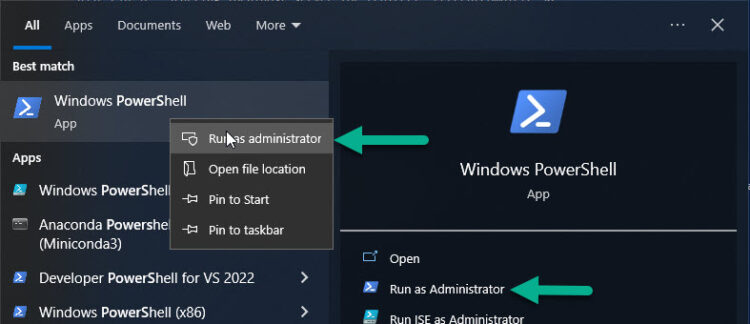 During the process, it will ask for user/pass, and maybe MFA in case you have it enabled, authorize yourself normally:
It will redirect us to a localhost tab in our browser, but we can omit that and close it later, let’s get back to the PowerShell to see what it does:
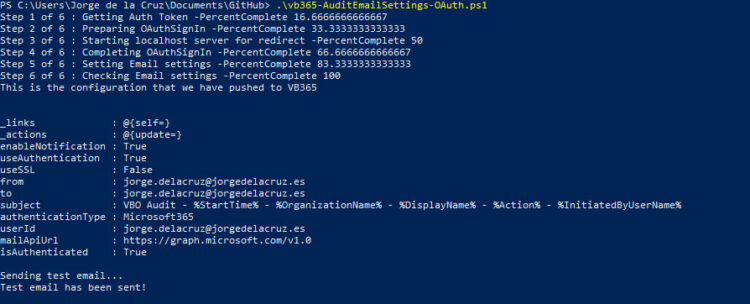 It seems all went good, we can check our Inbox to see if we receive the Test Email:
 And that’s it, we finished the AuditEmailSettings part within seconds. Now, we need the second part, that as of today you need swagger. Will automate this perhaps later.
Whole process in video
Adding here the video of what you should see if you follow all the steps:
Recommended – All Automated!
Please come here to find everything automated:
You will find there two scripts to make your life easier with this.
How to Enable Auditing of protected items with Veeam Backup for Microsoft 365
We have all the help and official information in the following link, but it is really very simple, if we look at the diagram above, we will see that to receive notifications, we must first select the items we want to audit. We have two types that we can audit, the Users (Exchange Mailboxes, Shared Mailboxes, OneDrive for Business, etc.), and the Groups (SharePoint and Teams).
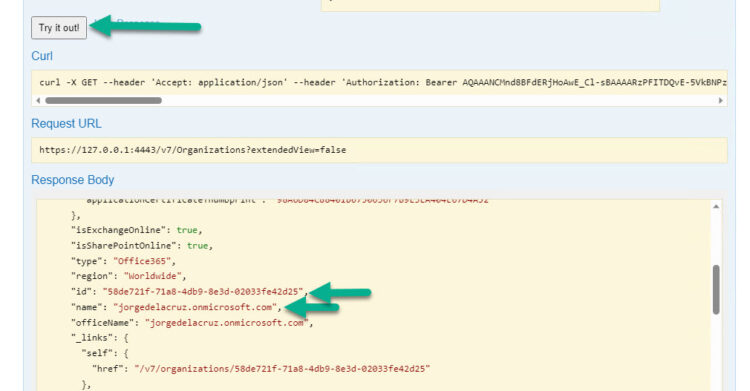
To start making a deeper visualization of what happens of one or the other, we have to know the ID, and the name of what we want to audit, we will see the example with a User, we will have to go first to Organizations, since we need to know our Organization ID, from our swagger – https://YOURVB365:4443 and you do the Auth at the end of the page to obtain the token, then on the top to login, then you go to Organizations, expand the GET, and click on Try it out, you will see something similar to this:
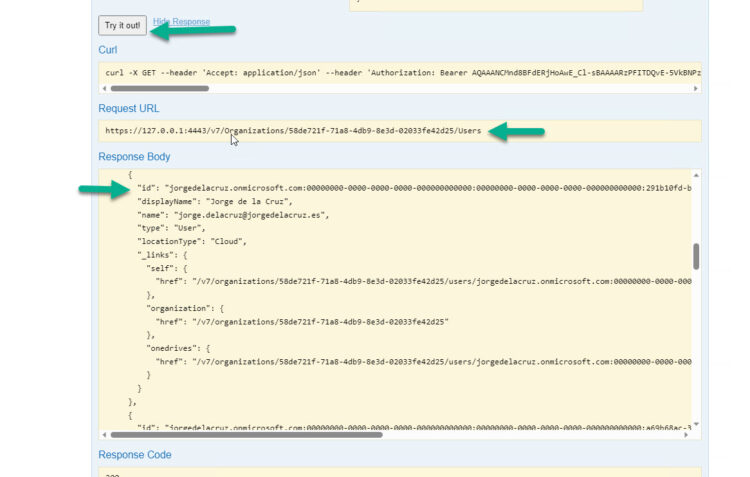
Now that we know our Organization ID, we will go to OrganizationUser and expand the GET, where we ask for the Organization ID, once we paste it we give Try it out!
This will give us back all the users, in my case in which I want to enable the audit is Jorge de la Cruz, so the relevant data are the following: ID, displayName, and name
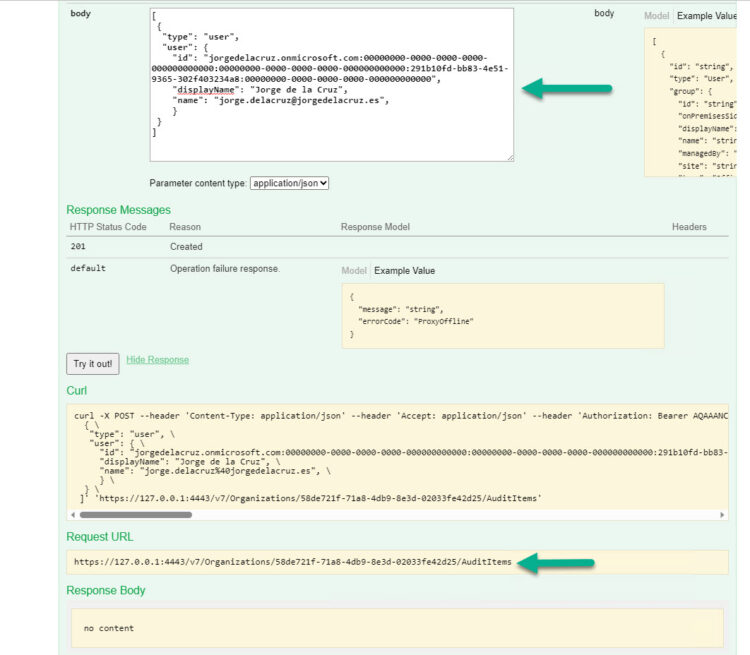
We are almost there! We will finally go to OrganizationAudit, and in the AuditItems POST, we will introduce our Organization ID, and the following code with the user, or users, or groups. It is a .json, so at once we can add as many components as we want:
[
 {
  "type": "user",
  "user": {
    "id": "jorgedelacruz.onmicrosoft.com:00000000-0000-0000-0000-000000000000:00000000-0000-0000-0000-000000000000:291b10fd-bb83-4e51-9365-302f403234a8:00000000-0000-0000-0000-000000000000",
    "displayName": "Jorge de la Cruz",
    "name": "[email protected]",
    }
 }
]
The result would have to be something like this, we will hit the Try it out button as always, we will have to receive a 200 to know that everything has gone well:
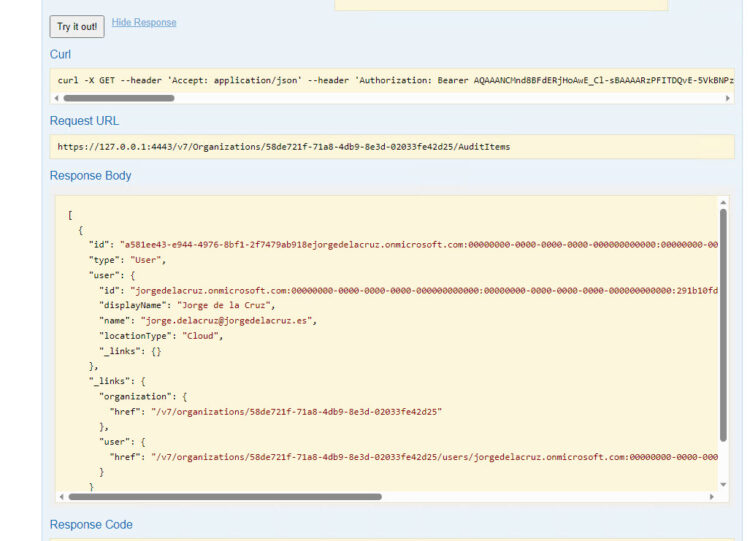
If we wanted to check that everything has been added in a satisfactory way, very quickly we go to the GET of AutidItems, and check what we have:
We see that everything has gone well and we have our users, this would help us to check which users and groups we are auditing.
We already have everything ready. What is left for us? Open the Veeam Explorers and start playing.
A Real-Life Example of Audit being sent in Real-Time
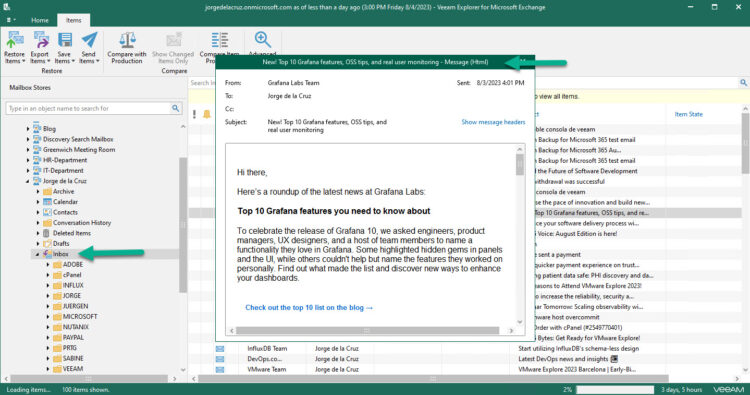
As I say, no matter if we open the Explorer from the server, or from a Tenant, or from another PC, any element that we open, restore, or export, the relevant security email will be sent so that everything is audited, for example:
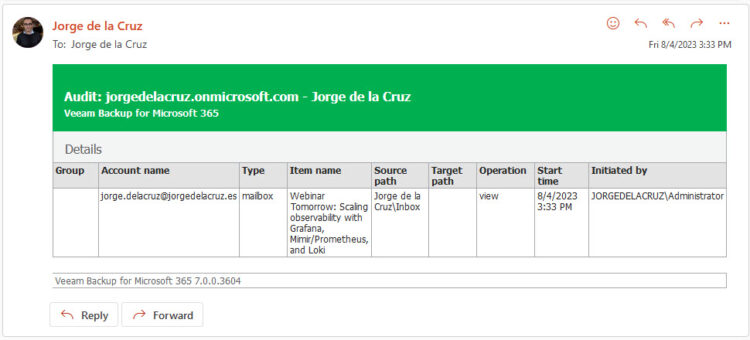
I have opened an Exchange Explorer, and in a user where the audit is enabled I have View an email to browse it:
I immediately received this message on my security account where I am auditing who does what and when:
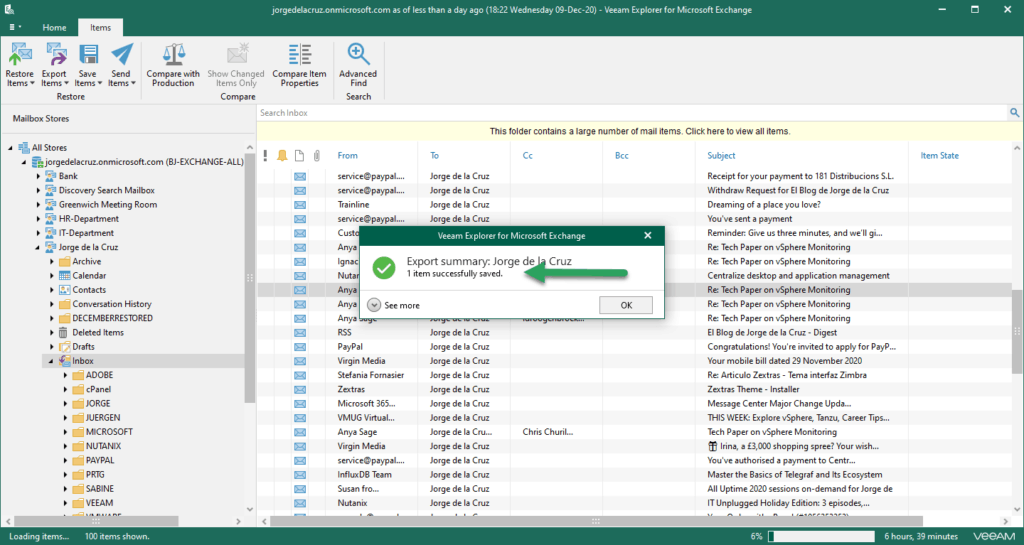
 Now I have decided to export an email to my computer as .msg:
I have immediately received this message in my security account where I am auditing who does what and when, and in this case where I have exported the item: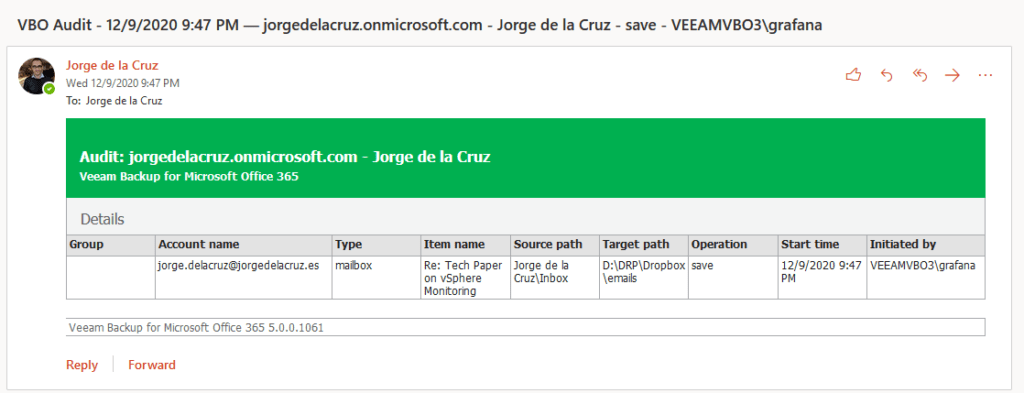
I leave you another example, this time of restoration of OneDrive for Business: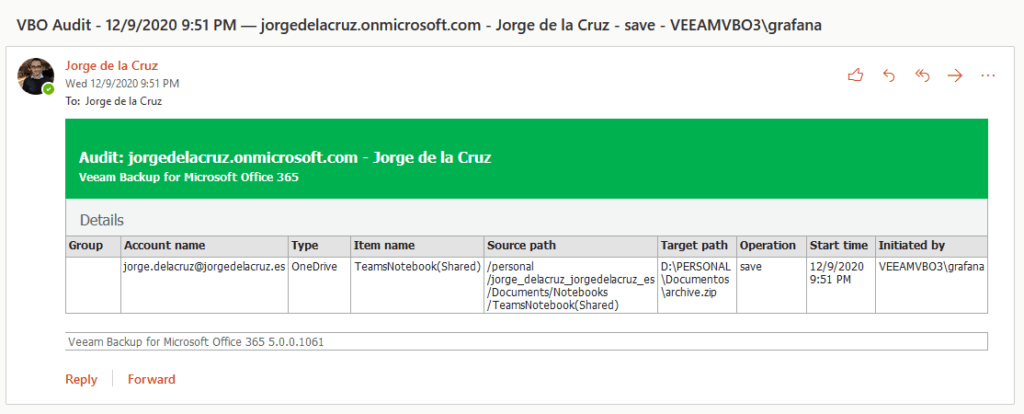
This is very, very powerful, and will surely give us a lot of play in the near future. I hope you find it useful, thank you very much for reading.

Great infos Jorge!!!
Maybe have you also a script how to remove auditing from protected items?
Thaks
Hello,
Not at the moment, I can probably write something but busy currently with other projects, so you will need to wait a bit.
Cheers