 Greetings friends, some time ago I showed you how to install Nutanix Community Edition using the ISO, but it is true that it gave some problems, you could not turn on VMs, and in the end, deploy it on VMware in a nested way, gave us many problems.
A few days ago, Nutanix surprised us with a new version, that if it works without any problem, in a very elegant and fast way, and with a surprise that I would like to try later. When you finish, you will be able to visualize a PRISM like this: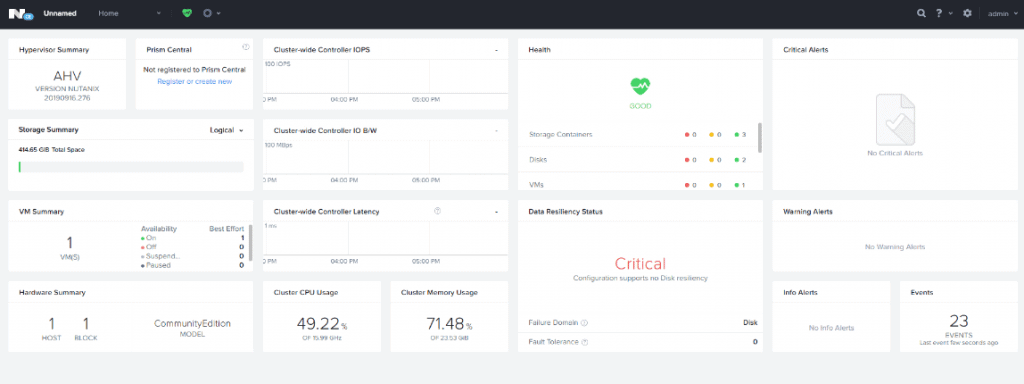
Downloading the Nutanix Community edition
We must log in at next.nutanix.com and go to the Nutanix Community section and then to Download Software. We will see there then a Post with the last image, as well as a Changelog with the improvements and functionalities: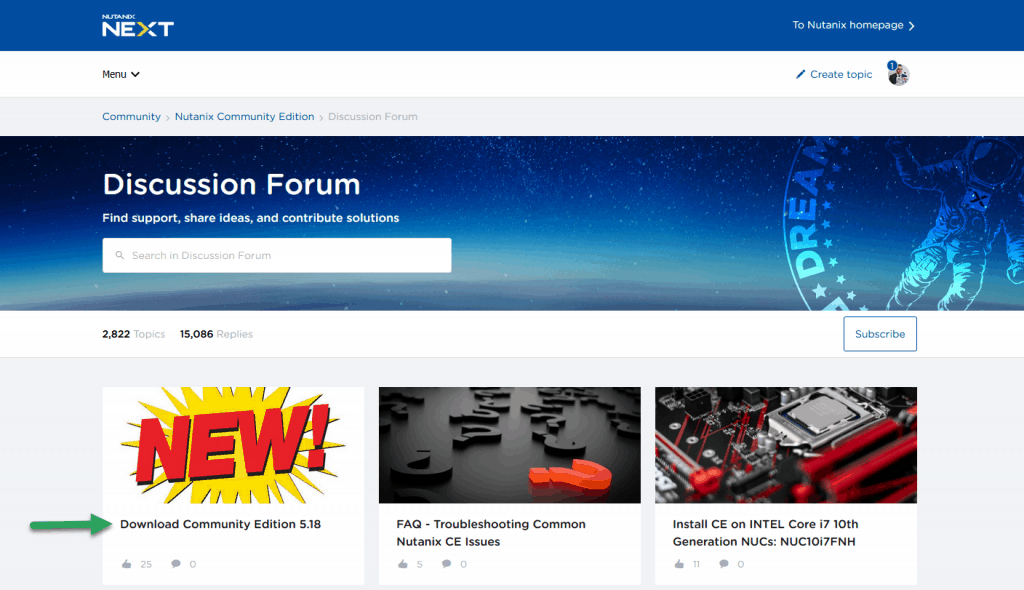
When you click on Download, we will save it in our computer, in this blog we will use the new ISO version: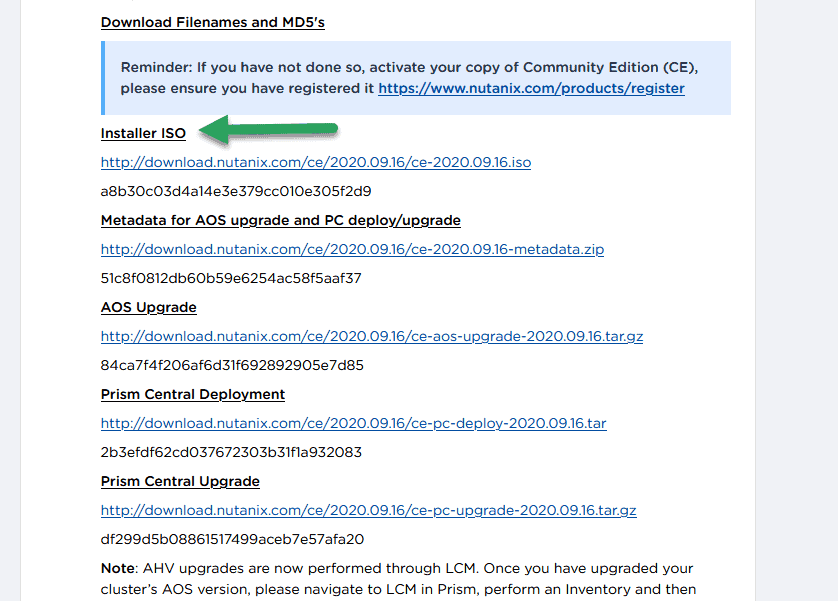
Deploy Nutanix Community Edition 5.18 (ISO) on vSphere 7 in images
Once we have the ISO image already downloaded, we will have to start creating the VM in our vSphere environment, but before that, let me remind you of the system requirements:
System requirements
Remember that we can launch a VM in Single-Node, as in this tutorial, or a cluster of 3 and 4 servers, for all of them we will have to have:
- Intel CPUs, 4 cores minimum, with VT-x support enabled.
- Memory 16GB minimum, I recommend 24GB, and to go well, 32GB.
- Hot Tier (SSD) One SSD for each server minimum to install the Acropolis Hypervisor, ≥ 16GB.
- Hot Tier (SSD) One SSD for each server minimum, ≥ 200GB per server.
- Cold Tier (HDD) One SSD for each server minimum, ≥ 500GB per server.
We can always assign more disks, but these requirements are the minimum so that you do not give an error when installing. We can also use VMXNET3 for the network adapter without any problem.
The first thing to do is to log in to our vSphere Client HTML5, or to our ESXi and create a new VM: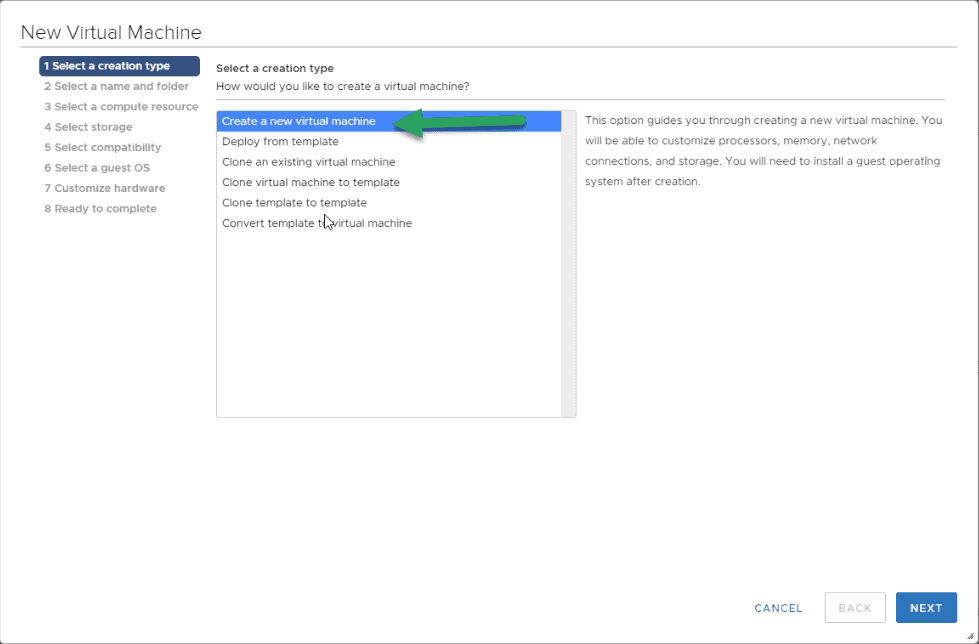
We will select a name for the VM, in my case NUTANIX-CE-2020.09.16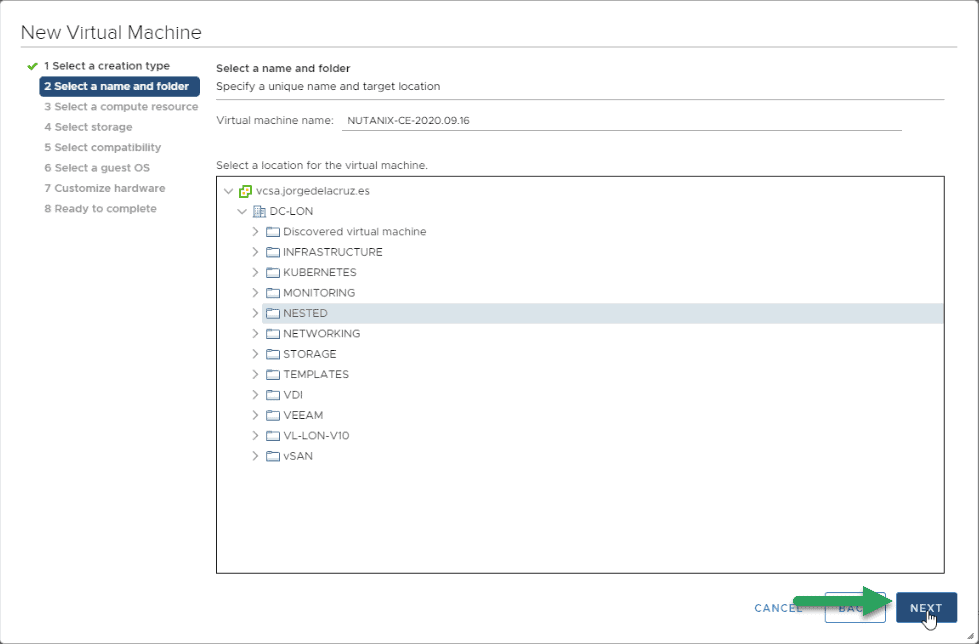
The next step will be to select the Cluster or Host where we want this Nutanix nested to run: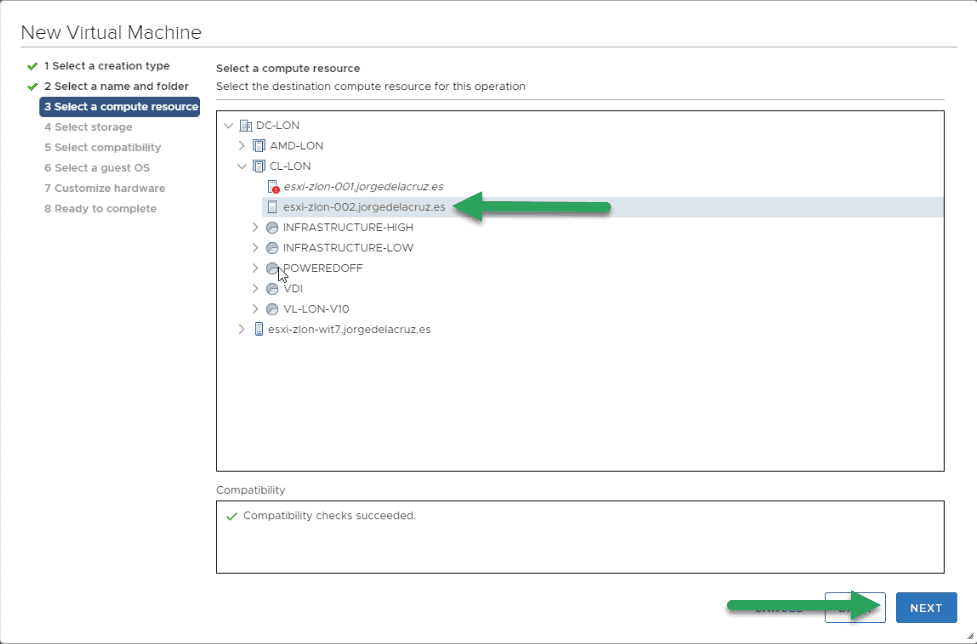
Now we will select the Storage where we want to store the VM, we are going to select an SSD, although later we will give it a more personalized touch: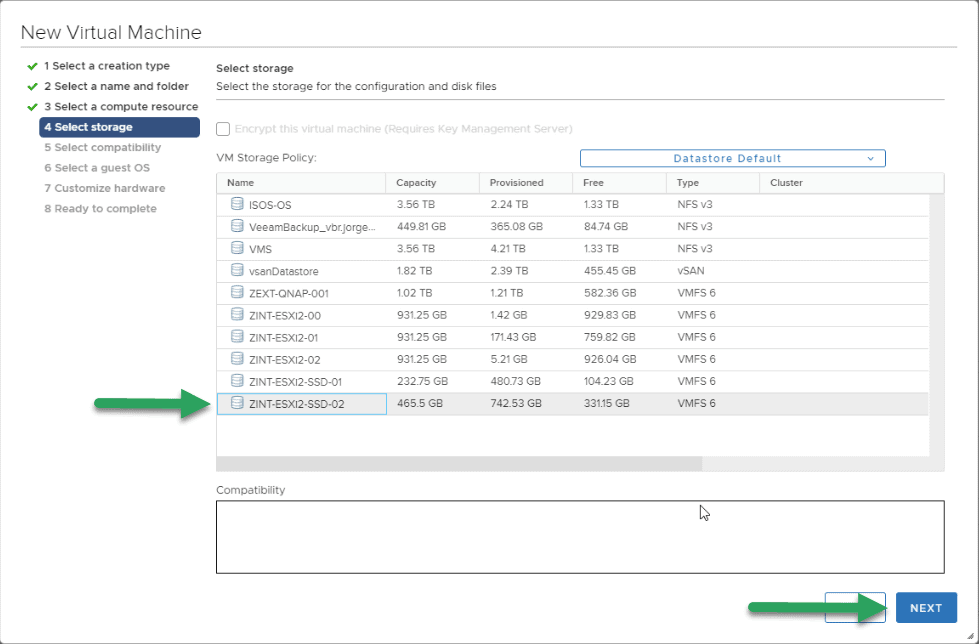
We will select that we want compatibility with ESXi7 or higher: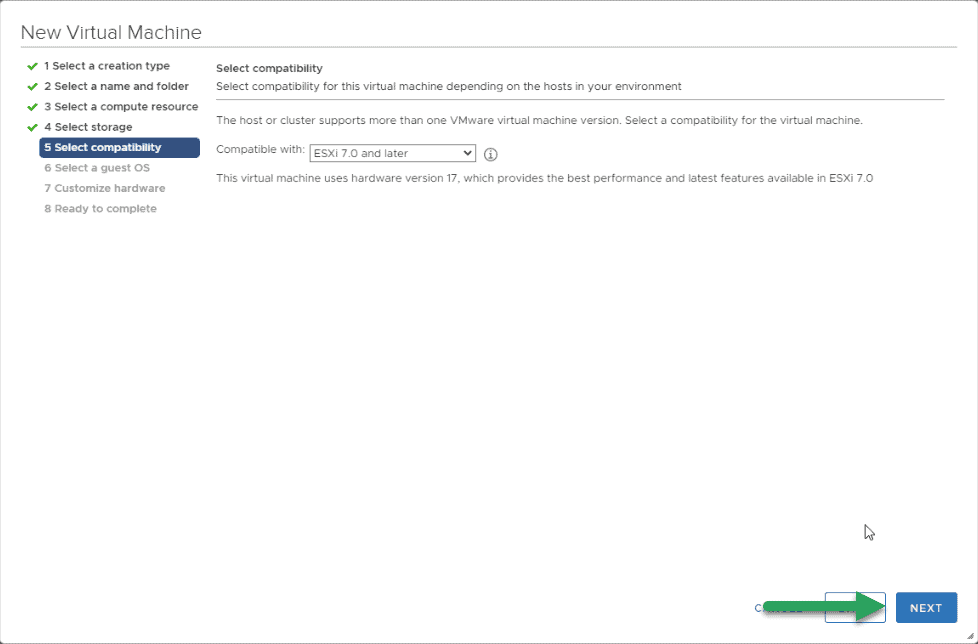
We will select for the OS that is type Other, and then Other 64bit, and in the name, we will put Nutanix, but this last one is optional: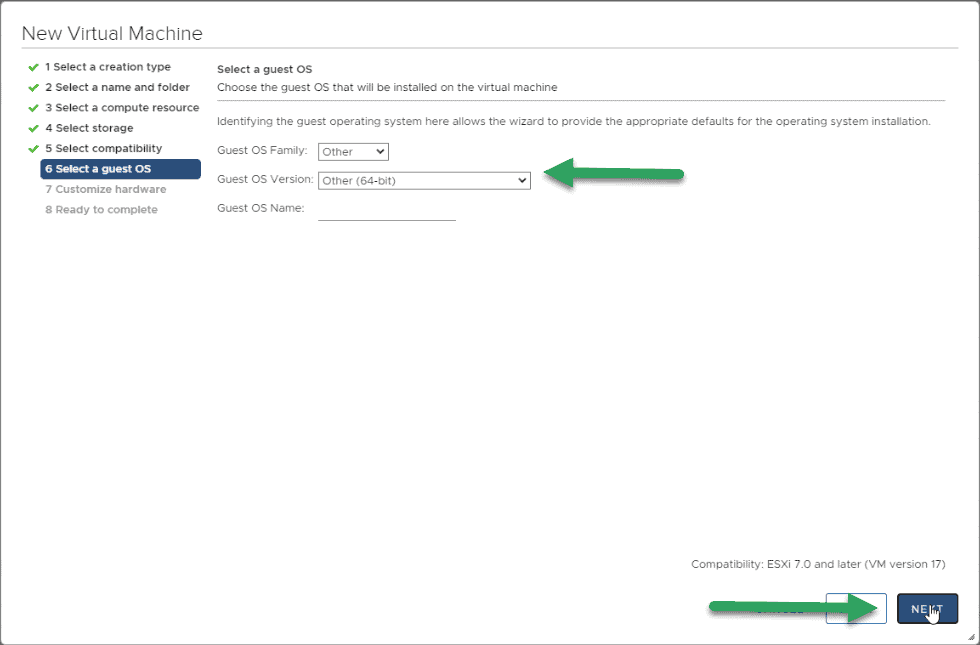
The time has come to give it the personalized touch so that everything works, from top to bottom, let’s start:
We will have to have 4vCPU or more, and very important, mark the option of Hardware virtualization: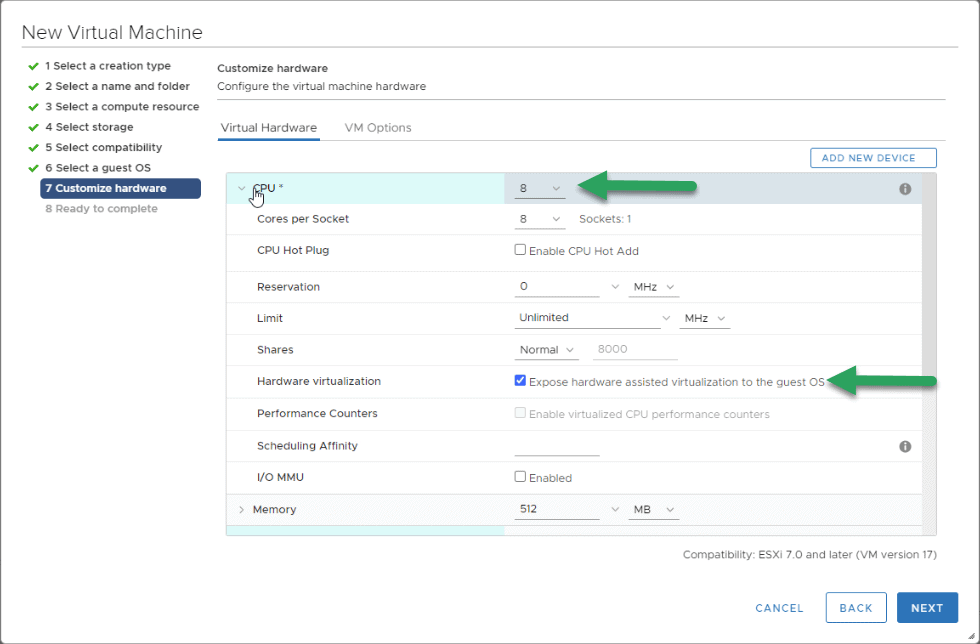
For RAM, 16GB is the minimum, but in my case, I have selected a little more since it is a Single-Node: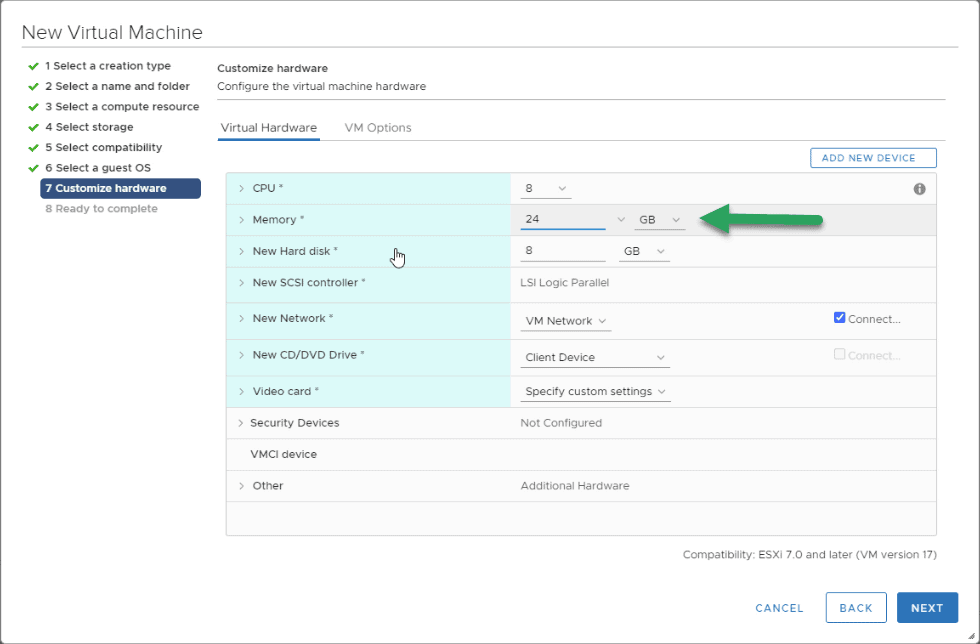
In the Disk Controller we will have to eliminate it, and create one of the type SATA: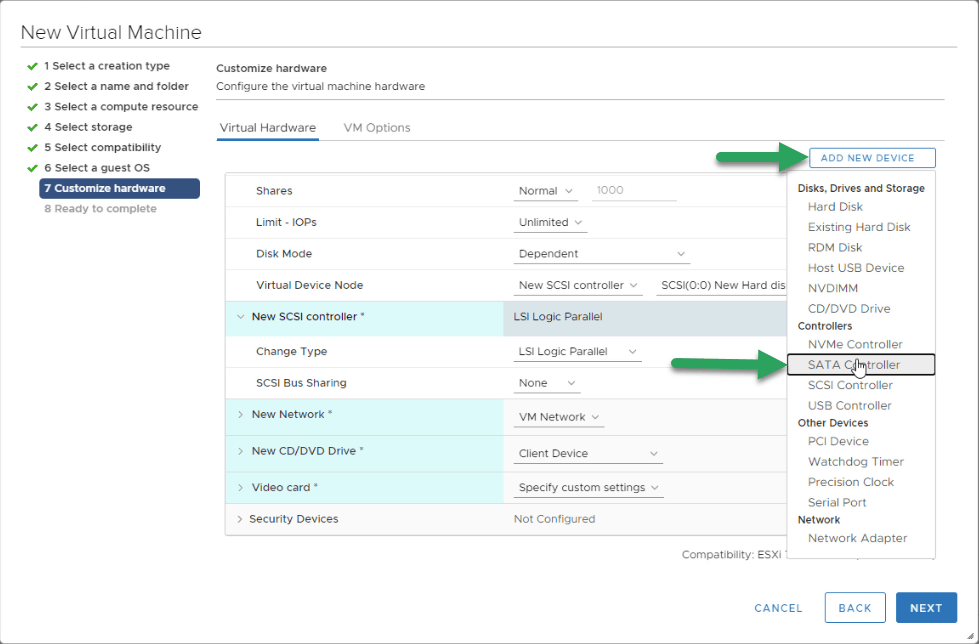
We will give to the main disk, where Acropolis 16GB of space will be installed, remember that it is on SSD, in addition, we will add another SSD of 200GB and a SATA disk of 500GB: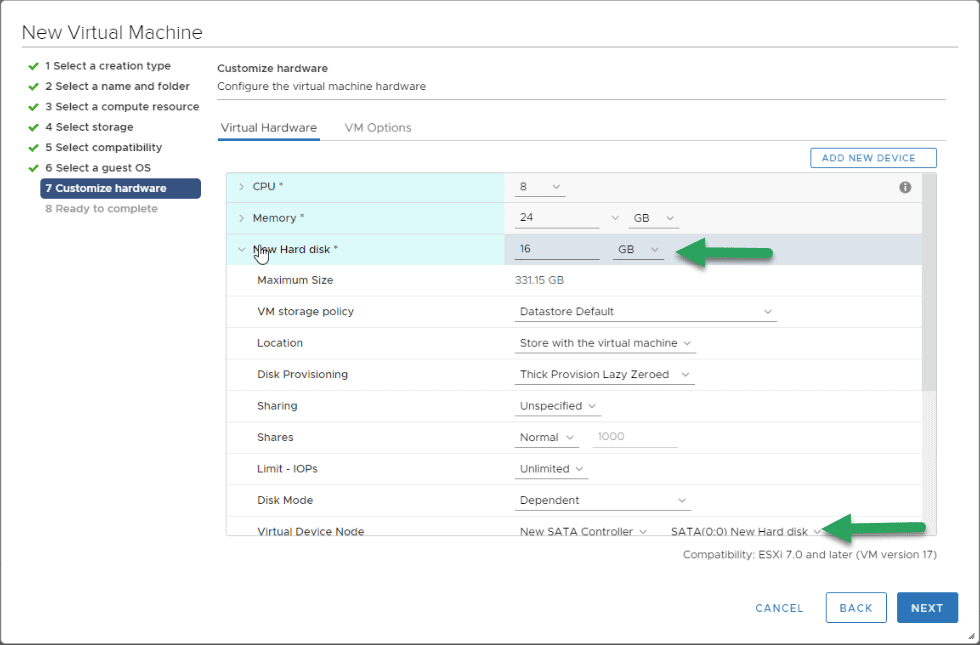
For the ISO, we will select the new Nutanix Community Edition 5.18 ISO and map it: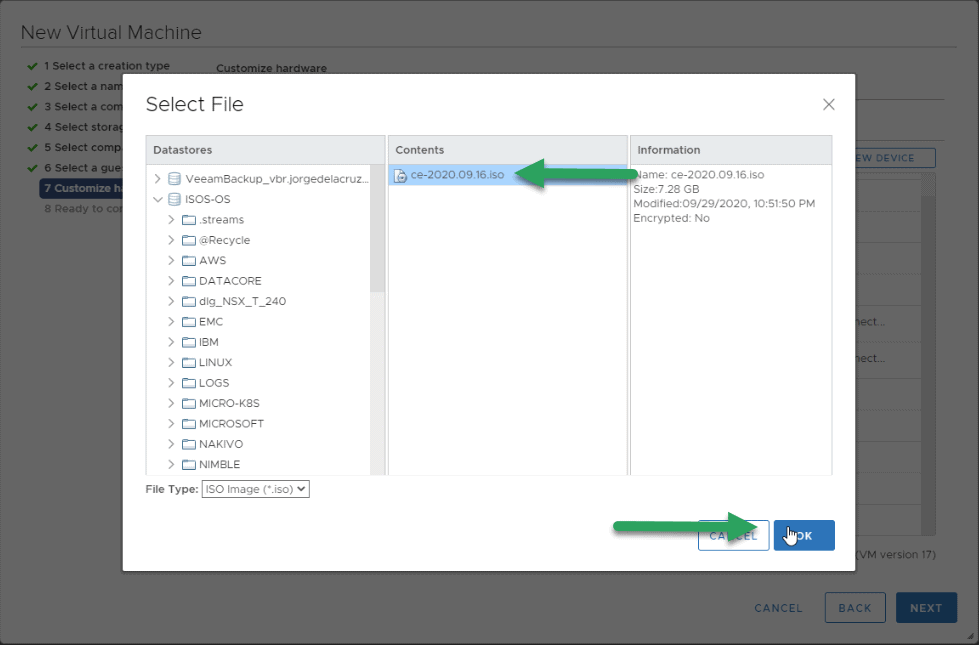
At Networking level, I recommend VMXNET3 whenever possible, and in Nutanix Community Edition it is possible, so there is no excuse: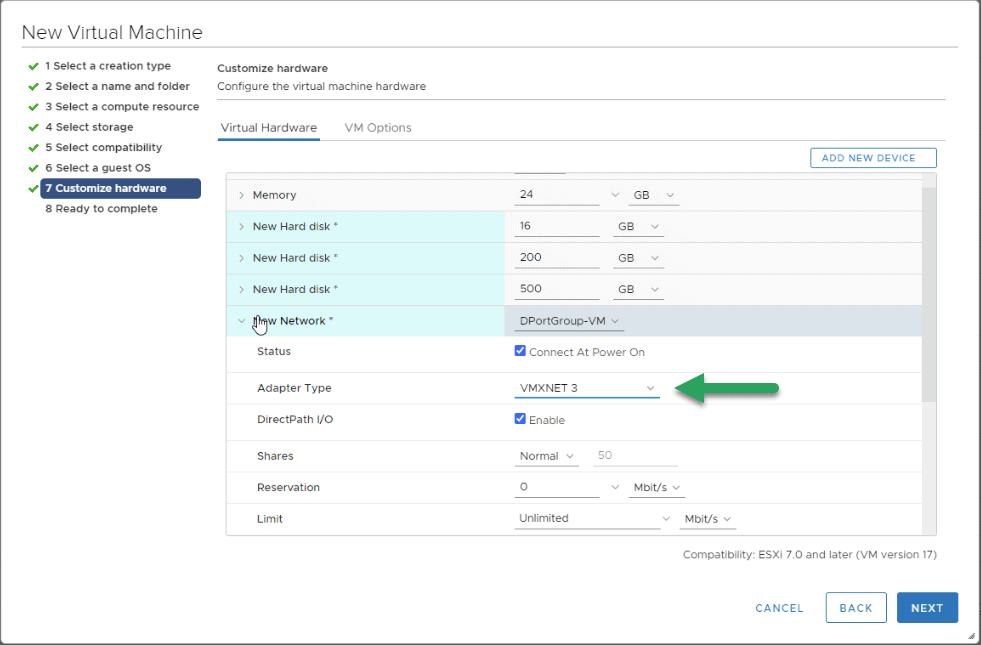
Once we have everything to our liking, we can observe the summary to do a double check before passing the next step: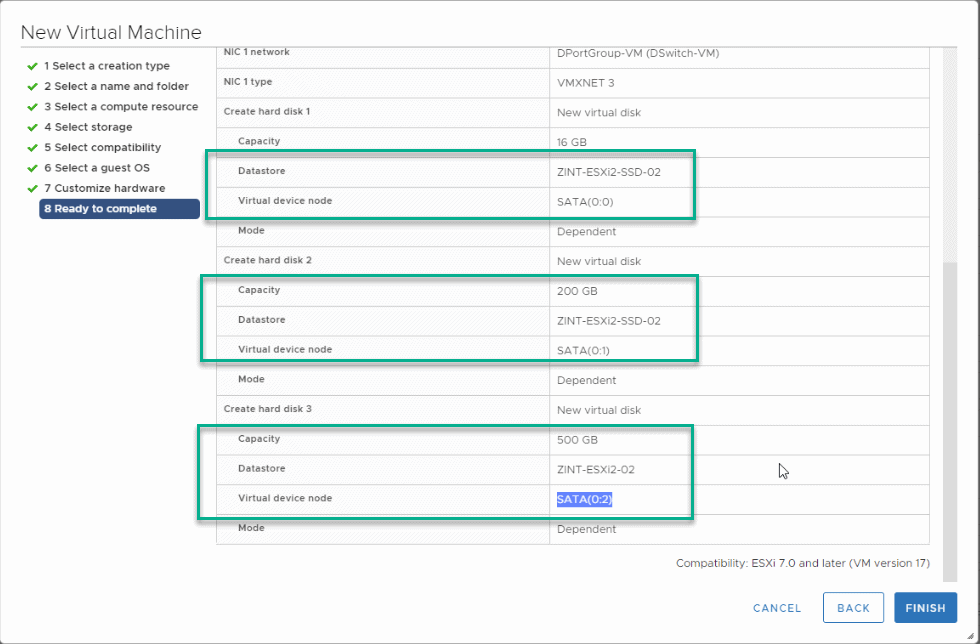
Installation of Nutanix Community Edition 5.18
When I start the VM, it goes straight to the point, I have not had time to select anything: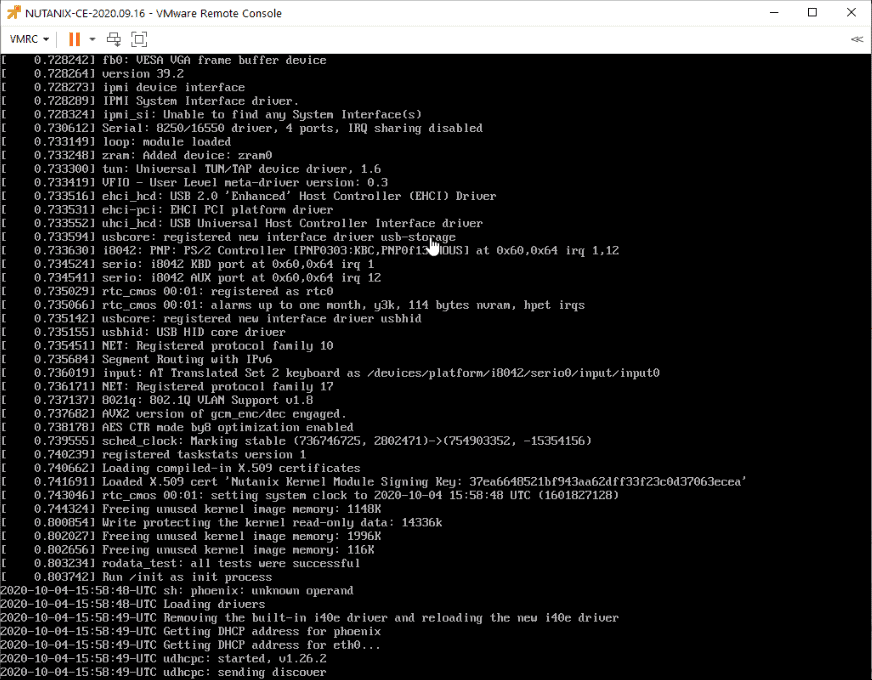 After a few seconds, a new Nutanix configuration screen will appear, where we will have to enter:
- The type of display we want, whether ESXi or AHV!
- The disk configuration, being able to select which one we want for what purpose.
- The network configuration, one for the Hypervisor Acropolis itself and another for the virtual machine of CVM
- We will mark it as a Single-Node
- We will add a DNS server, read the EULA, and mark that we have read it:
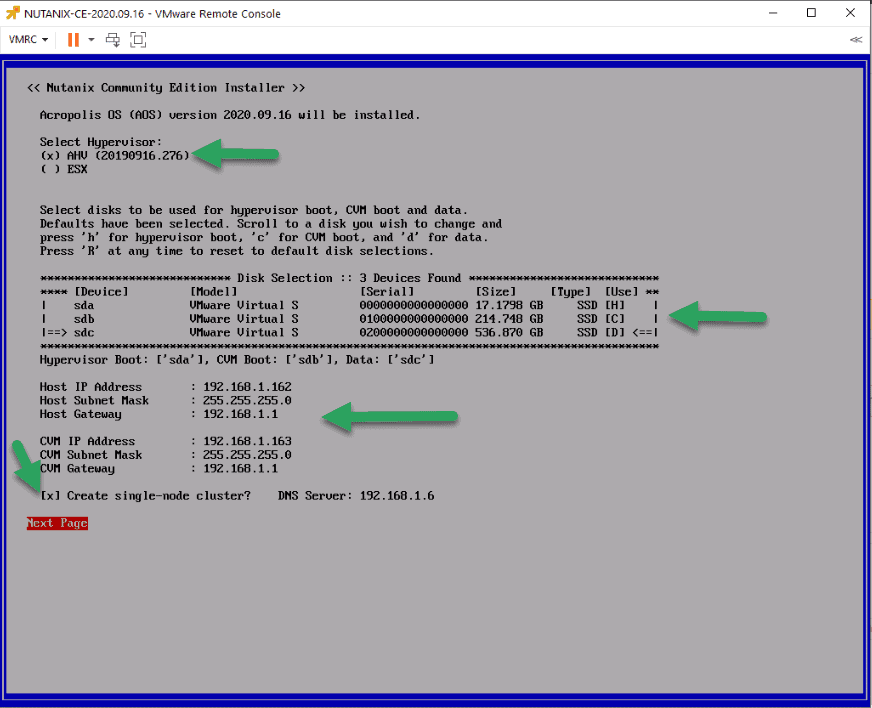 Note: If we mark the option of single-node, when it starts for the first time the CVM will create the cluster automatically and it takes of the order of 10/15 minutes, give it time.
We can follow the installation process in the console: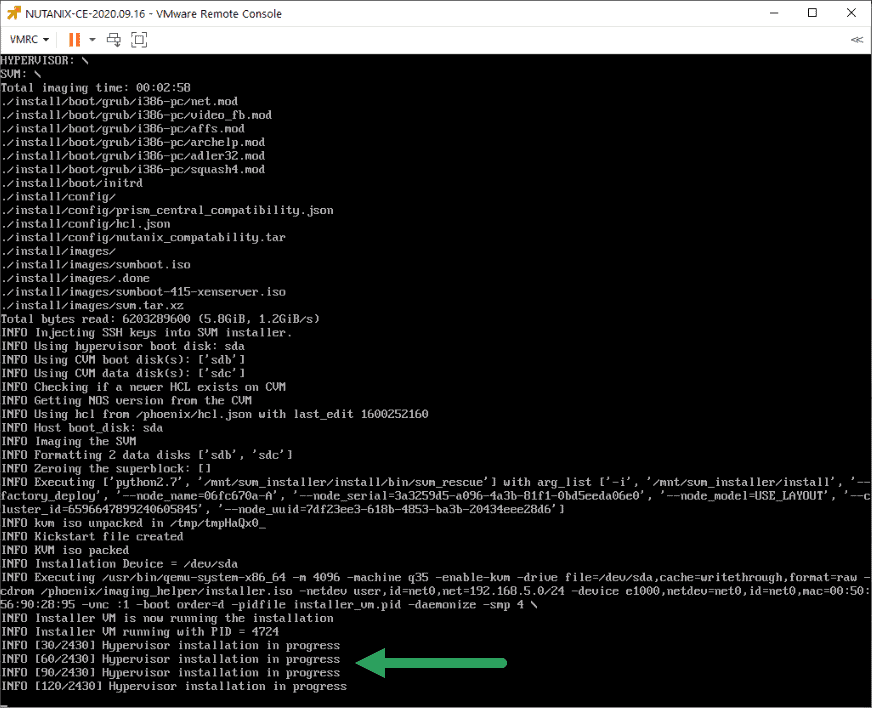
After a few minutes, we will have our Nutanix Community Edition installed: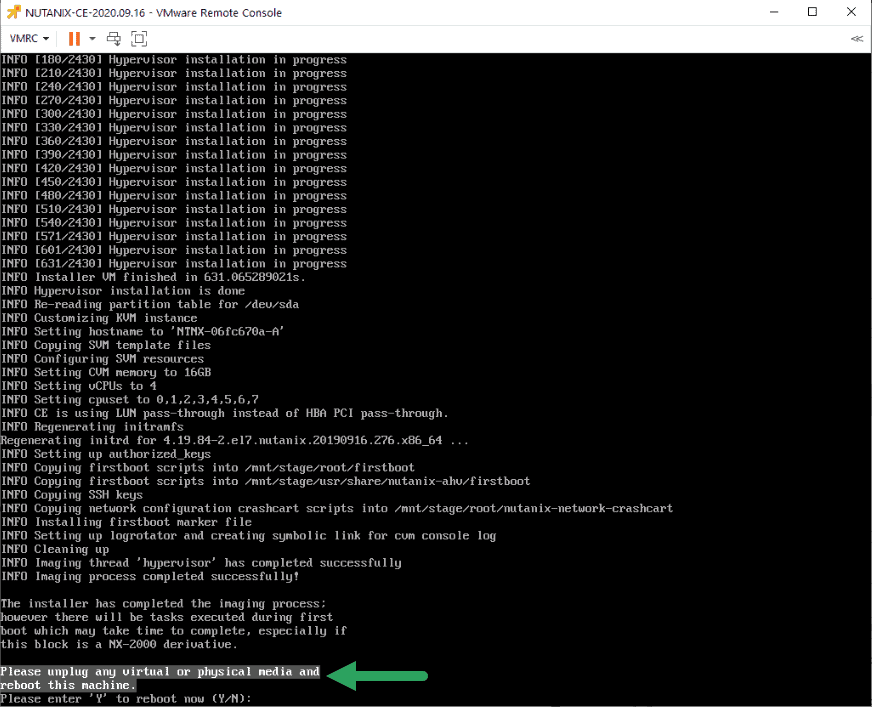
Nutanix Community Edition 5.18 configuration
Once we make the restart of the VM, we will see the typical splash of Nutanix, with the build number: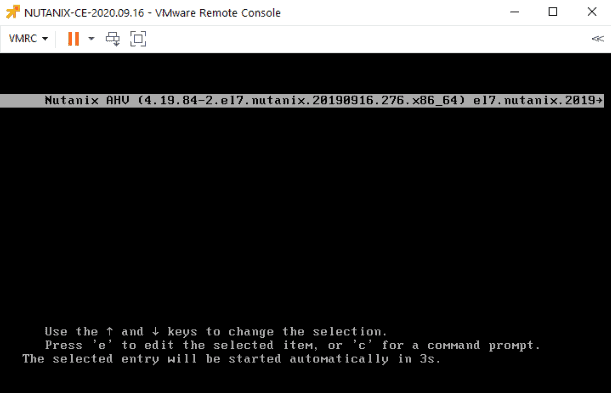
Remember that we have two IPs, the Acropolis one and the CVM one. Once we have pinged the CVM, we must login through SSH and create the cluster with the services. In my case, it is all single-node, but the idea is to create a cluster of more nodes in the following posts.
- CVM Username: nutanix / Acropolis Username: root
- Password: nutanix/4u
If we have selected a single-node in the previous configuration, this step is not necessary, after about five minutes it creates the cluster automatically. Create the cluster with the following command if you have not selected single-node, where the IP 192.168.1.163 is the IP you have selected for your CVM: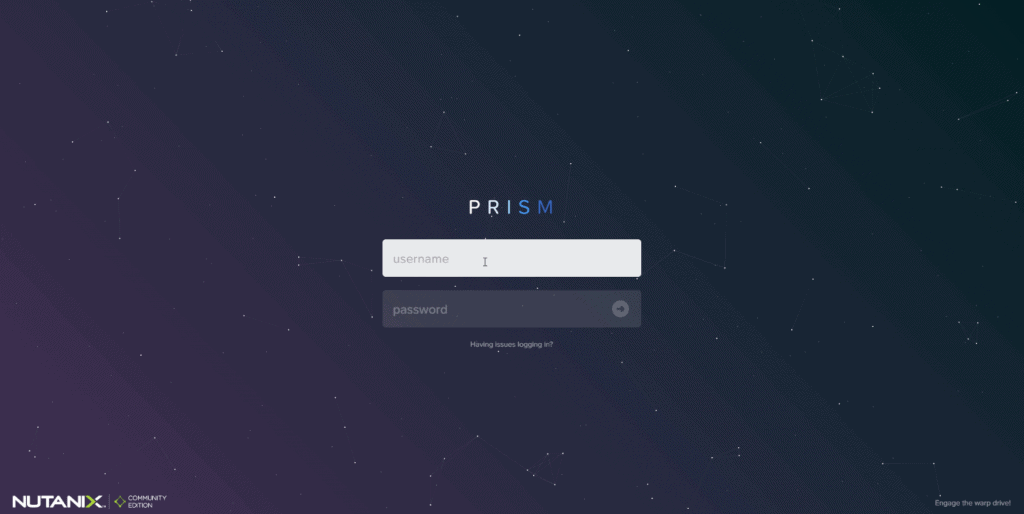 We will change the default user and password:
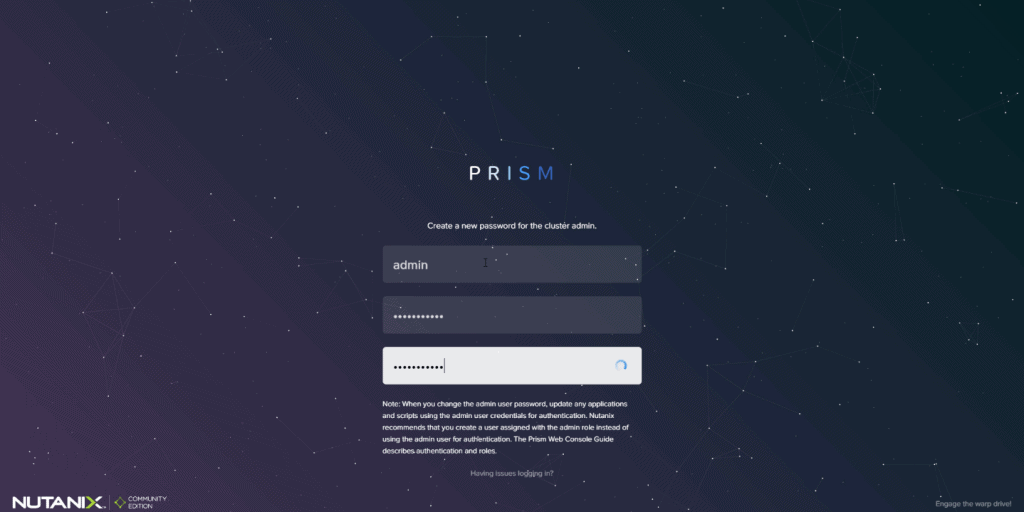
We will also need an official account in the Nutanix community to log in: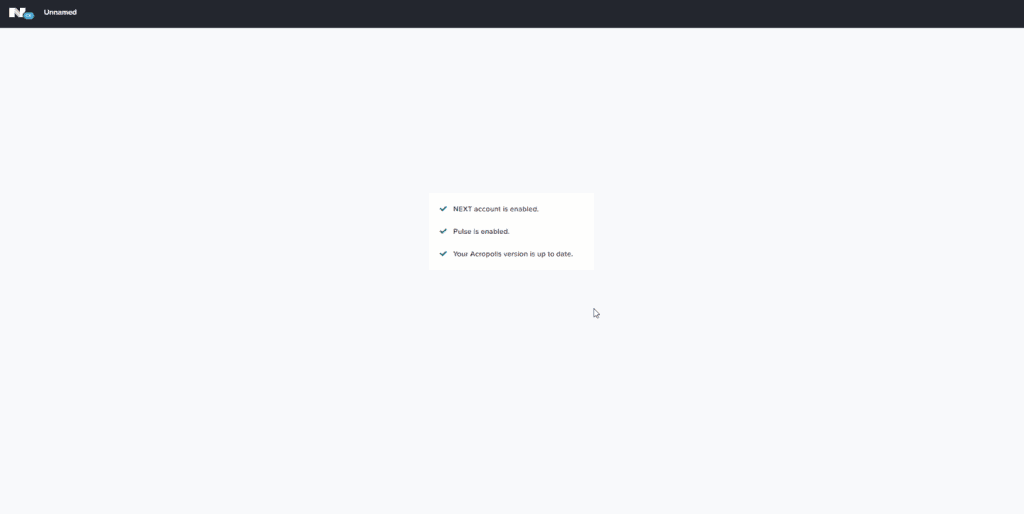
Finally and for curiosity, I have created a Linux VM to see if I had to do something in the BIOS, etc. But luckily, this is the first time that Nutanix gives us an image in which we don’t have to configure absolutely anything: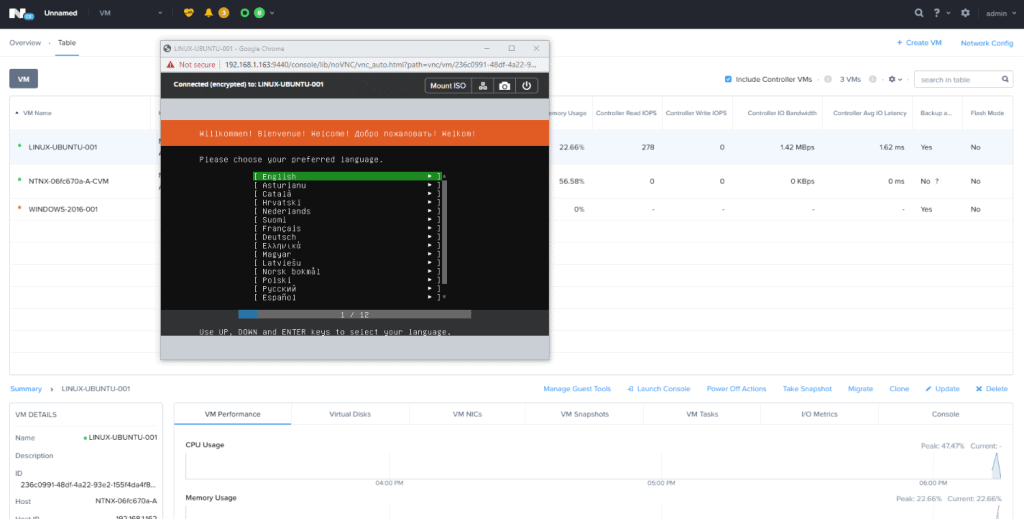
That’s it friends, a great Nutanix release, and all in luxury.

after installation, I cannot ping to CVM from my pc !! any solution please.
But I can ping to AHV.
Maybe it didn’t auto start, try:
virsh list --allYou will see something like:
1 NTNX-7797adcf-A-CVM stopped2 2ed53ab2-b7b1-42e1-878b-35134181399f stopped
3 8193b79e-37a5-4be6-9dc6-4dd7c4115f5d stopped
Then you try, replacing your CVM ID, of course:
virsh start NTNX-7797adcf-A-CVMGood luck
I’m able to ping CVM from AHV instance but not from my laptop. the CVM is in running state
Hello Pablo,
Are you on VMware, etc right? Please review that the virtual switch has promiscuous mode enabled 🙂
Best regards
Hey Jorge,
Thanks for the prompt reply. Yes, it’s on VMware and the assigned port-group for the AHV VM accepts promiscuous mode. :/
I’m able to ssh AHV from my laptop but the CVM is not reachable. It’s only reachable trought AHV
Ping from laptop:
C:\Users\Administrator>ping 192.168.110.215
Pinging 192.168.110.215 with 32 bytes of data:
Reply from 192.168.110.78: Destination host unreachable.
Reply from 192.168.110.78: Destination host unreachable.
Reply from 192.168.110.78: Destination host unreachable.
Reply from 192.168.110.78: Destination host unreachable.
Ping from AHV:
[root@NTNX-1122c898-A ~]# ssh [email protected]
FIPS mode initialized
Nutanix Controller VM
[email protected]‘s password:
Last login: Wed Jun 2 09:52:01 2021 from 192.168.110.216
BTW: the AHV or CVM GUI is not reachable but the CVM is UP
nutanix@NTNX-1122c898-A-CVM:192.168.110.215:~$ cs | grep -v UP
The state of the cluster: start
Lockdown mode: Disabled
CVM: 192.168.110.215 Up, ZeusLeader
The CVM should have a lot of other services running, can you run a cluster status, and check?
ncc health_checks run_allThank you Jorge.
Seems the NTP port is not working. My NTP (synology) service is running on 123 port, but CVM uses port 53
FAIL: DNS Server 192.168.110.247 is not reachable.
DNS Server 192.168.110.247 is blocked on port 53.
DNS Server 192.168.110.247 response time untraceable.
Unable to resolve 127.0.0.1 on DNS Server configured on host 192.168.110.216: 192.168.110.247 from CVM, DNS Server may not be running.DNS Server 192.168.110.247 is blocked on port 53.
DNS Server 192.168.110.247 response time untraceable.
Node 192.168.110.215:
FAIL: This CVM is the NTP leader but it is not syncing time with any external NTP server. NTP configuration on CVM is not yet updated with the NTP servers configured in the cluster. The NTP configuration on the CVM will not be updated if the cluster time is in the future relative to the NTP servers.
ERR : node (service_vm_id: 2) : NTP synchronized to server which is neither in the cluster nor in the list of allowed NTP servers
Could be the NTP causing the GUI is not accesible and/or the CVM reachable via https?
Thank you again
Hello,
All the services must be running, and CVM should be able to see the DNS server, etc. It seems a networking issue somewhere, not the Nutanix itself. I have a DNS on the same virtual network, so all worked for me. Where is your DNS/NTP?
Hi Jorge,
DNS+NTP (Synology), CVM and AHV run in the same subnet (192.168.110.x/24).
Hello, the same subnet yes, but not the same logical Network as CVM and AHV is on the virtual network, on a virtual switch, and the DNS+NTP is on a Synology, outside that virtual realm.
Have you tried the next.nutanix.com on the Community section, they usually helped me there in the past.
Best regards
Thanks Jorge.
Problem solved. The gap was NSX-T related. As mentioned, the nested env is on VMware (VCF). After checking the segment fw polices I noticed there was a gap.
After changing the rule, it worked.
Thank you so much for your support and time!!
Awesome, Pablo, truly blessed to see all working now. Have a great day!
Thanks for this. I’ve tried numerous times. Got close a few times, but no cigar. Now following your instructions, IT WORKED! Thx!
Amazing to hear Steve! This is what I am here for, cheers!
Tx for putting this together – setup went smooth…mostly. I am having an odd issue similar to Pablo’s . I can ssh to the hypervisor, but not the CVM (same subnet) from my desktop. From the AHV console I can ssh to the CVM via the internal network – the cluster is up, and networking looks normal, the CVM outside interface thinks it is up. From the CVM I cannot ping anything other than its own IP on the base VLAN. On the VMware host, I enabled ssh client on the firewall and can now ssh to the CVM from the hypervisor by the CVM outside IP – but still cannot hit the CMV from my desktop. It feels like either an AHV issue, or the VMware host blocking something (VMware v7 U3). Curious if you had any thoughts – thank again.
Hello Dominick,
Have you put the virtual switch where that VM is on promiscuous mode?
Best regards
Hi Jorgeuk,
The installation went smooth for a 3 node cluster, but I built it on ESXi 6.7 Build 3. No issues. But a weird problem is happening to me. When I power recycle or shutdown the nodes and power them on, I am unable to login to the Prism GUI of the nodes and getting ‘Server is not reachable’ response. I have waited for several minutes to ensure all the services of the Nuntanix are fully up and operational, they are when I checked, but still I am unable to login to the nodes from GUI. Any suggestions? Appreciate your help and contribution to the community greatly!
Hello,
Yes of course, it is not booting your CVM, it happens on my side, I always need to do the next:
virsh list --all | grepvirsh start CVM_name
Let me know
Thank you Jorgeuk, I have tried rebooting the nodes as well as rebooting the CVM. Also currently all the CVMs in my three node cluster are up but still I am unable to login to the Prism web GUI of the nodes.
Please find the output below:
[root@NTNX-f6586b9f-A ~]# virsh list –all
Id Name State
—————————————————-
3 NTNX-f6586b9f-A-CVM running
[root@NTNX-f6586b9f-A ~]# virsh start NTNX-f6586b9f-A-CVM
error: Domain is already active
Appreciate your help.
Tried the commands. It says Domain is already active.
[root@NTNX-f6586b9f-A ~]# virsh list –all
Id Name State
—————————————————-
3 NTNX-f6586b9f-A-CVM running
[root@NTNX-f6586b9f-A ~]# virsh start NTNX-f6586b9f-A-CVM
error: Domain is already active
Still unable to login to the GUI and getting the same error message “Server is not reachable”