
Greetings friends, in previous posts about Nutanix I showed you how to launch Nutanix Community Edition on VMware vSphere using the.img image that Nutanix offered us:
- Nutanix: Desplegar 3 Nodos en Cluster de Nutanix Community Edition sobre VMware vSphere en modo Nested
- Nutanix: Desplegar Nutanix Community Edition sobre VMware vSphere en modo Nested
- Nutanix: Instalar Nutanix Community Edition en VMware Fusion y primer contacto con Acropolis
These posts and videos, with hundreds of visits were fine, but now and in real great news, Nutanix has announced its Nutanix Community Edition 5.6, which in addition to all the news that includes AOS 5.6, give us a simple ISO image so that we can deploy Nutanix Community Edition much more easily, when you finish, you can view a PRISM like this:

Downloading the Nutanix Community Edition
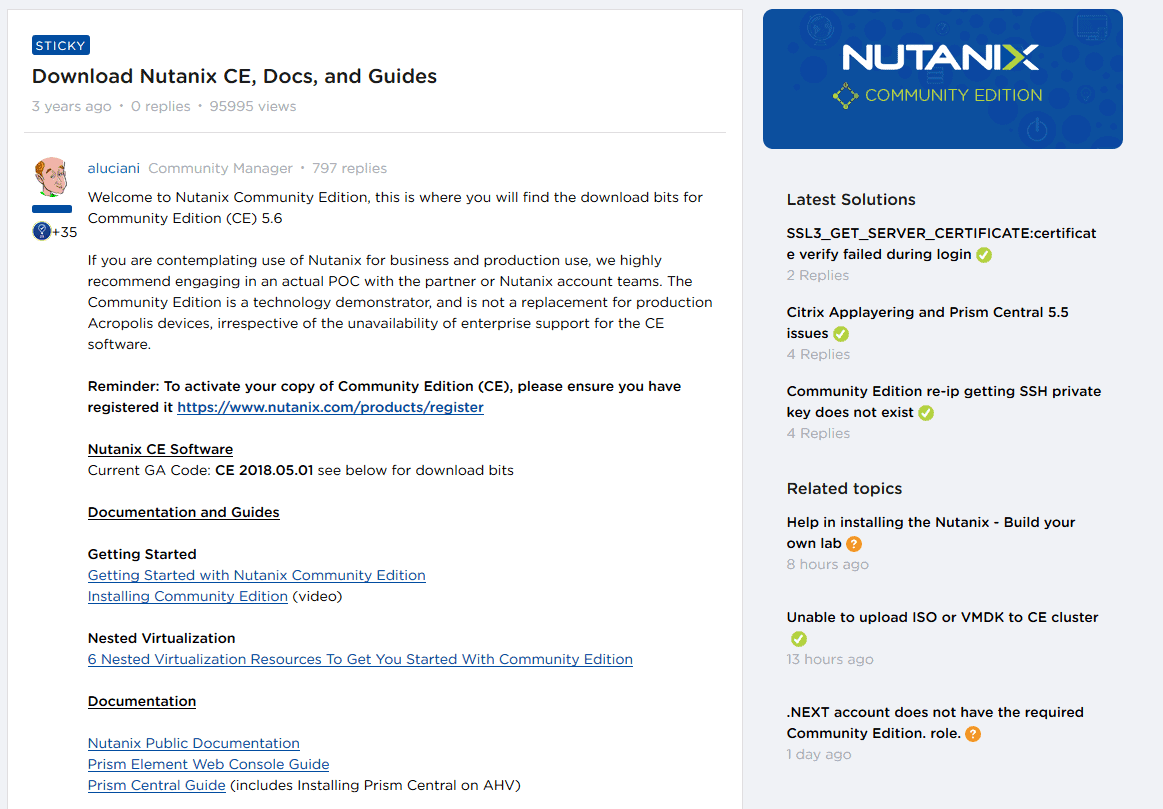
You will need to login at next.nutanix.com and go to the Nutanix Community section and then to Download Software.
 We will then see a Post with the last image, as well as a Changelog with the improvements and functionalities:
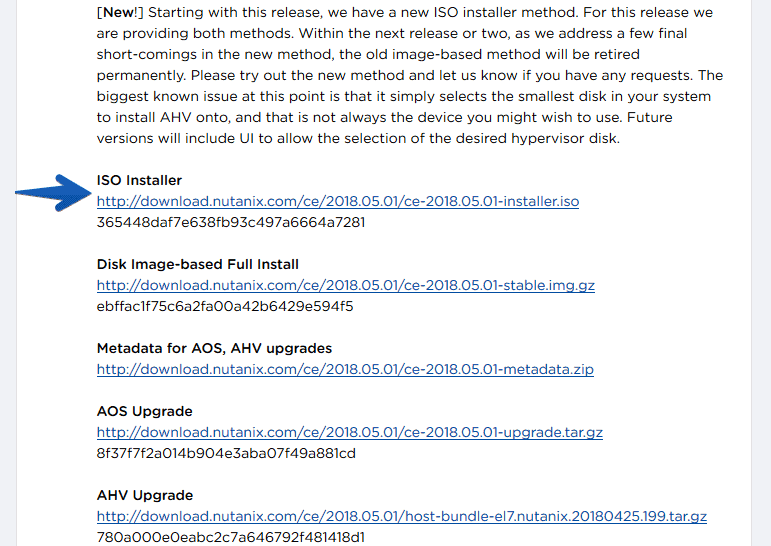
 By clicking on Download, we will save it in our computer, in this blog we will use the new ISO version:

Deploy Nutanix Community Edition 5.6 (ISO) over vSphere 6.5 on video
As I know that many of you like videos, with comments, notes and listening to another human being, I leave you here step by step on how to deploy the new Nutanix CE 5.6 (ISO) on vSphere 6.5:
Deploy Nutanix Community Edition 5.6 (ISO) over vSphere 6.5 in images
Once we have the ISO image already downloaded, we will need to start creating the VM in our vSphere environment, but before that, let me remind you of the system requirements:
System requirements
Remember that we can launch a Single-Node VM, as in this tutorial, or a cluster of 3 and 4 servers, for all of them we will have to have:
- Intel CPUs CPUs, 4 cores minimum, with VT-x support enabled.
- Memory 16GB minimum.
- Storage Subsystem RAID 0 (LSI HBAs) or AHCI storage sub-systems.
- Hot Tier (SSD) One SSD for each minimum server to install the Acropolis Hypervisor, ≥ 16GB.
- Hot Tier (SSD) One SSD for each minimum server, ≥ 200GB per server.
- Cold Tier (HDD) One SSD for each minimum server, ≥ 500GB per server.
We can always assign more disks, but these requirements are the minimum so that you don’t get an error when installing. We can also use VMXNET3 for the network adapter without any problem.
The first thing to do is to log in to your vSphere Client HTML5, or ESXi and create a new VM:
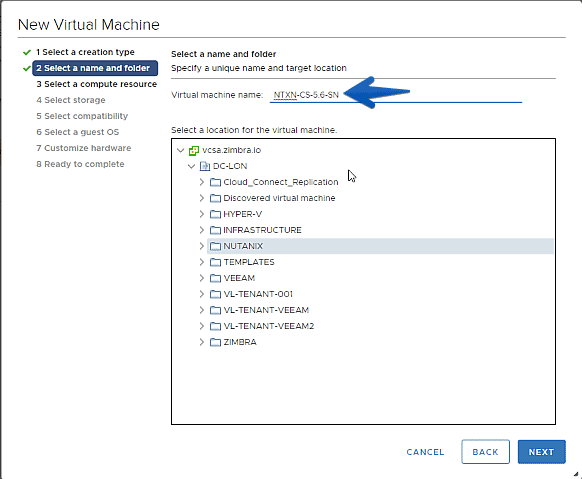
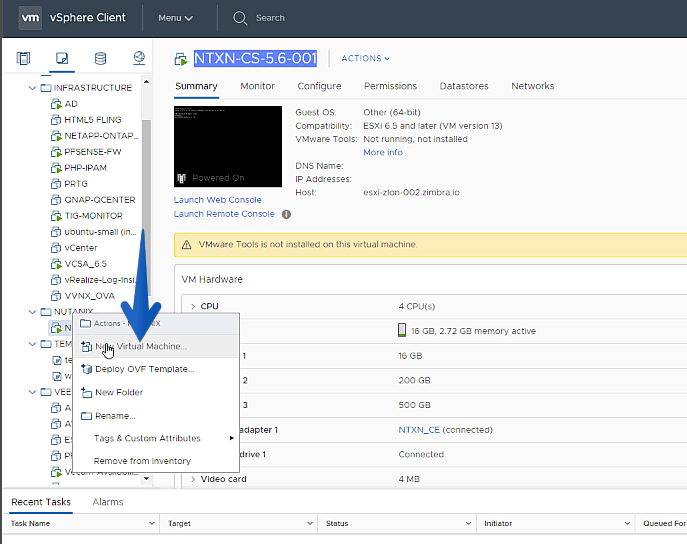 We will select a name for the VM, in my case NTXN-CE-SN
 The next step will be to select the Cluster or Host where we want this Nutanix nested to run:
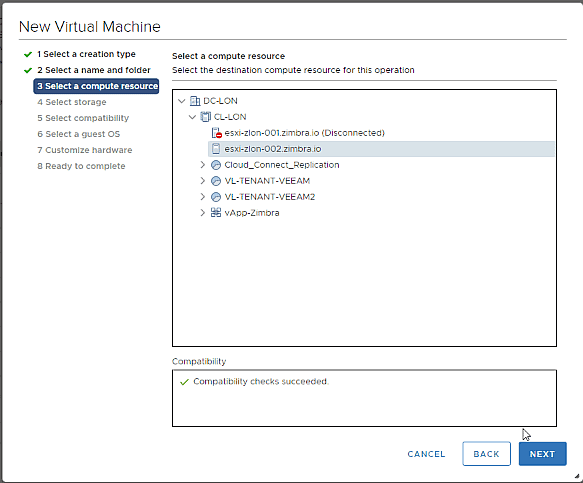 Now we will select the Storage where we want to store the VM, we will select an SSD, but then we will give it a more personalized touch:
 We will select that we want support for vSphere 6.5 and higher:
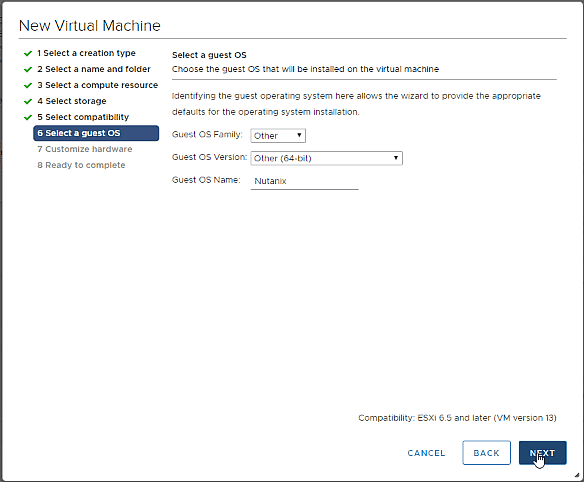
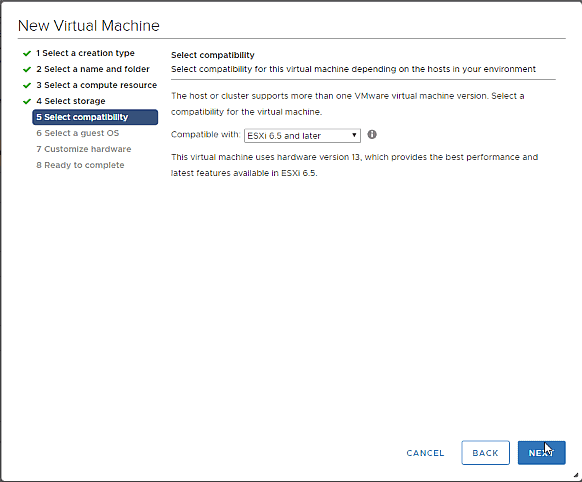 We will select for the OS that is type Other, and then Other 64bit, and in the name we will put Nutanix, but the latter is optional:
 It’s time to give it a personal touch so that everything works, from top to bottom, let’s get started:
We will have to have 4vCPU or more, and very importantly, check the Hardware virtualization option: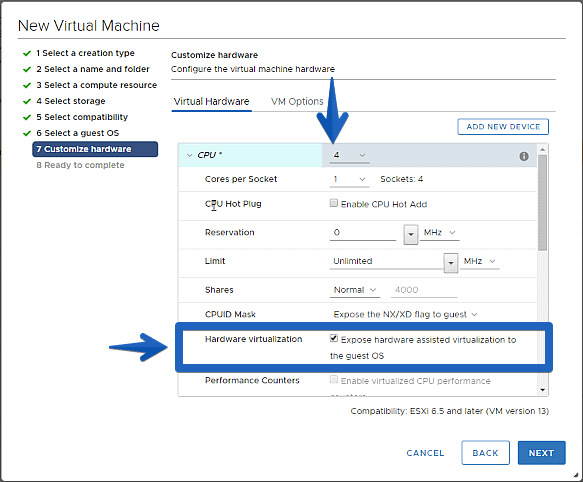 For the RAM, 16GB is the minimum, but in my case I have selected a little more as it is a Single-Node:
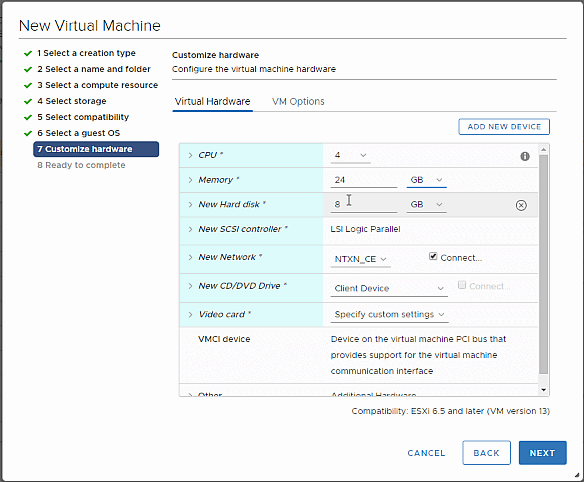 In the Disk Controller we will not touch it, but we will give it to the main disk, where Acropolis 16GB of space will be installed, remember that it is on SSD, besides we will add another SSD of 200GB and a SATA disk of 500GB:
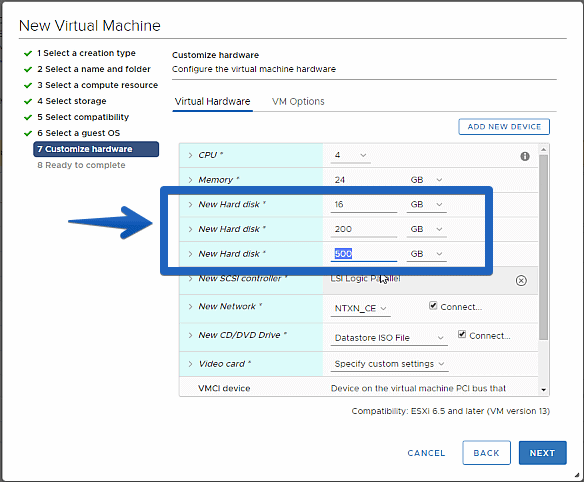 For ISO, we will select the new ISO from Nutanix Community Edition 5.6 and map it:
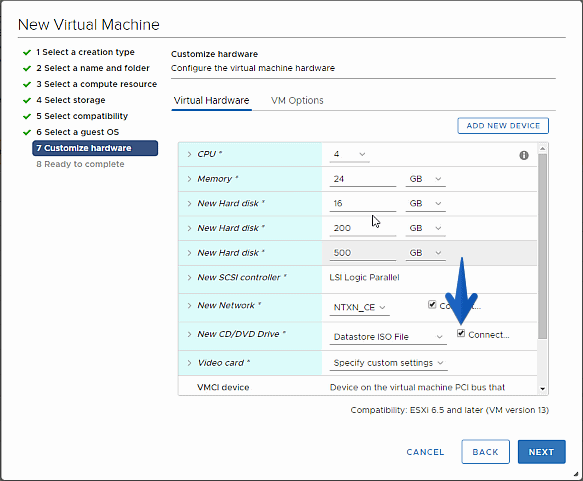 At the Networking level, I recommend VMXNET3 whenever possible, and at Nutanix Community Edition it is possible, so there is no excuse:
 Once we have everything to our liking, we can look at the summary to double-check it before moving on to the next step:
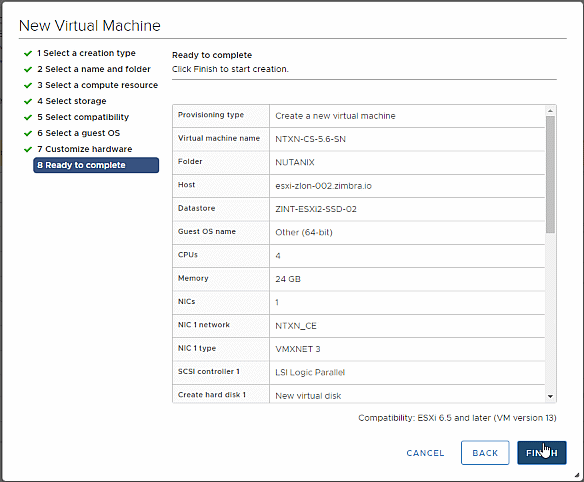 Installing Nutanix Community Edition 5.6
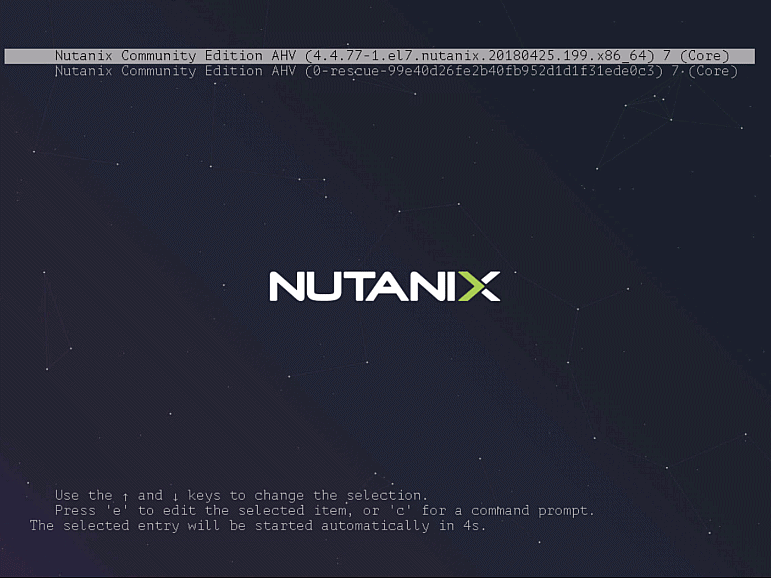
When booting the VM, we can see the new boot menu that we had not seen before, with four options, Installer, Rescue Shell, Rescue Shell with Networking and CE Installer, by default is CE Installer so we’ll leave it that way: After a few seconds, the typical Nutanix configuration screen will appear, where we will have to introduce two network configurations, one for the Hypervisor Acropolis itself and the other for the virtual CVM machine, we will mark it as a Single-Node, we will add a DNS server, we will read the EULA and we will mark that we have read it:
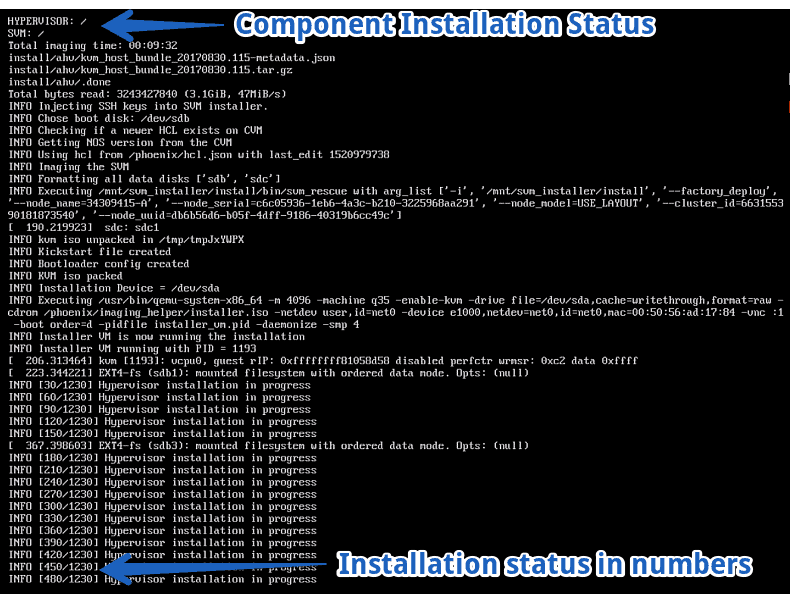
Note: If we check the single-node option, when it starts for the first time the CVM will create the cluster automatically.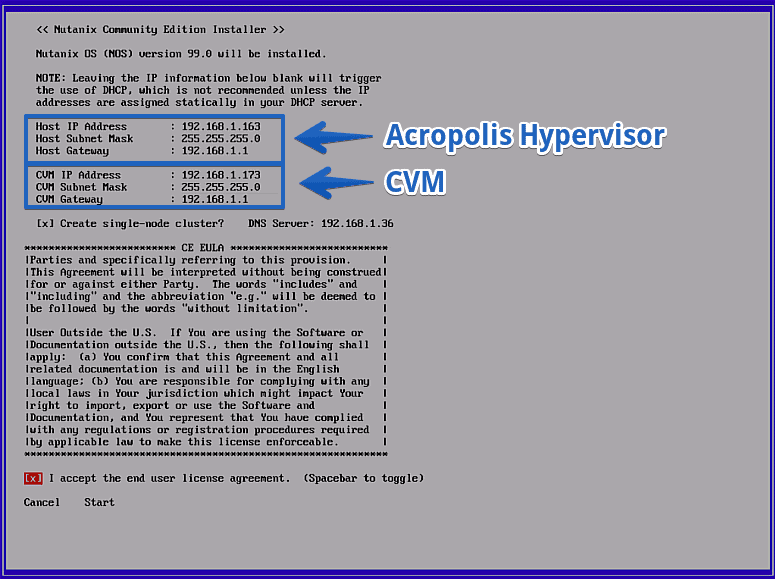 We can follow the installation process in two ways, seeing if the CVM and Hypervisor are displayed correctly, above, and seeing the remaining points to finish:
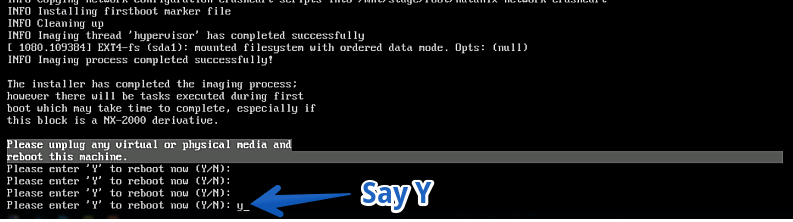
 After a few minutes, in my case 09.32 to be exact, we will have our Nutanix Community Edition installed:
 Configuring Nutanix Community Edition 5.6
Once we restart the VM, we’ll see the typical Nutanix splash, with the build number:
 Remember that we have two PIs, that of Acropolis and that of CVM. Once we have pinged the CVM, we’ll have to log in using SSH, and create the cluster with the services, in my case it’s all Single-Node, but the idea is to create a cluster of more nodes in subsequent posts.
- Username CVM: nutanix / Username Acropolis: root
- Password: nutanix/4u
If you have selected single-node in the previous configuration, this step is not necessary, after about five minutes it creates the cluster automatically. Creation of the Cluster with the following command if we had not selected single-node, where the IP 192.168.1.41 is the IP you have selected for your CVM:
cluster -s 192.168.1.41 create
This will start creating the Cluster and will leave us more or less the next output and will end after 2 minutes or so:
nutanix@NTNX-34309415-A-CVM:192.168.1.173:~$ cluster -s 192.168.1.173 create
2018-06-17 14:51:11 INFO cluster:2066 Executing action create on SVMs 192.168.1.173
Atleast 3 nodes are required for cluster creation!. 1 IPs provided. Do you want to proceed? (Y/[N]): y
2018-06-17 14:51:19 WARNING cluster:742 At least 3 nodes required to support redundancy factor 2
2018-06-17 14:51:23 INFO cluster:790 Discovered node:
ip: 192.168.1.173
rackable_unit_serial: 34309415
node_position: A
node_uuid: 1179d5a5-2dfe-4f0f-9a45-a80b87a1a072

2018-06-17 14:51:23 INFO cluster:829 Configuring Zeus mapping ({u'192.168.1.173': 1}) on SVM node 192.168.1.173
2018-06-17 14:51:24 INFO cluster:847 Creating cluster with SVMs: 192.168.1.173
2018-06-17 14:51:24 INFO cluster:851 Setting redundancy factor to 1 for single node cluster
2018-06-17 14:51:27 INFO cluster:892 Waiting for services to start
Waiting on 192.168.1.42 (Up, ZeusLeader) to start:  SSLTerminator SecureFileSync Medusa DynamicRingChanger Pithos Stargate InsightsDB InsightsDataTransfer Ergon Uhura Cerebro Chronos Curator Prism CIM AlertManager Arithmos Acropolis Snmp SysStatCollector Tunnel ClusterHealth Janus NutanixGuestTools MinervaCVM Apps

Waiting on 192.168.1.173 (Up, ZeusLeader) to start:
The state of the cluster: start
Lockdown mode: Disabled

        CVM: 192.168.1.173 Up, ZeusLeader
                                Zeus   UP       [2231, 2262, 2263, 2267, 2307, 2325]
                           Scavenger   UP       [7088, 7120, 7121, 7122]
                       SSLTerminator   UP       [8426, 8493, 8494, 25979]
                      SecureFileSync   UP       [8432, 8491, 8492, 8496]
                              Medusa   UP       [8697, 8747, 8748, 8770, 9188]
                  DynamicRingChanger   UP       [15034, 15129, 15130, 15193]
                              Pithos   UP       [15038, 15115, 15117, 15140]
                              Mantle   UP       [15043, 15134, 15135, 15175]
                                Hera   UP       [15126, 15220, 15221, 17148]
                            Stargate   UP       [16153, 16200, 16201, 16309, 16310]
                          InsightsDB   UP       [16156, 16287, 16288, 16509]
                InsightsDataTransfer   UP       [16161, 16336, 16337, 16470, 16471, 16472, 16473]
                               Ergon   UP       [16166, 16322, 16323, 16327]
                             Cerebro   UP       [16172, 16439, 16440, 16631]
                             Chronos   UP       [16222, 16480, 16481, 16549]
                             Curator   UP       [16252, 16477, 16478, 16596]
                               Prism   UP       [16522, 16647, 16648, 16771, 17356, 17410]
                                 CIM   UP       [16553, 16722, 16723, 16769]
                        AlertManager   UP       [16579, 16749, 16750, 16843]
                            Arithmos   UP       [16820, 16959, 16960, 17064]
                             Catalog   UP       [16839, 16988, 16989, 16995]
                           Acropolis   UP       [16918, 17037, 17038, 17042]
                               Uhura   UP       [16945, 17054, 17055, 17056]
                                Snmp   UP       [16975, 17115, 17116, 17117]
                    SysStatCollector   UP       [17008, 17118, 17119, 17120]
                              Tunnel   UP       [17161, 17213, 17214]
                               Janus   UP       [17166, 17231, 17232]
                   NutanixGuestTools   UP       [17245, 17321, 17322, 17342]
                          MinervaCVM   UP       [26044, 26118, 26119, 26123, 27335]
                       ClusterConfig   UP       [26056, 26174, 26175, 26180]
                         APLOSEngine   UP       [26073, 26203, 26204, 26208]
                               APLOS   UP       [28108, 28192, 28193, 28197, 28908, 28919]
                               Lazan   UP       [28119, 28250, 28251, 28255, 29229, 29233]
                              Delphi   UP       [28132, 28273, 28274, 28276]
                       ClusterHealth   UP       [28205, 28405, 28406, 28966, 29009, 29010]
2018-06-17 14:52:34 INFO cluster:2177 Success!
The first time we log in to PRISM, we will be prompted to enter our next.nutanix.com data, so the Nutanix Community environment must have Internet access and resolve by DNS, we must add the following command:
ncli cluster add-to-name-servers servers=1.1.1.1.1
First PRISM Login, quick look at Acropolis
Now we can open the IP in a browser and it will redirect us to PRISM over port 9440 in HTTPS.
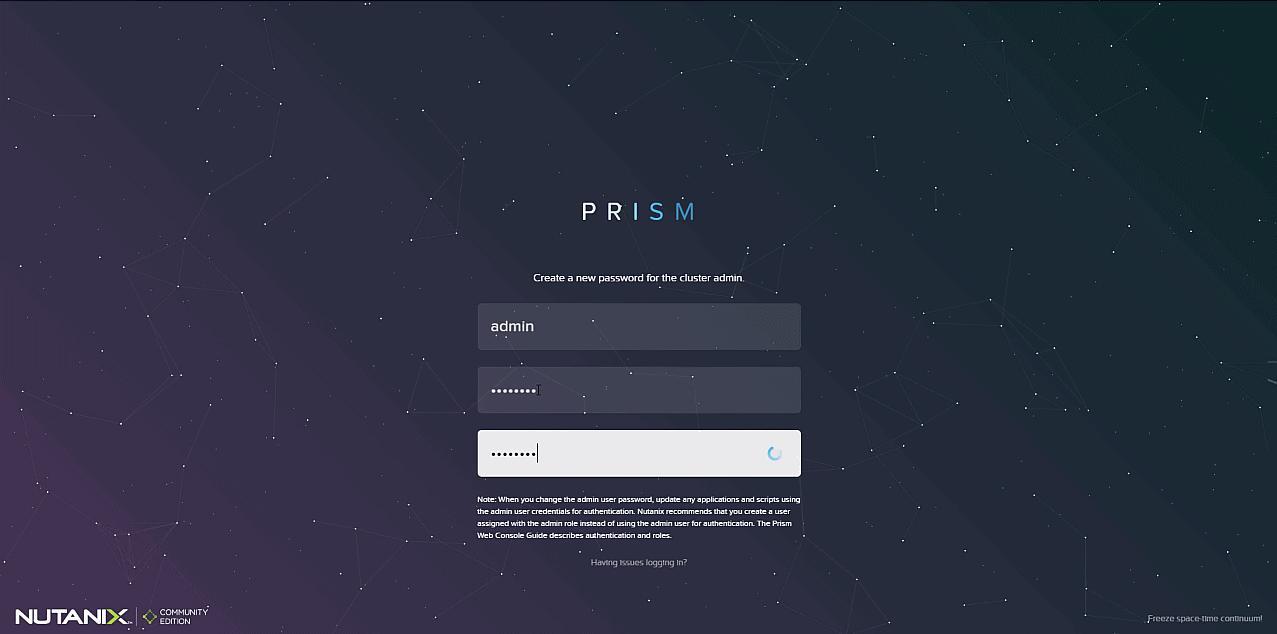
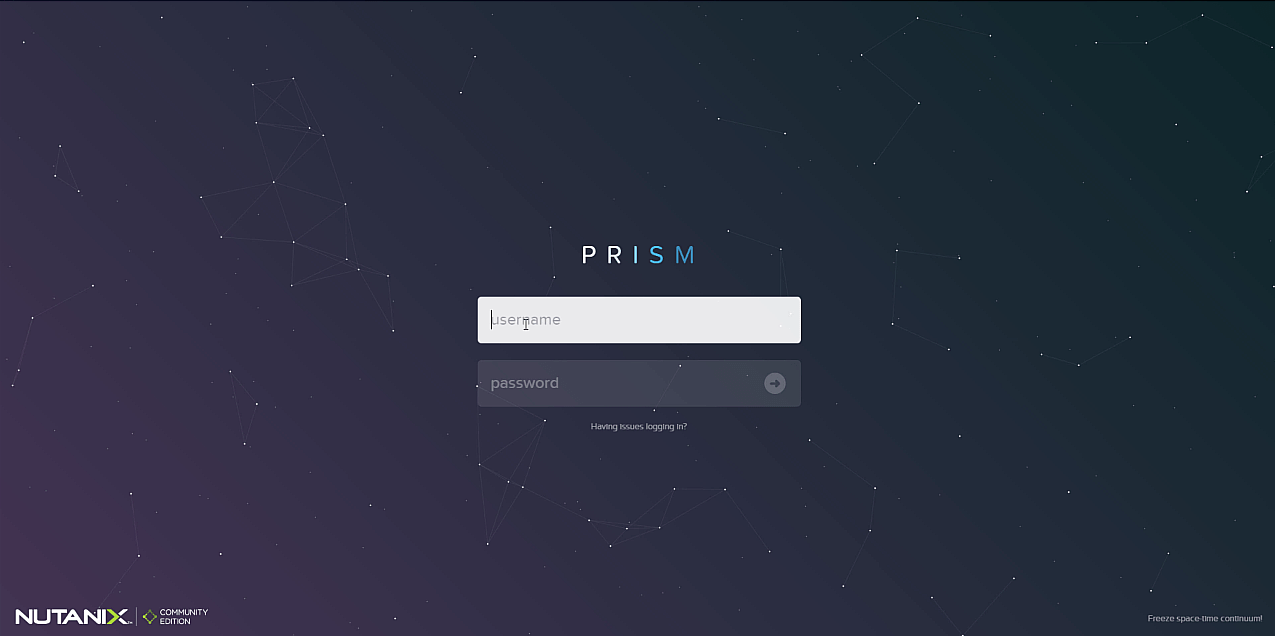 The first step will be to change the default password of the Admin user (admin and password nutanix/4u)
 In this step we will have to introduce our credentials of the NEXT community, the same one with which we downloaded the image of Nutanix Community Edition
 And we’ll be inside Acropolis, the latest version, where we can start to create VM, add other hosts, check all the menus, etc.
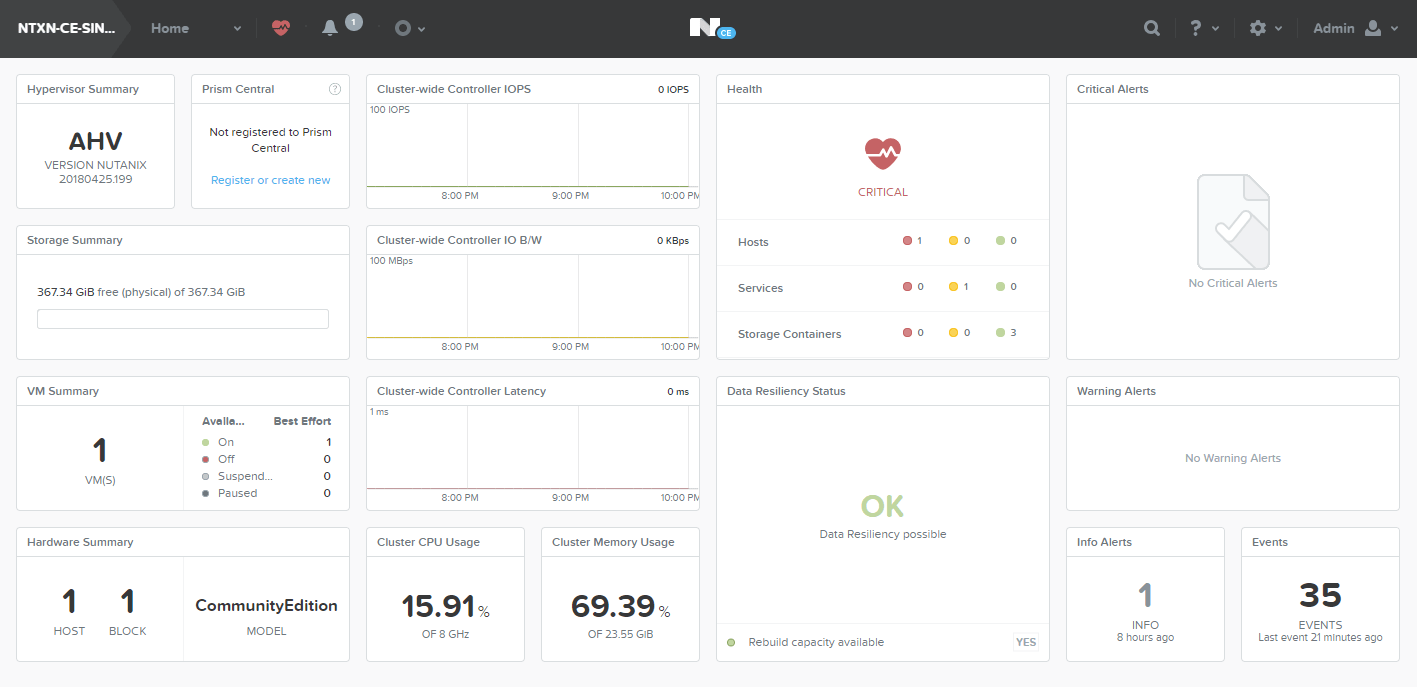
I hope you like it, and don’t miss the following posts about Nutanix Community Edition
[…] by Jorge de la CruzPosted on 18 June, 20183 November, 2020 Read it in English […]