 Greetings friends, we have already seen in the previous entry that Veeam had launched Veeam Backup for Microsoft Azure Free Edition, the solution to protect workloads in Microsoft Azure without the need of agents. Also, and as we all like it, with a free version of up to 10 Instances. Let’s see the step by step to deploy Veeam Backup for Microsoft Azure.
Deploy Veeam Backup for Microsoft Azure Free Edition
Before deploying Veeam Backup for Microsoft Azure Free Edition we will need to have several instances of Azure VM running, security groups created, VPC, etc. I guess we are interested in this solution and I consider all this done.
We will go to the Microsoft Azure Marketplace and if we search “veeam” we will find the product, we will click on Create to continue: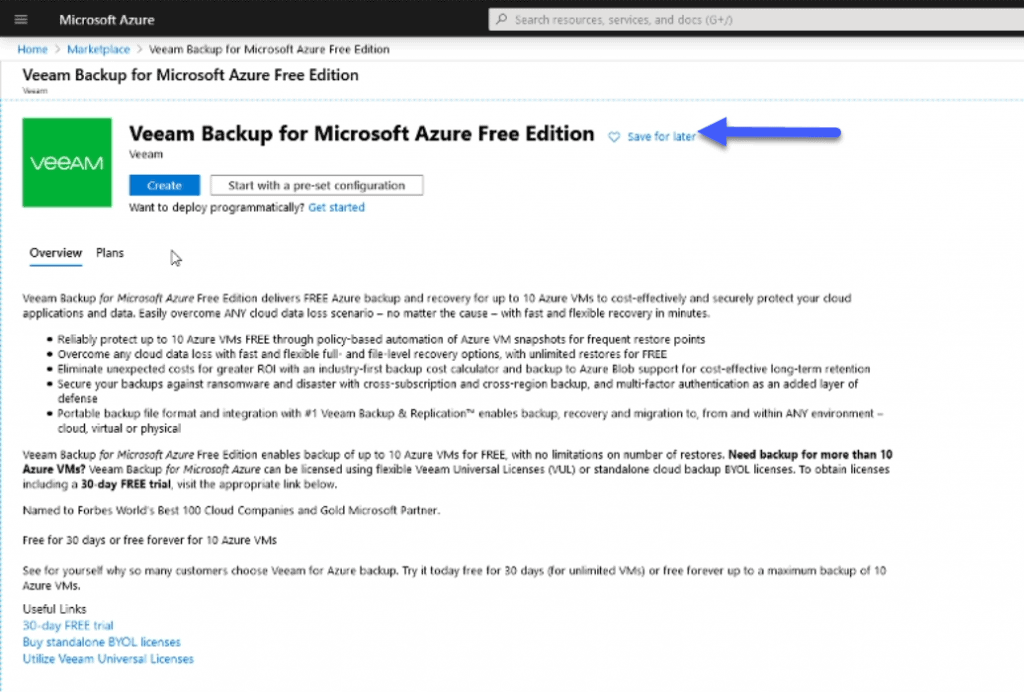
After a few seconds we can see that the deployment is activated and we can continue with the next step, which is to select the subscription we have, size and region where we want to launch it and a user and pass for the appliance: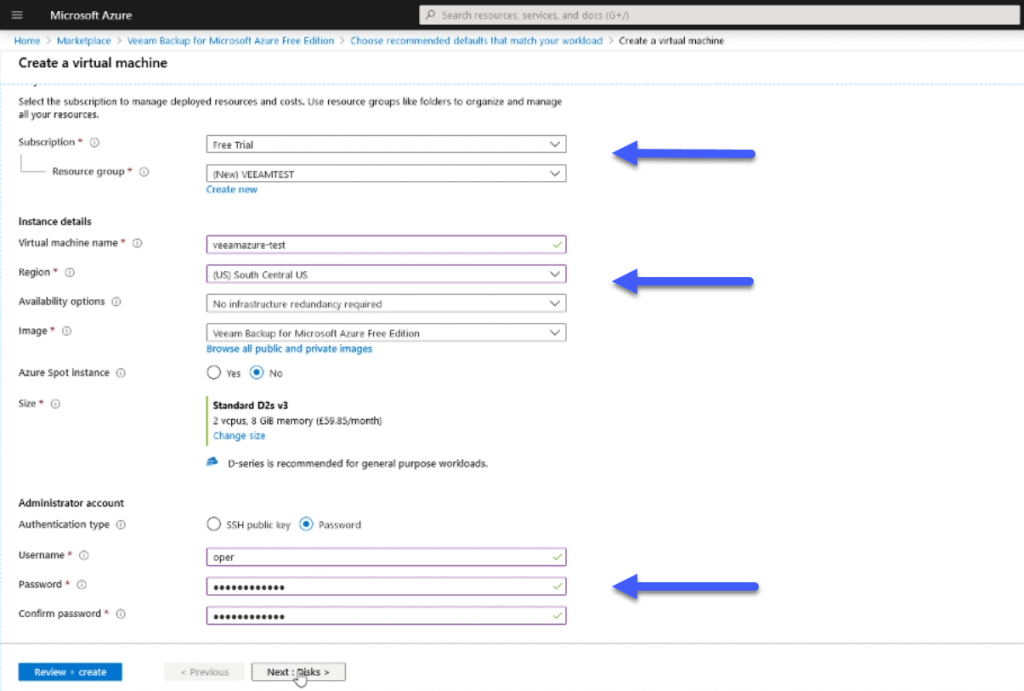
We will also have to introduce the network configuration we want to deploy this solution and the security group: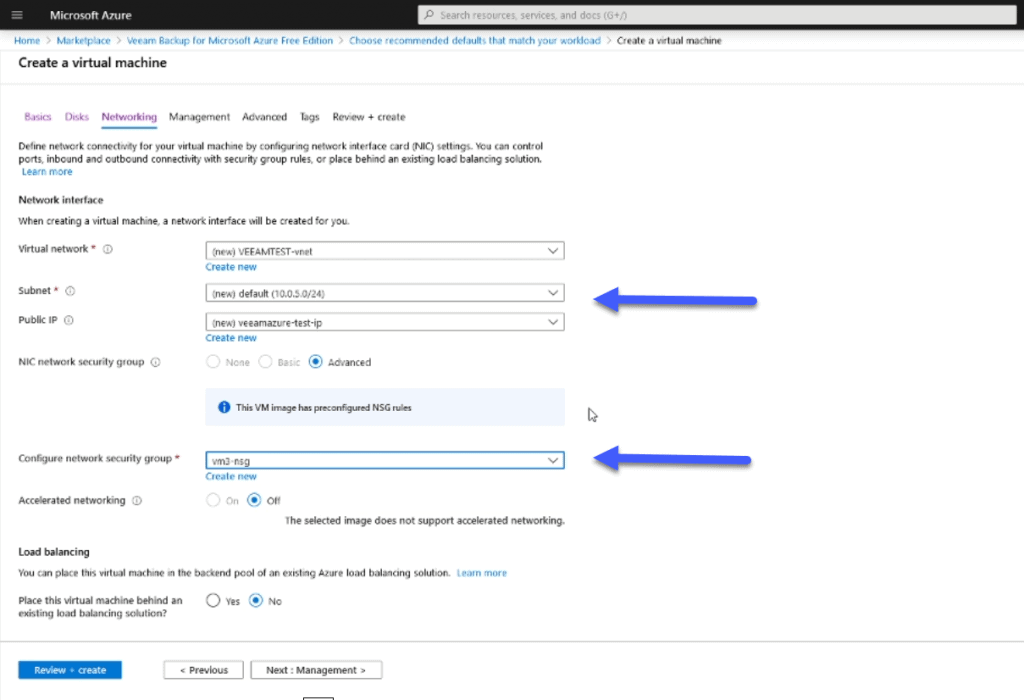
With all this, we can now click on Review + Create, and if everything has gone well we will get a green message at the top, which tells us that everything will be fine and we can start: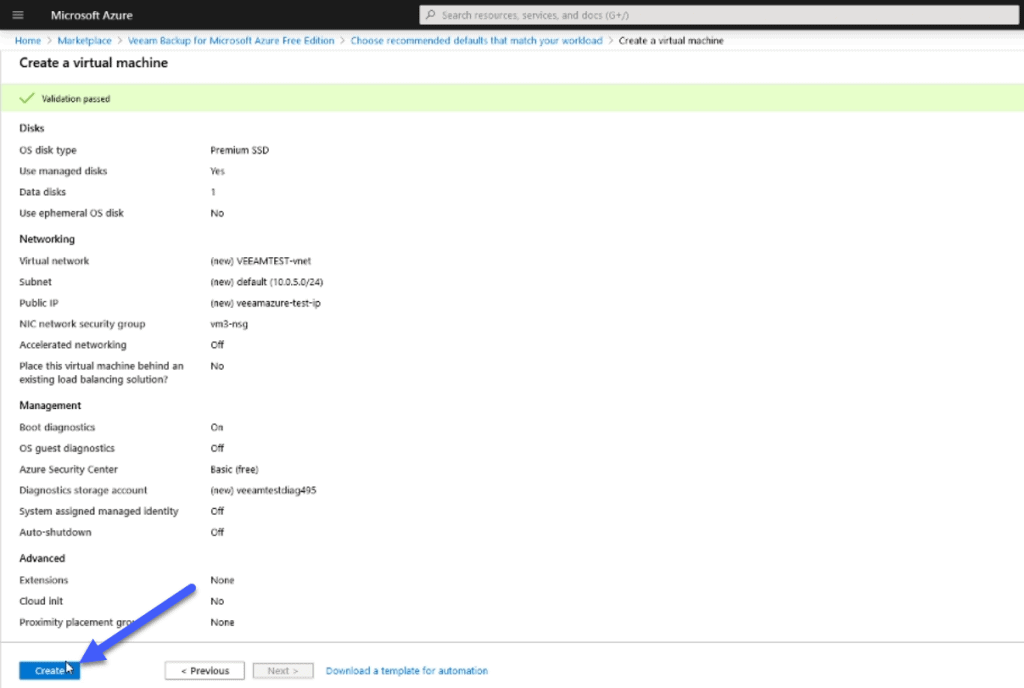
In a few seconds, we will see that the deployment is completed without problems, we will see this message: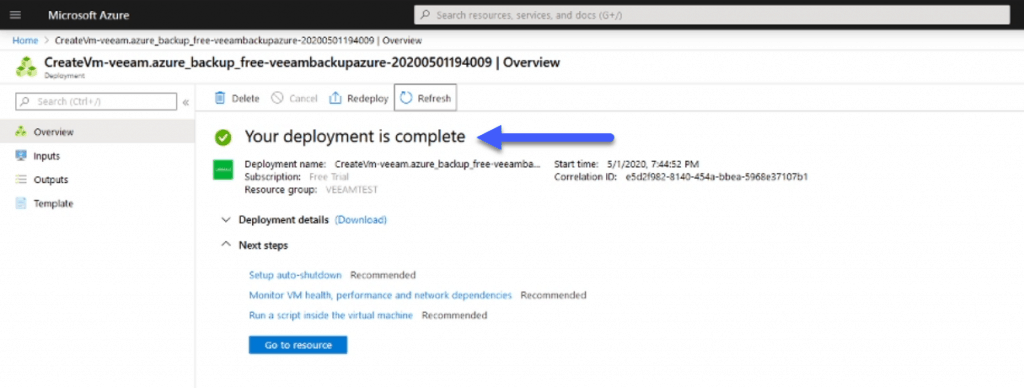
And if we look for the public or private IP, if we have a VPN, we can access this IP directly through https://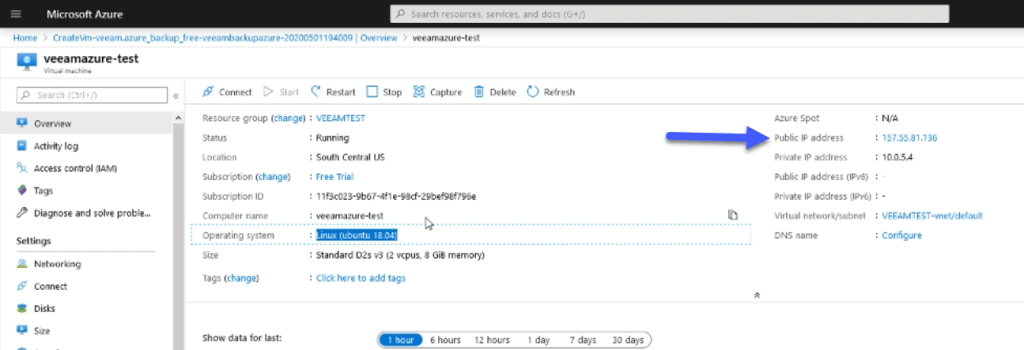
We have everything ready, we can go to the next blog post to see how to configure it step by step.
As Veeam Backup for Azure is a very complete new product, I have prepared a series of blogs about the product, I hope you like them:

Leave a Reply