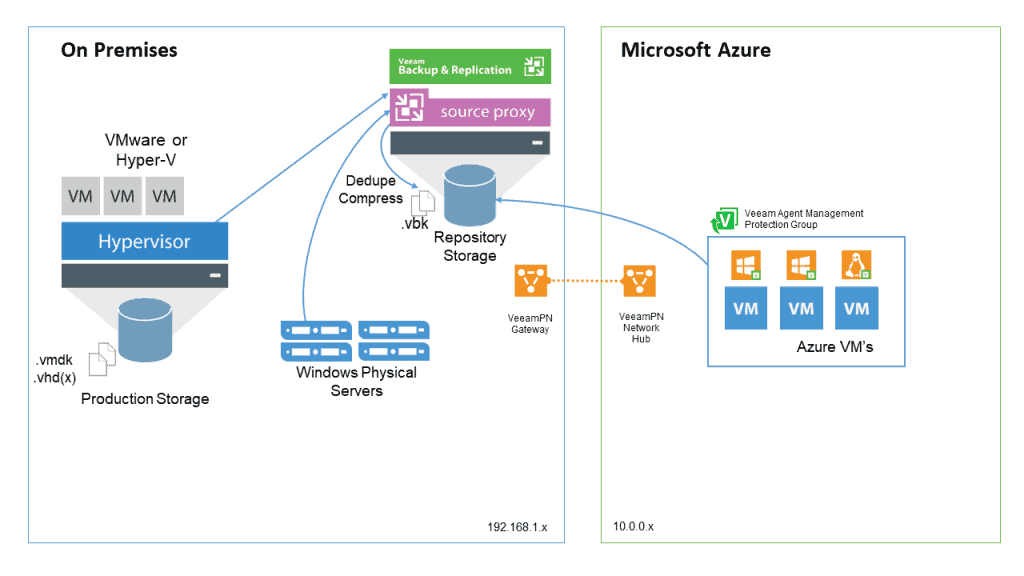
 Greetings friends, I continue with this very interesting series about Veeam and Microsoft Azure, we have already seen practically all the steps: from interconnecting Microsoft Azure with our Datacenter, deploying the VBR in Azure, launching the copy job jobs, and of course restoring Microsoft Azure, today I bring you how to bring those VM in Azure back to our Datacenter, as you can see in this illustration:
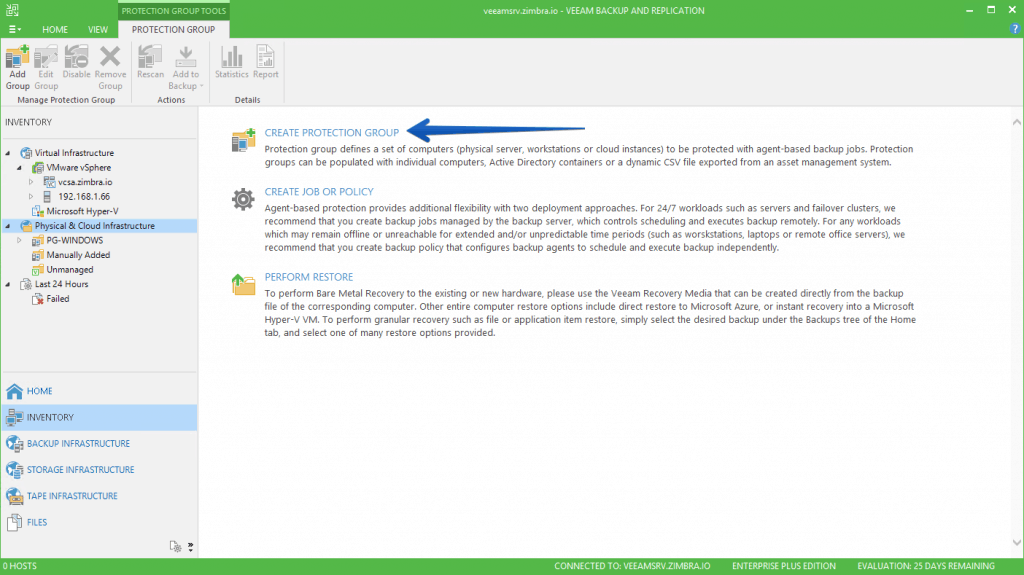
Creating a Protection Group in our Datacenter
Starting Veeam Backup & Replication v9.5 U3 we have this interesting feature available to manage Veeam Agents natively, this allows us to deploy Windows or Linux agents automatically from our Veeam Backup & Replication console, fantastic!
In the Inventory tab, we will go to Physical & Cloud Infrastructure – Create protection group:
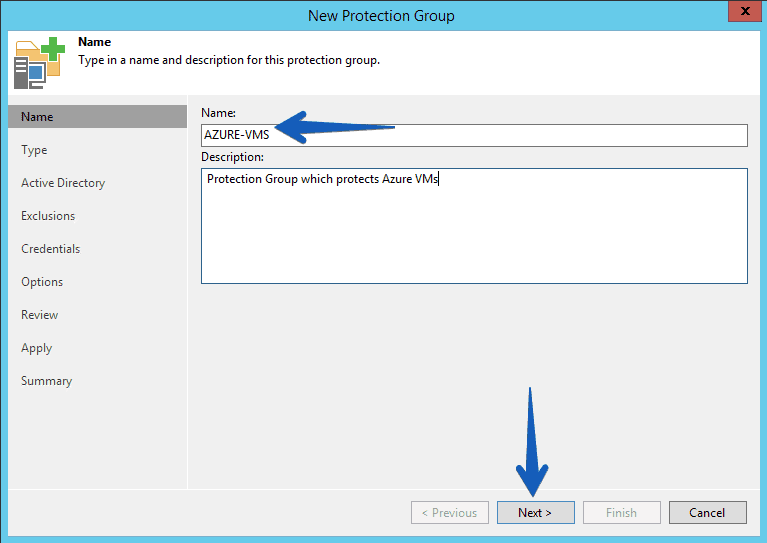
 We’ll give this new group a descriptive name:
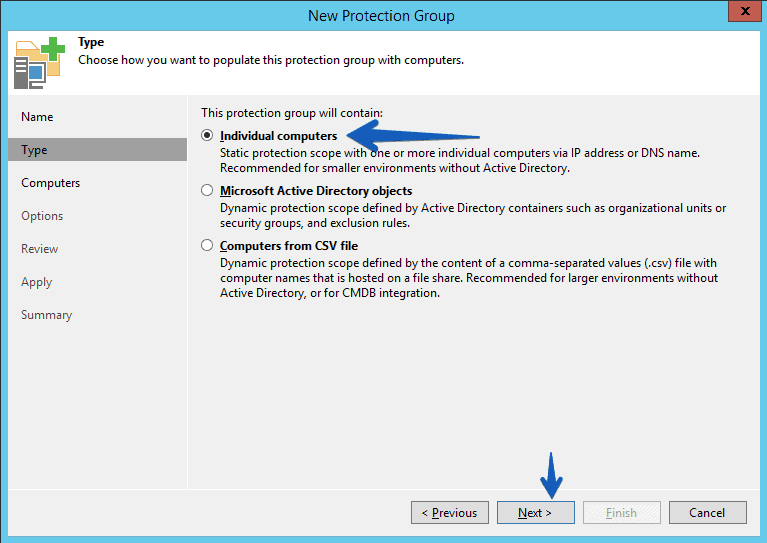
 We’ll tell you that we want to protect Individual computers:
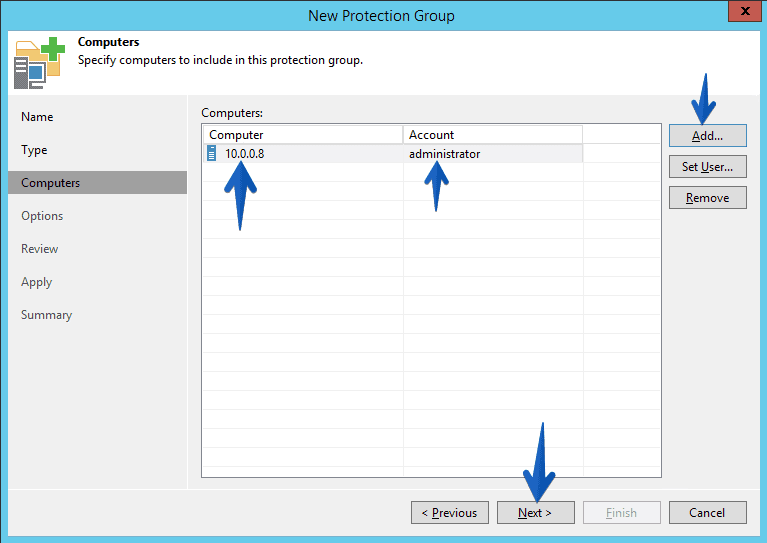
 We’ll add the VM or VMs from Microsoft Azure by their IP, or IP range, in addition to entering the VM credentials, they are usually VMs in Active Directory:
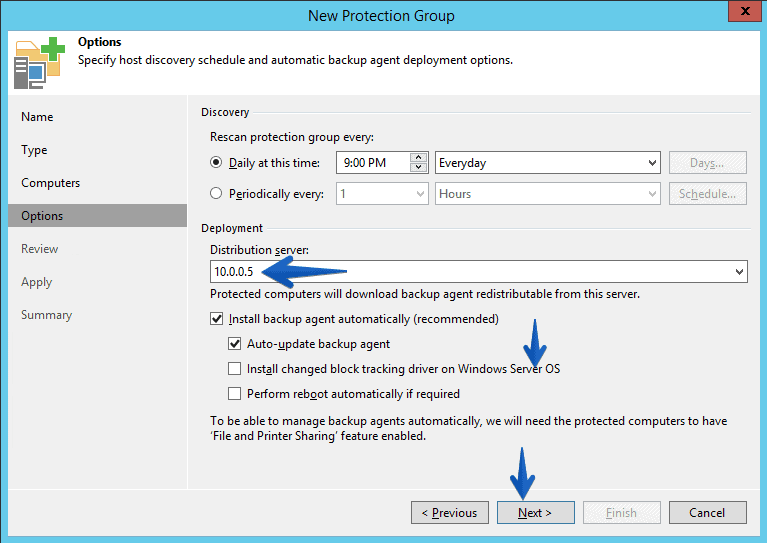
 We’ll introduce a schedule for Veeam to discover new computers in that IP range and auto-install the Veeam Agent for Windows 2.1, we will also select from distribution server the VBR that we already had in Azure to speed up the installation:
 In Review, we will check that everything is correct and press Apply:
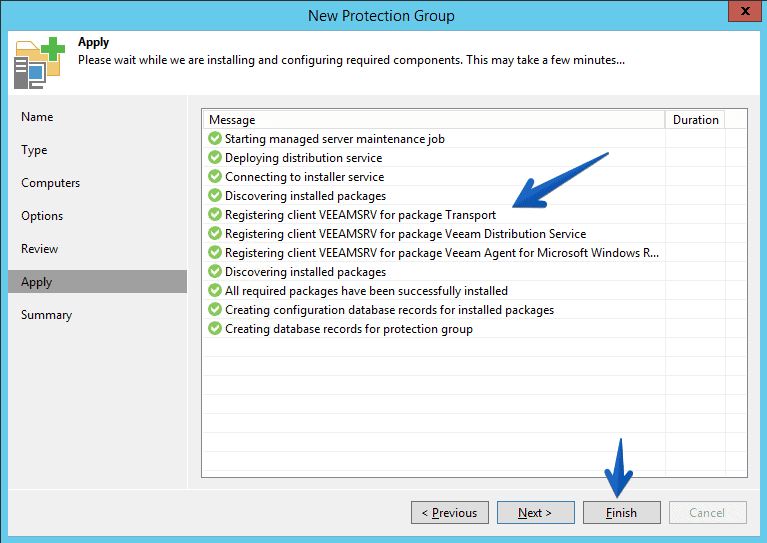
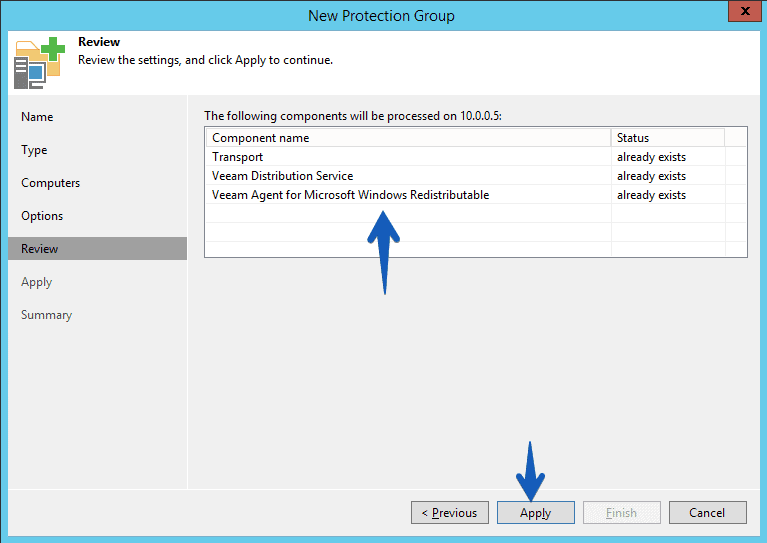 It will begin the process of installing roles and services in the destination VBR, we will click Finish:
 In the summary, we will click Finish:
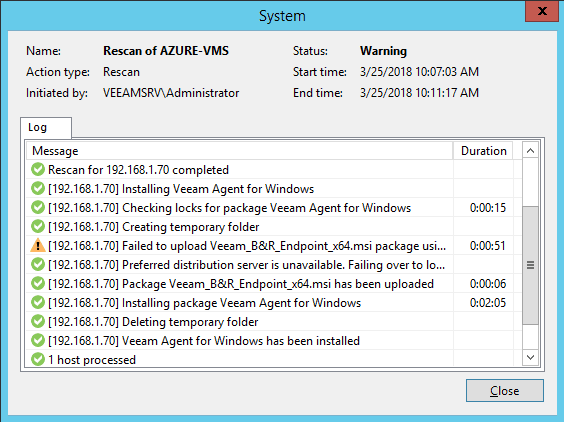
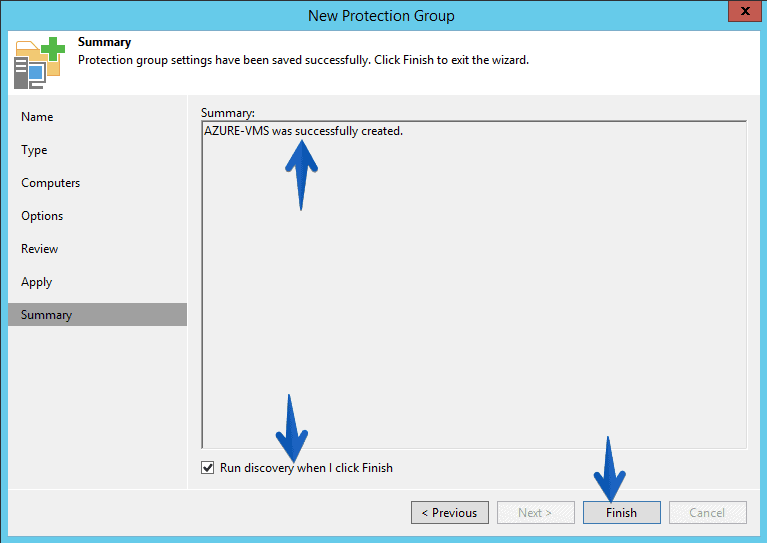 The process will begin to discover agents and will install the agent in the IP that we have defined:
Creating the Backup task to bring those VMs to our Datacenter
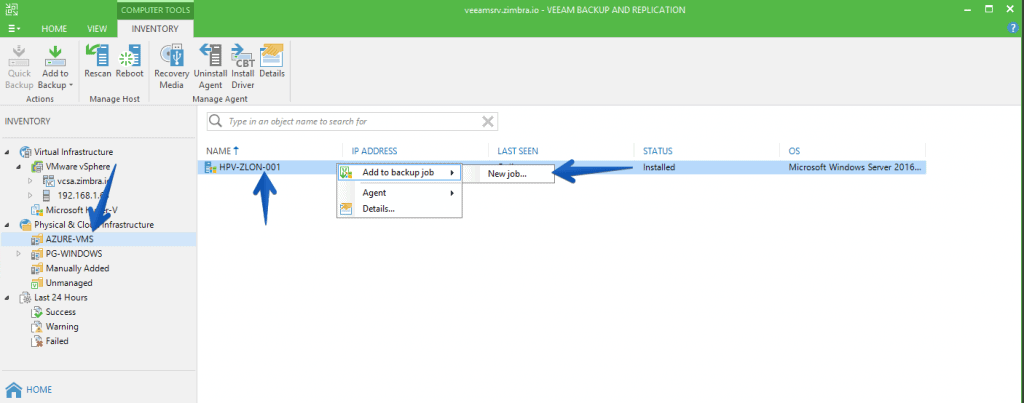
Once we have the Agents ready in our protection group called AZURE-VMS, we can then add them to a Backup task:
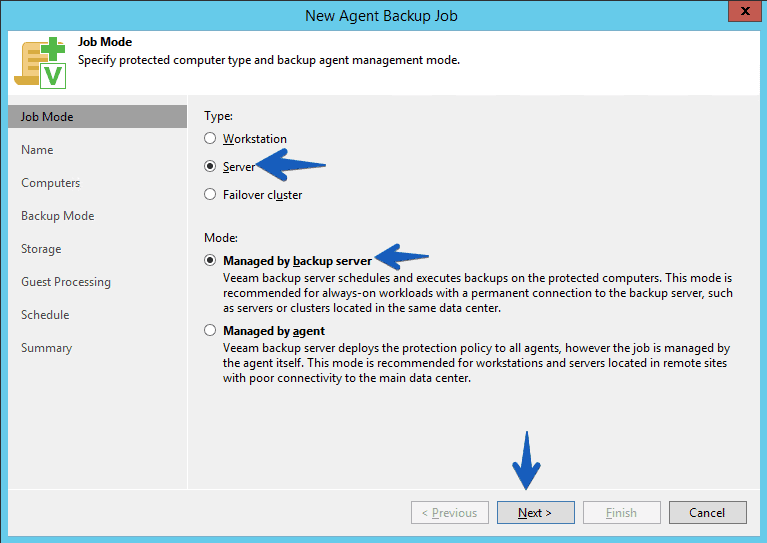
 We will select that the Azure VMs are of the Server type, and that they are also protected by the backup server:
 In the name, we will select something that is descriptive for us:
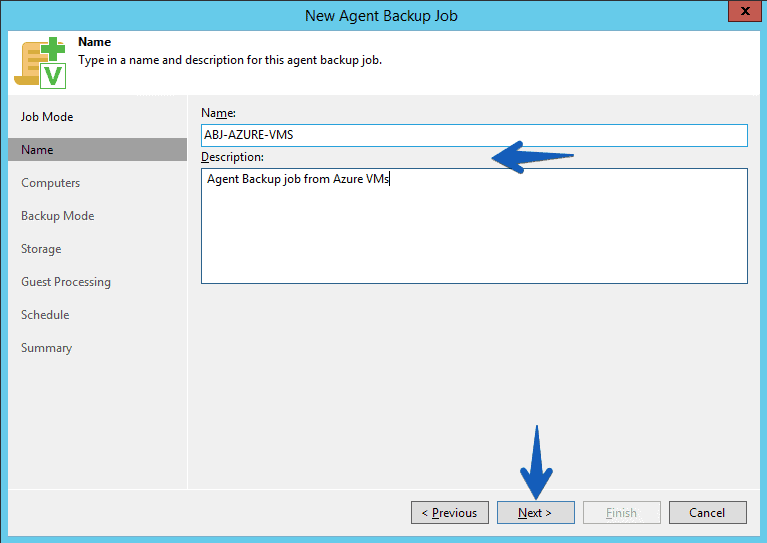 We will select the Microsoft Azure VMs, which we can identify as Agent for Windows:
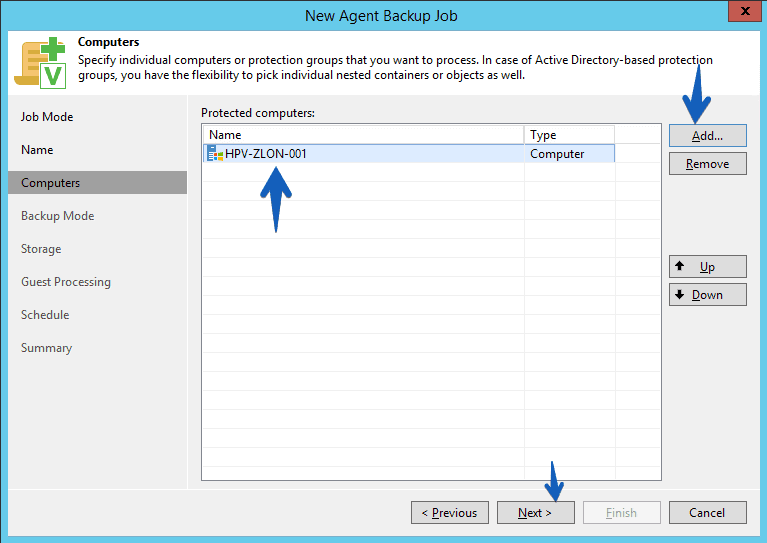 We will tell you that we want to protect the whole machine:
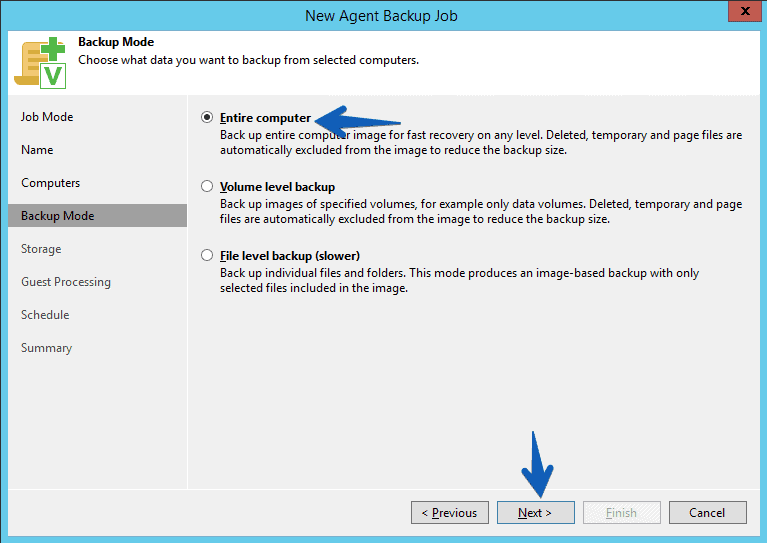 We will select a local repository of our Datacenter:
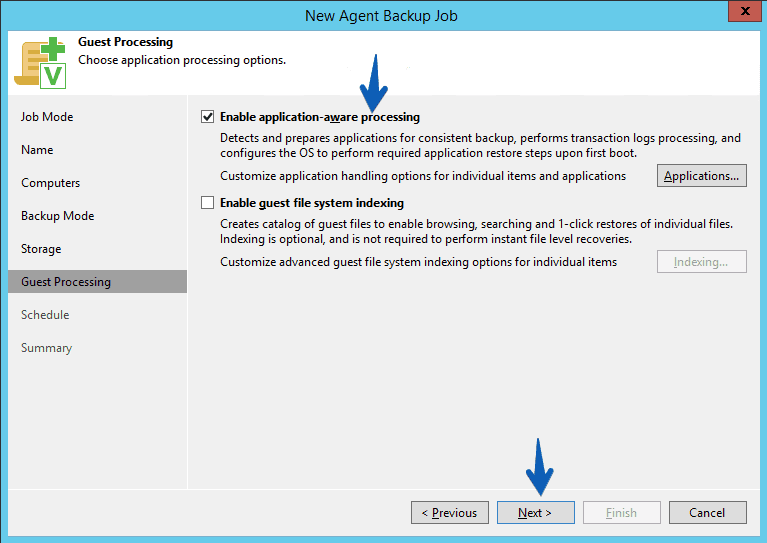
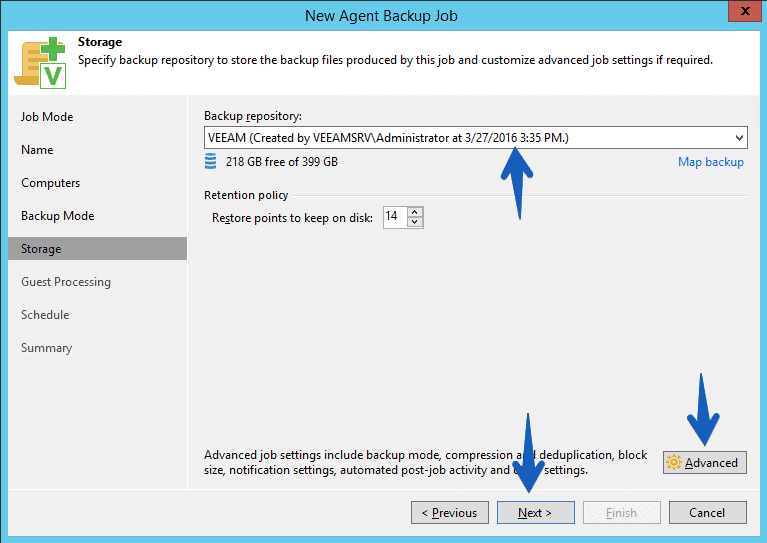 If we have business applications such as Exchange, AD, SQL, etc, I recommend you to check the option of application-aware:
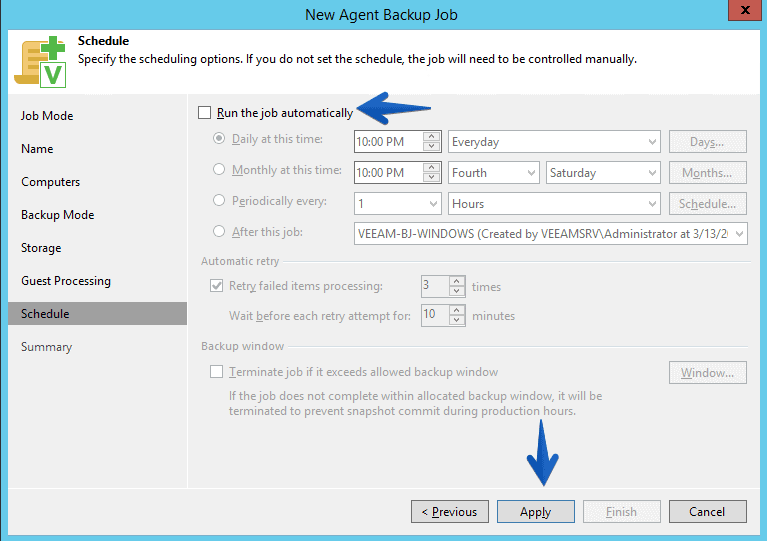
 And finally the programming of the work, which I leave to your liking:
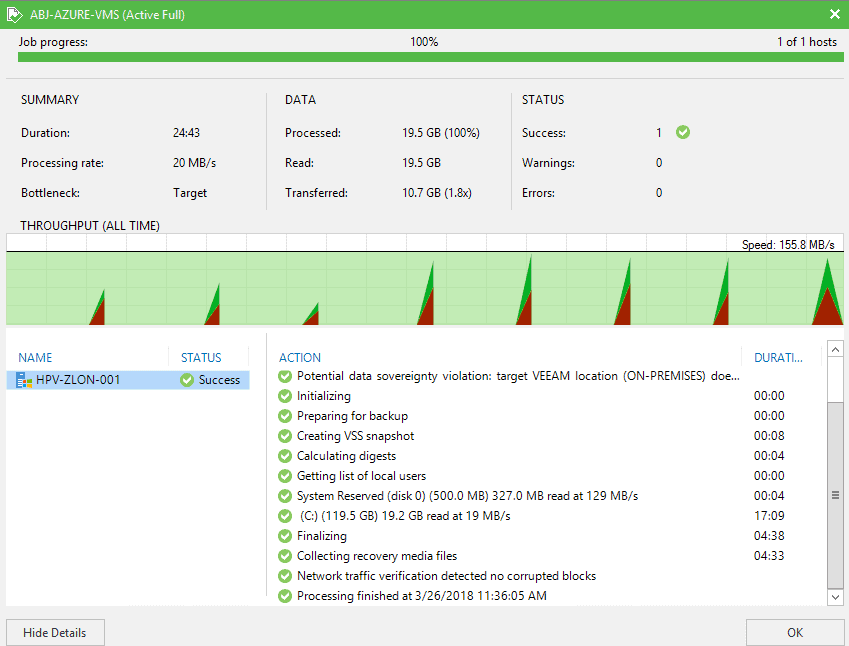
 The backup process from Azure to our Datacenter will take more or less depending on our bandwidth and resources in the backup repository of our datacenter:
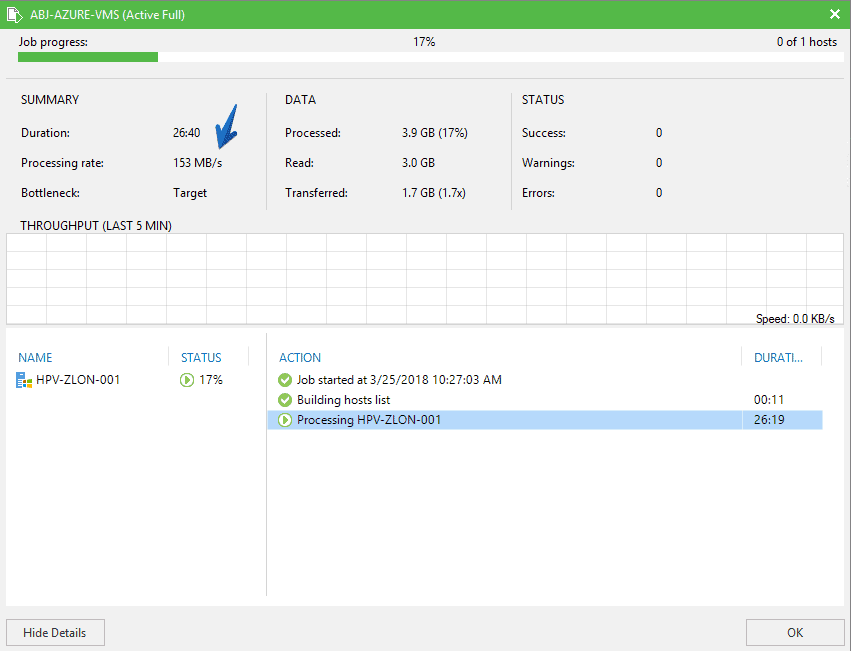
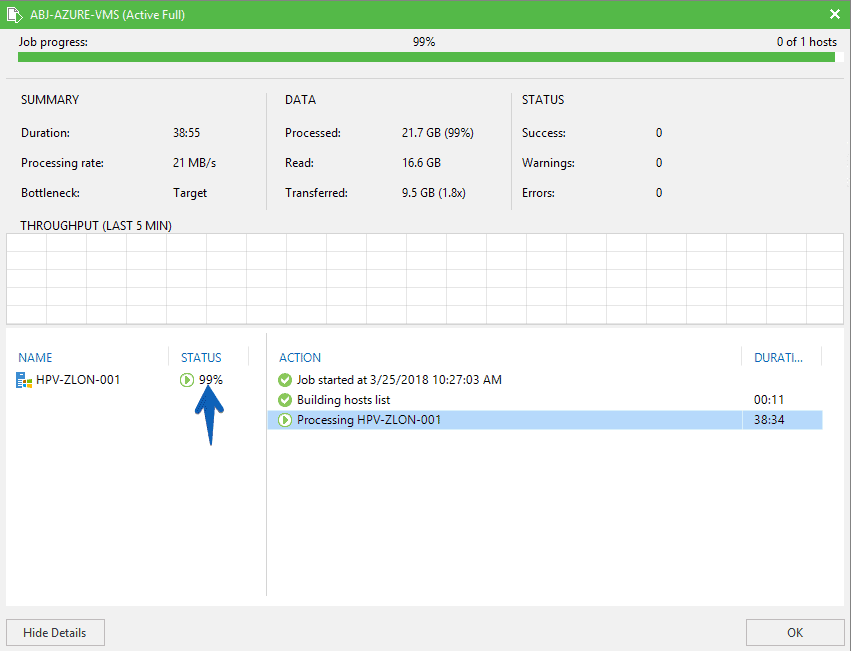 Once the work is finished, we can observe the speed of the work, statistics, etc:

Restoring backup to production – recommended mode using Hyper-V
Veeam has a very solid integration with Microsoft as we all know, from the Veeam components, designed by and for Microsoft, through the applications that are protected using the application-aware such as AD, SQL, Sharepoint, Exchange, etc. And that is why, if we have Hyper-V in our Datacenter we are in luck, because from a backup job of an agent windows, we can restore directly to Hyper-V, let’s see.
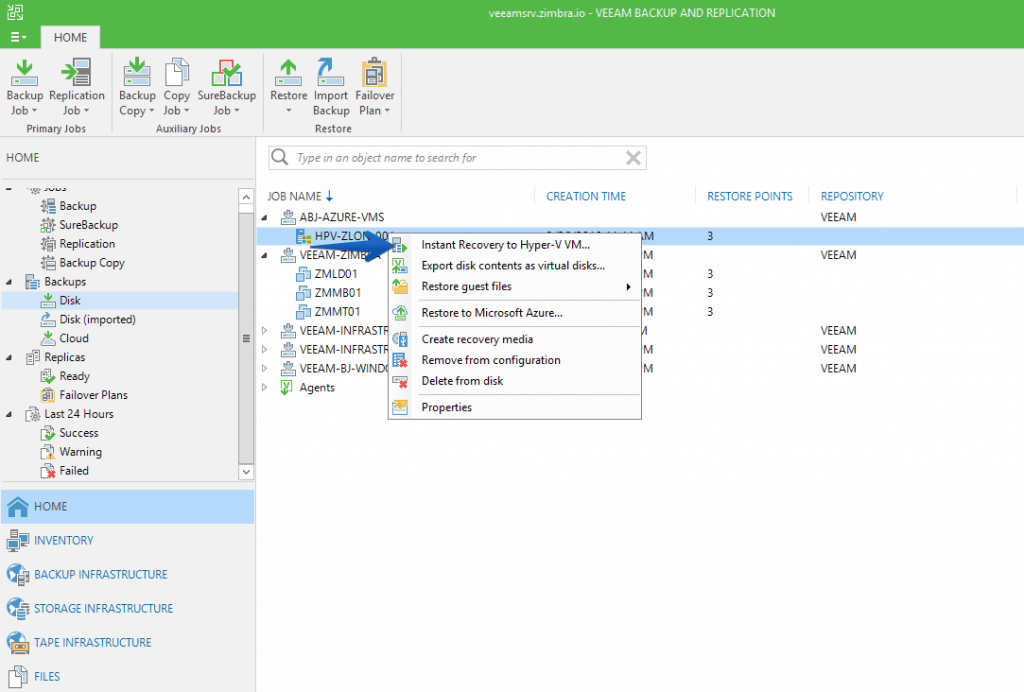
We will explore our Backups – Disk, we will look for our copy job from Azure, we will be able to see it because it has a Microsoft icon, when we have it located, as simple as right button – Instant Recovery to Hyper-V VM:
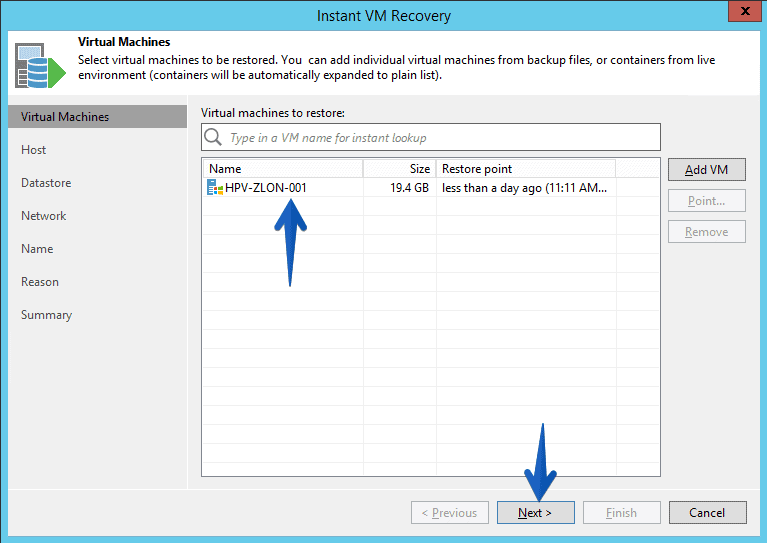
 This will take us to a wizard where we can select the VM, which was previously a VM in Azure, but could be a physical machine:
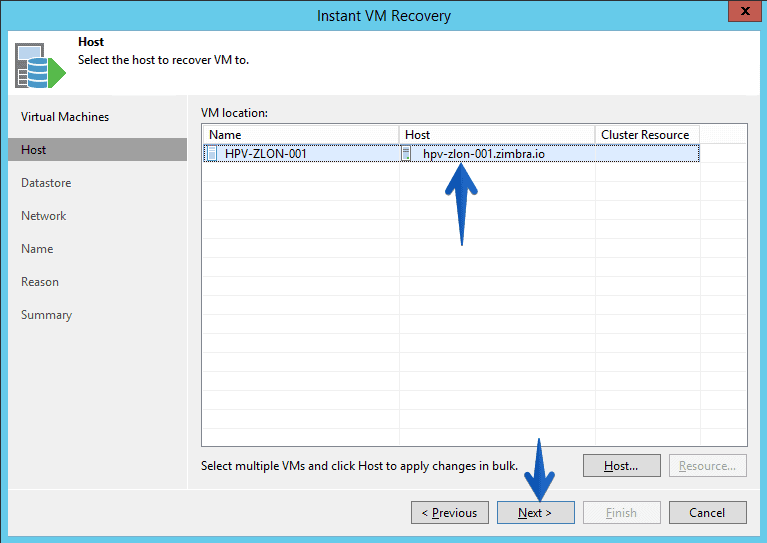
 Select the Host where we want to raise this VM:
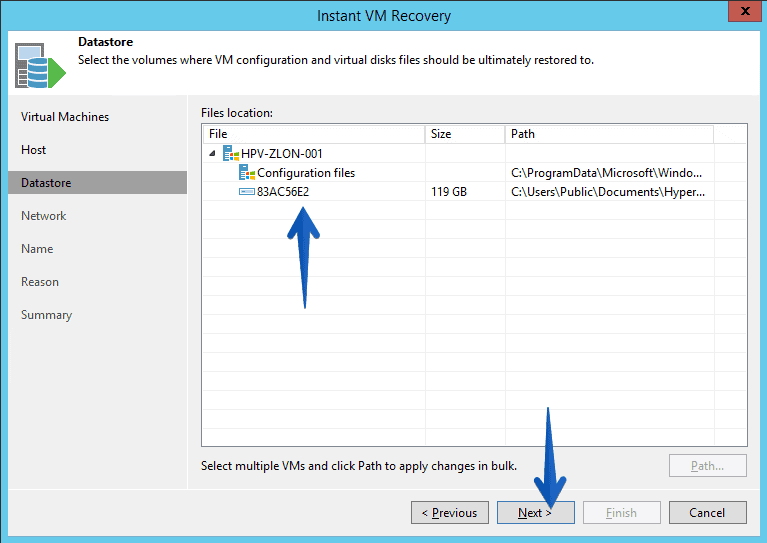
 Select the disk or disks to recover:
 The networking where we want to restore this VM:
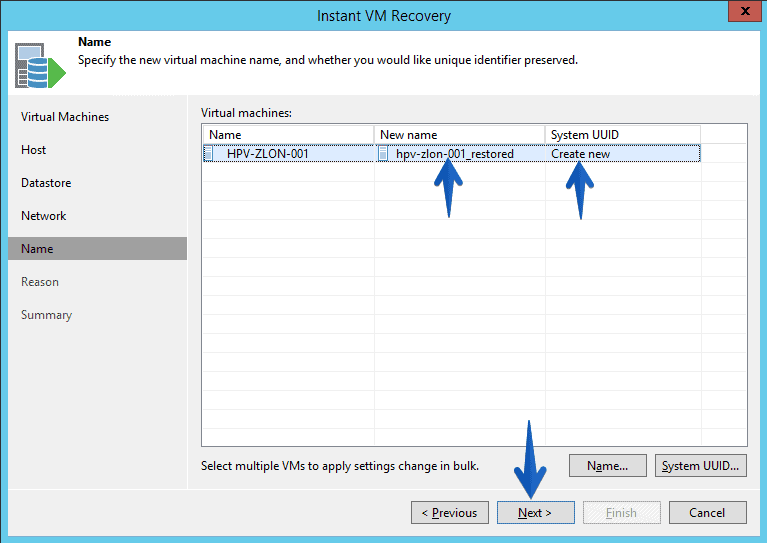
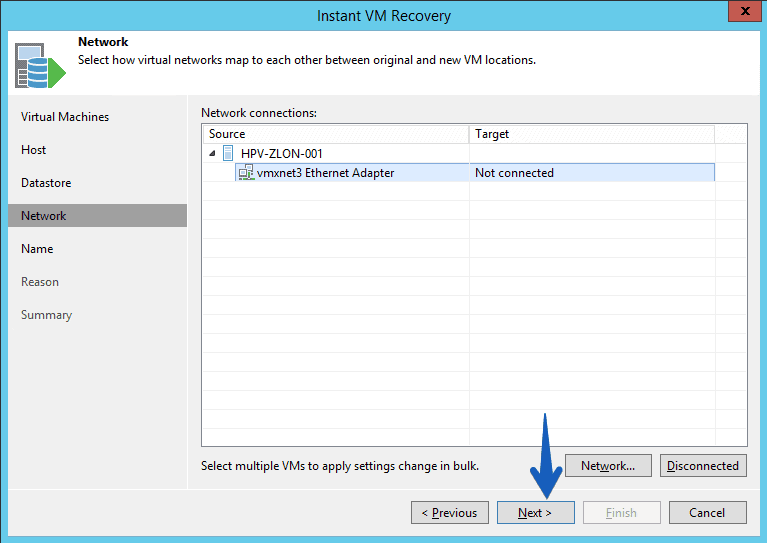 If we wanted a new name for it, and what we want to do with the System UUID, I recommend not to modify it:
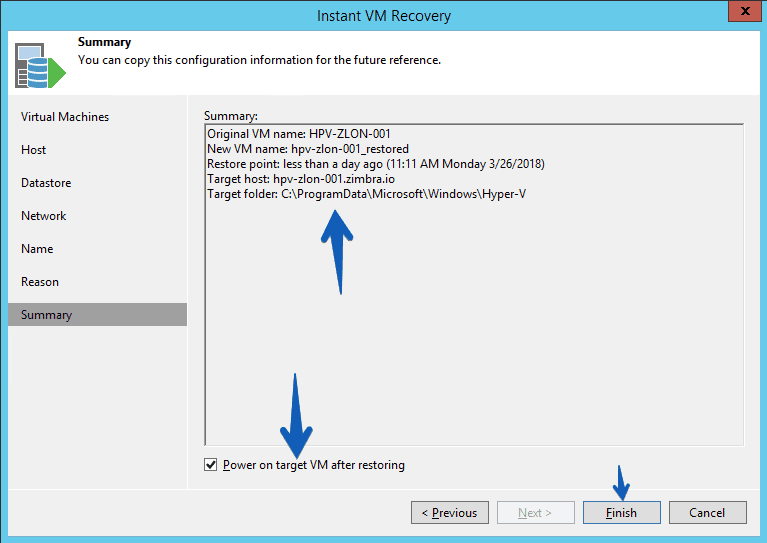
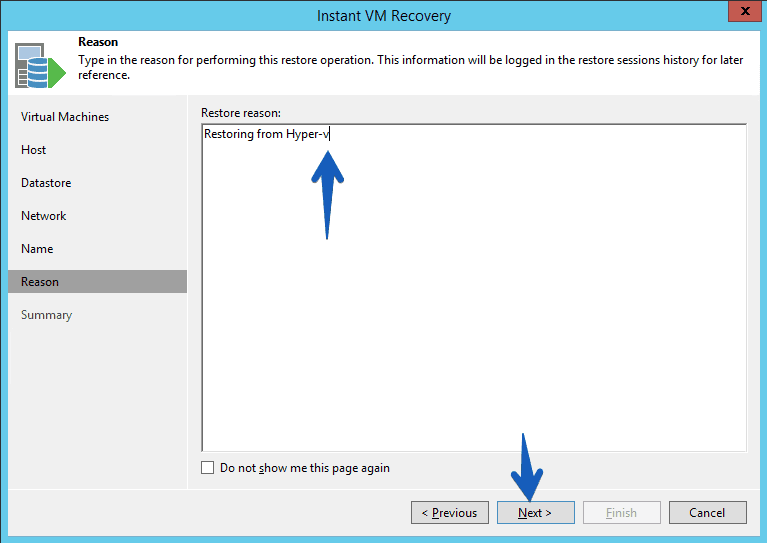 The summary, if all well, let’s go there:
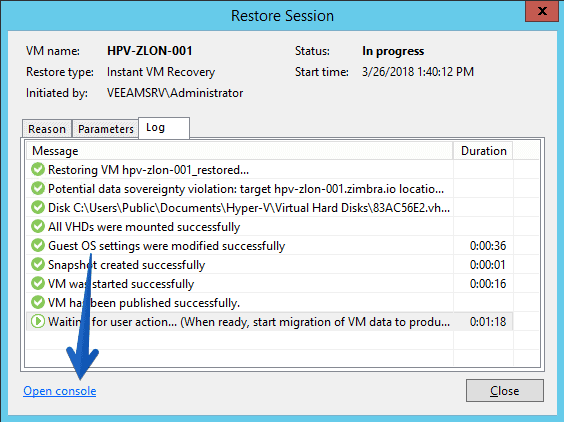
 During the restoration, we see that it is waiting for an interaction from us, besides this we can access the console in less than a minute and see if the VM works, etc.
 The action that Veeam is expecting from us is at the top of our VBR Console, we will have the job and will ask if we want Migrate to production or directly remove this temporary VM:
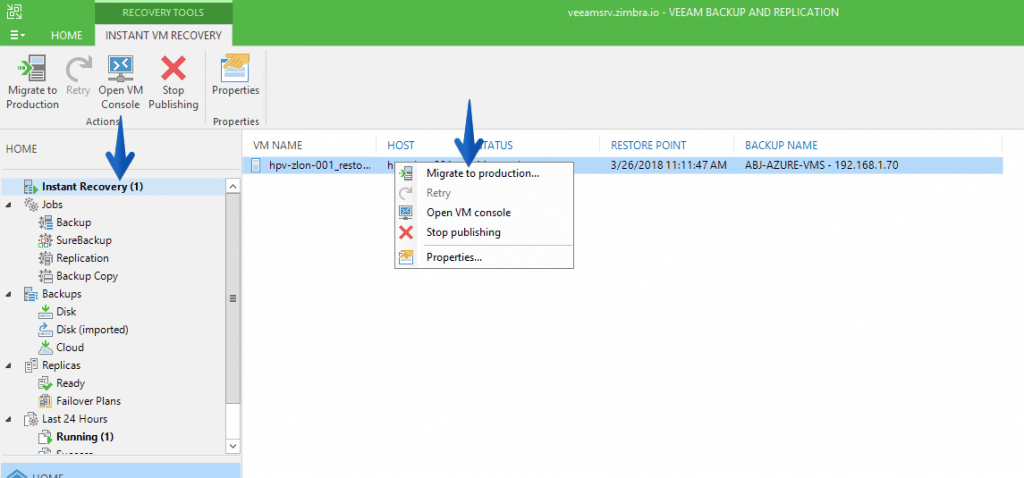 When we select migrate to production, Veeam will move the rest of the blocks from backup to production storage:
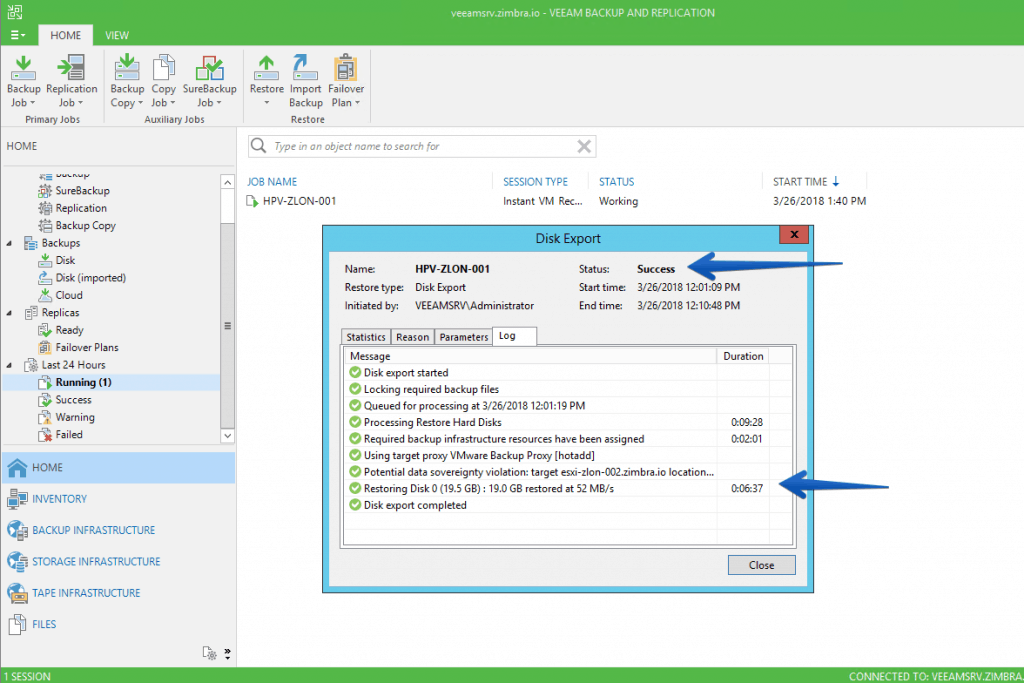
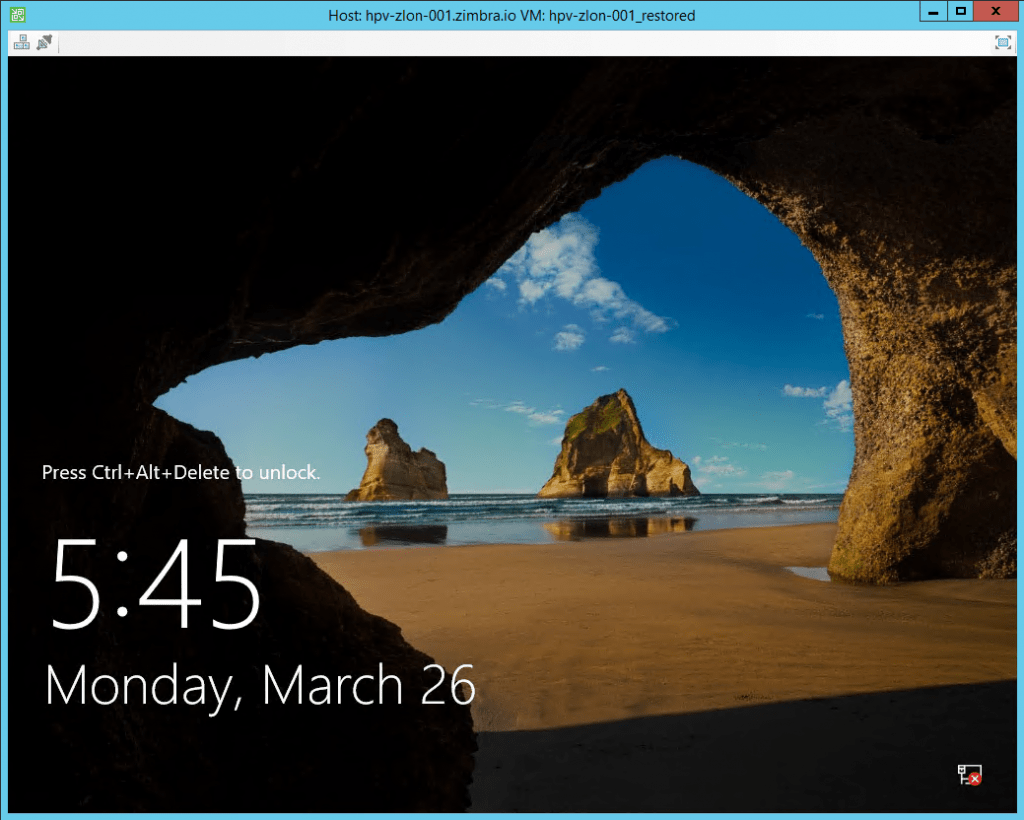
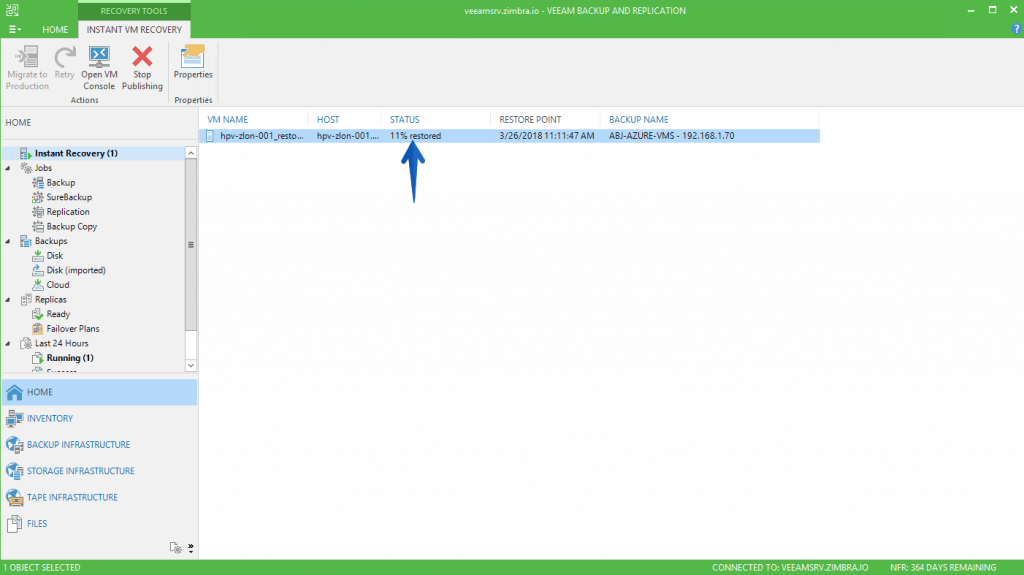 After a few minutes, everything will be restored, the active VM, a VM that was an Azure instance a few minutes ago:
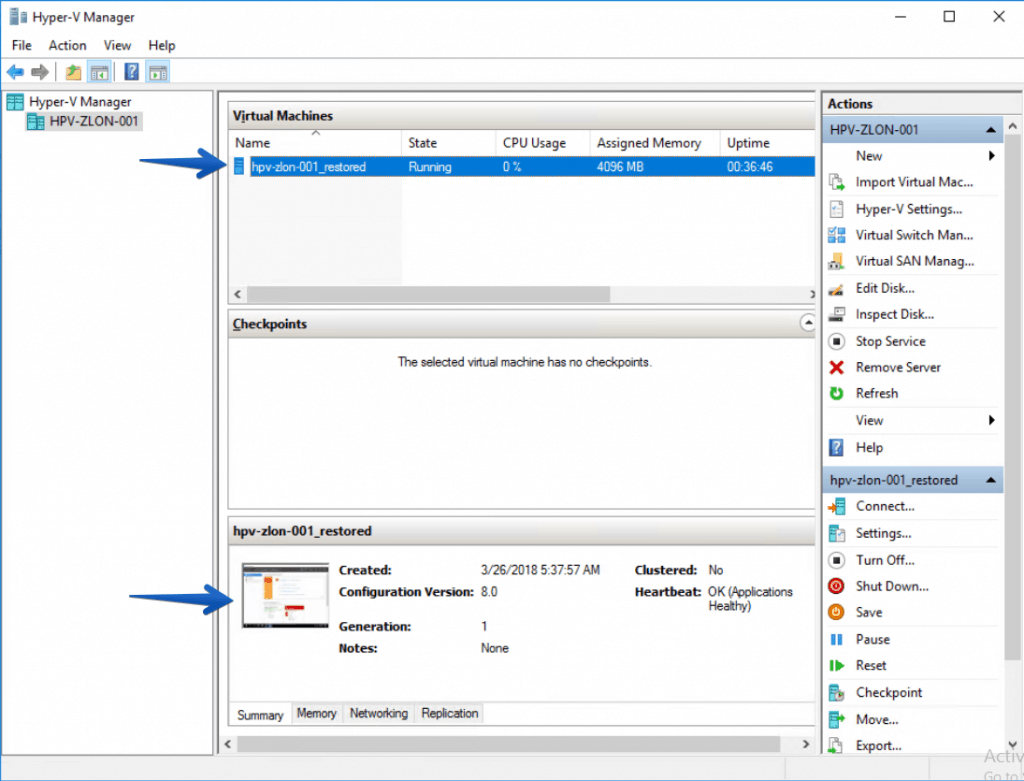
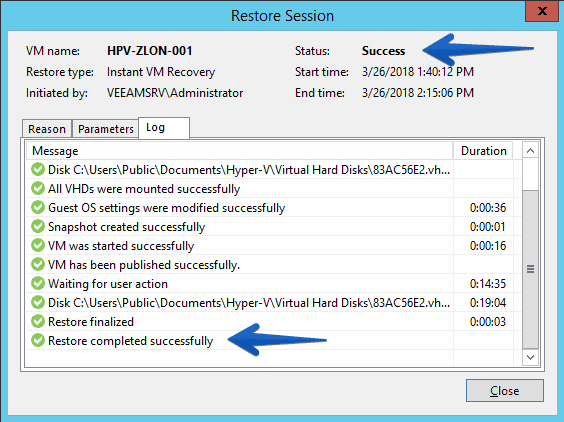 Inside our Hyper-V we can see the VM already active and working. It’s great! It’s great!
Restoring backup to production – slower mode using VMware
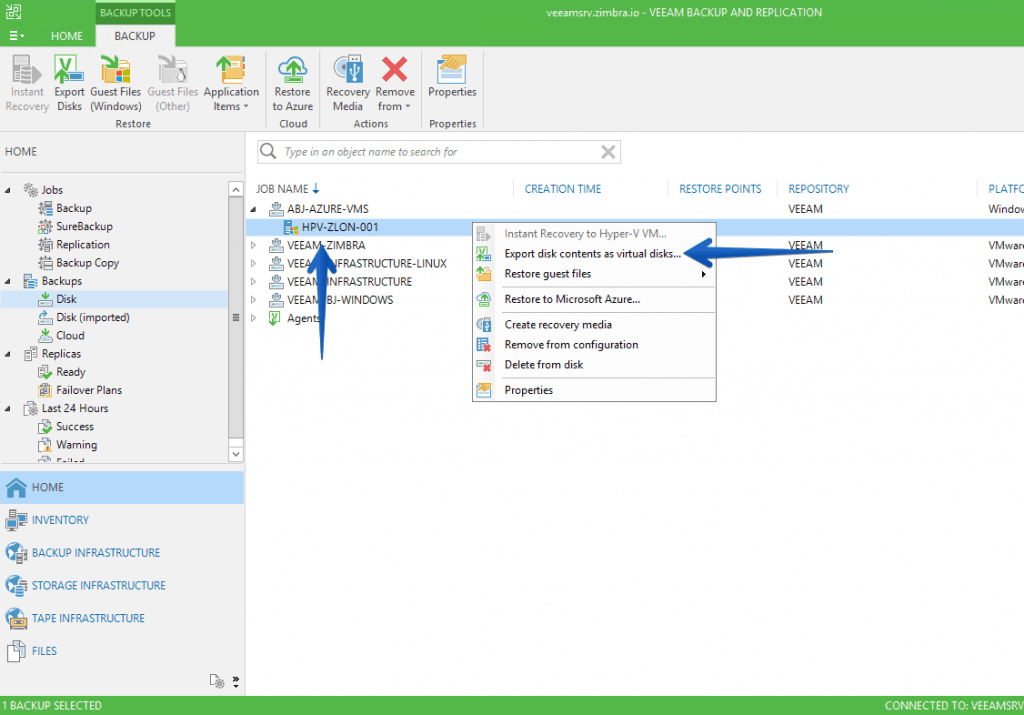
When I want to restore one of these Veeam Agent jobs to a VMware environment, it is not as clean as I would like, the only option I have is export disk contents as virtual disks:
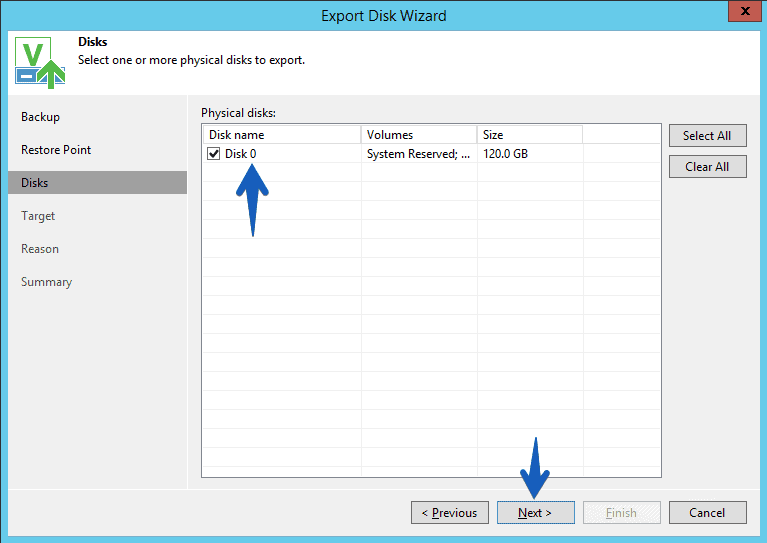
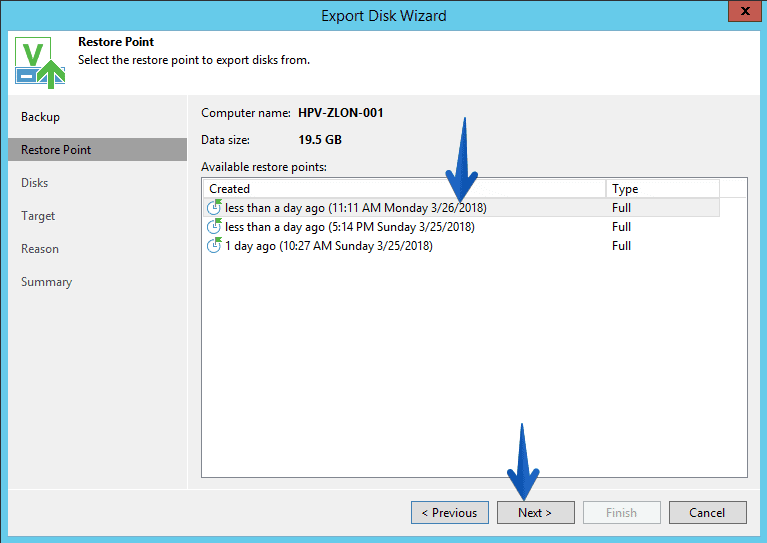
 We will select the most convenient point of restoration for you:
 The datastore where I want to recover it:
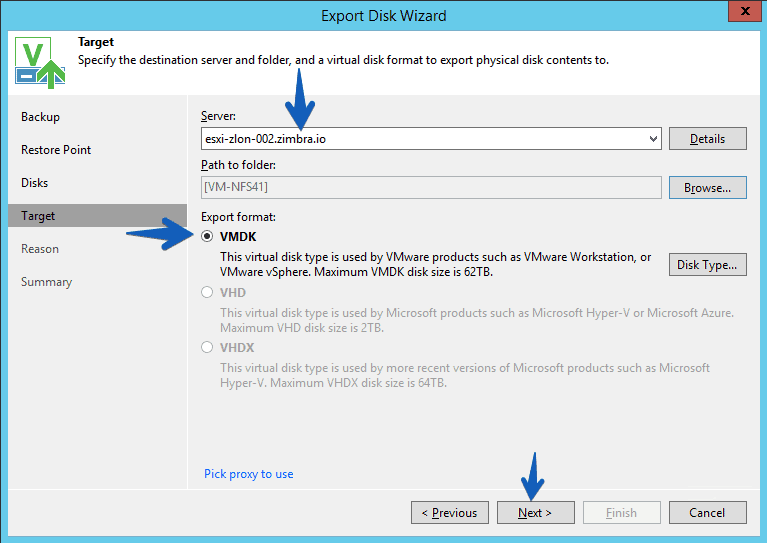
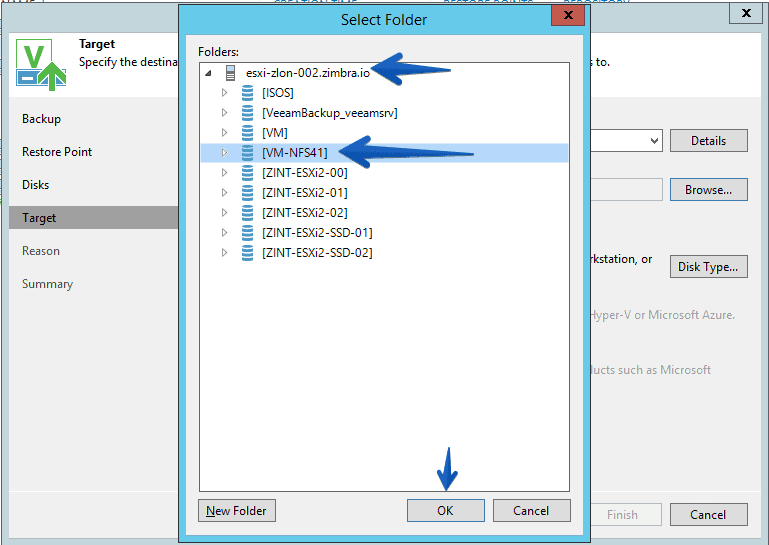 The server where I want to register this VMDK, as well as the format:
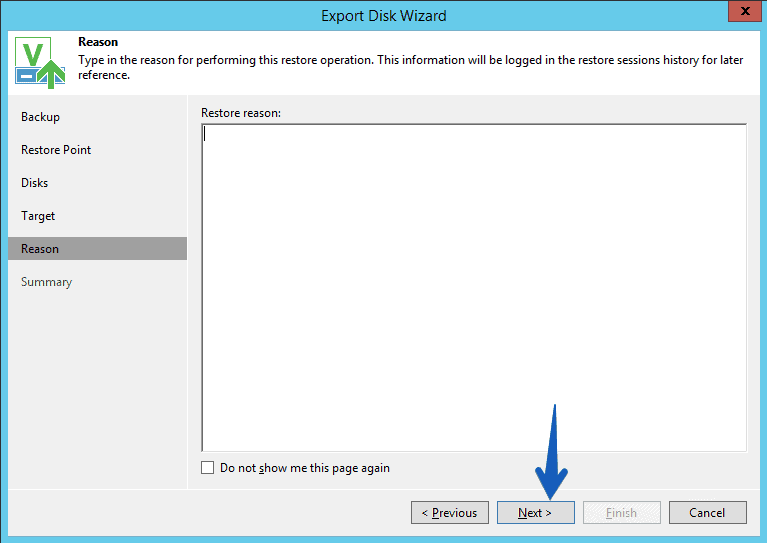 And the summary will click on Finish:
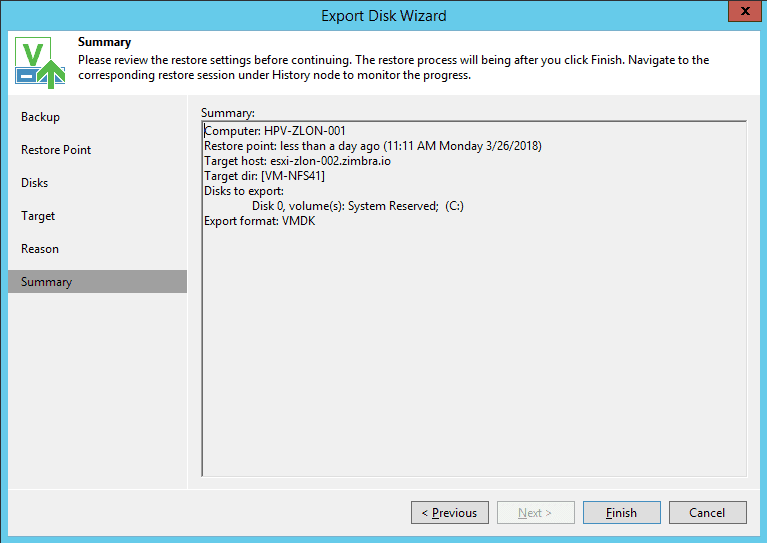 The process recovers everything in about 9 minutes or less:
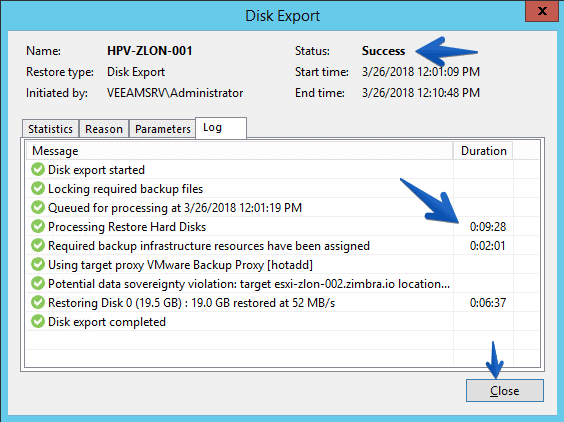 And from here, we just need to add this disk to a new VM with the resources we want.
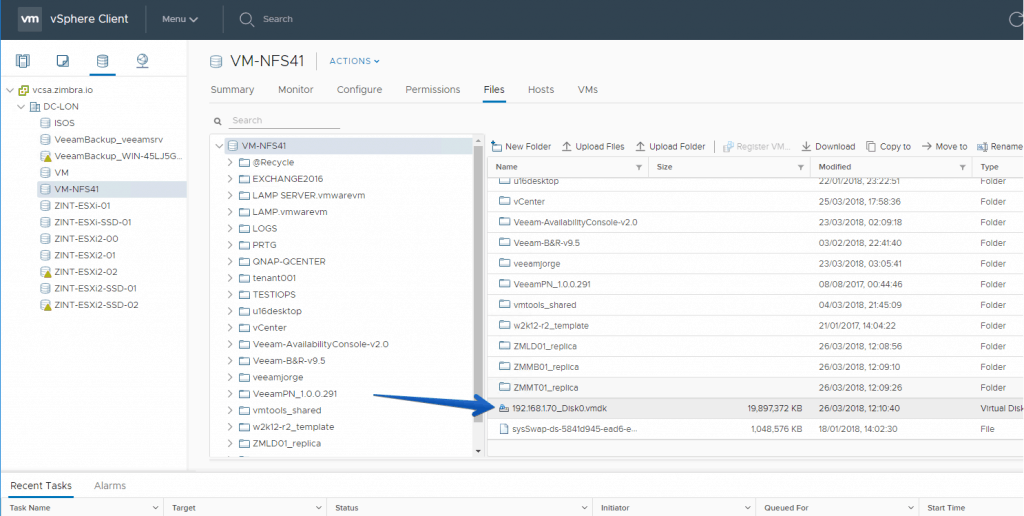 It’s not as clean as with Azure, but it works perfect too.
I would like to leave you the list of articles that we will be seeing throughout the series:
- Backup and restore workloads to Microsoft Azure – Introduction
- Backup and restore workloads to Microsoft Azure – Connectivity between our Datacenter and Microsoft Azure
- Backup and restore workloads to Microsoft Azure – Deploy Veeam Backup & Replication in Microsoft Azure
- Backup and restore workloads to Microsoft Azure – Configuration in our Datacenter for backup to Microsoft Azure
- Backup and restore workloads to Microsoft Azure – Restoring Microsoft Azure, from Microsoft Azure
- Backup and restore workloads to Microsoft Azure – Migrate workloads from Microsoft Azure to our Datacenter

Leave a Reply