 Greetings friends, in the previous post we could see the introduction to this great series on Microsoft Azure Blob Storage, and how to send there our backups.
In today’s chapter we are going to see a comfortable step by step on how to create our container of Microsoft Azure Blob, for it before we will see a bit of theory.
Before moving on to the content, I would like to show you the different components that make up Microsoft Azure Blob:
- Storage Account: It is in this component where we will have to select if we want the Storage Account to be General Purpose V1, v2 or Blob directly, as well as selecting if we want it to be Hot Tier or Cool Tier, finally in the Storage Account we can also select how we want Microsoft Azure to protect this account, with geo-distribution, or locally in the region, and so on.
- Container: In this component, which is a logical resource within a Storage Account, you can grant them access permissions, and make them public if you want.
- Blob: It will be the content that is inside the container, content that is specially prepared to store PB of information exposing a RESTfulAPI.
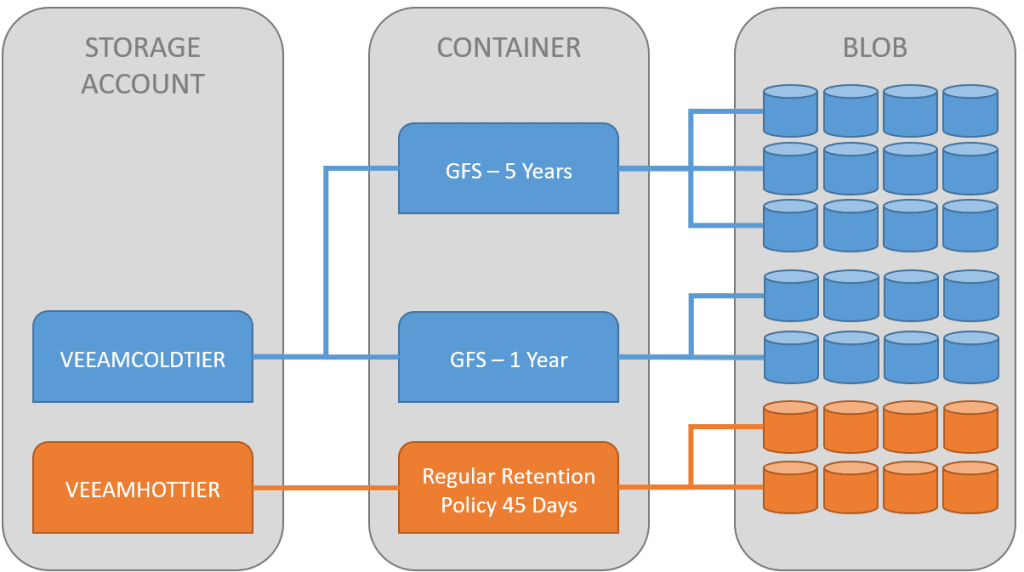 And now that we’re good at the different components of Microsoft Storage Account, we’re going through the steps to create everything.
Creation of Microsoft Azure Storage Account
From our console of Microsoft Azure, we will go to Storage Accounts, we can find it in Home, or if not with just look for Storage accounts will appear: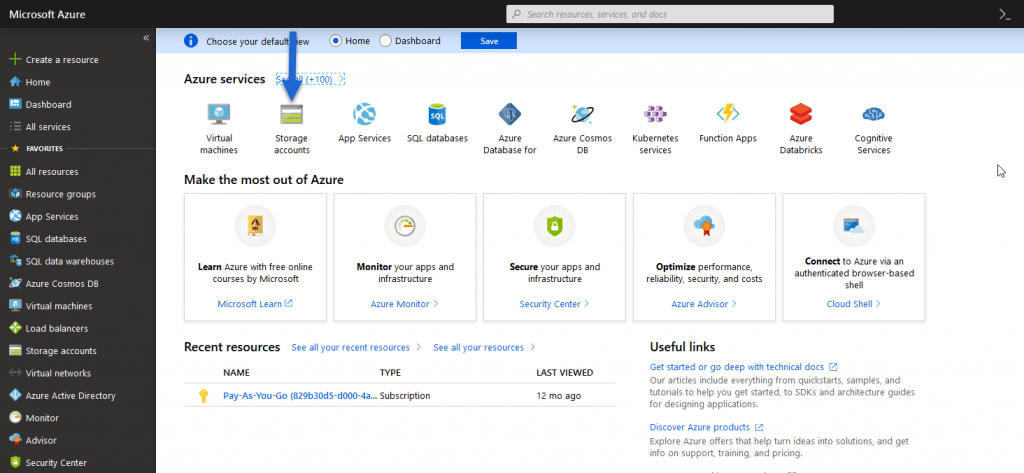
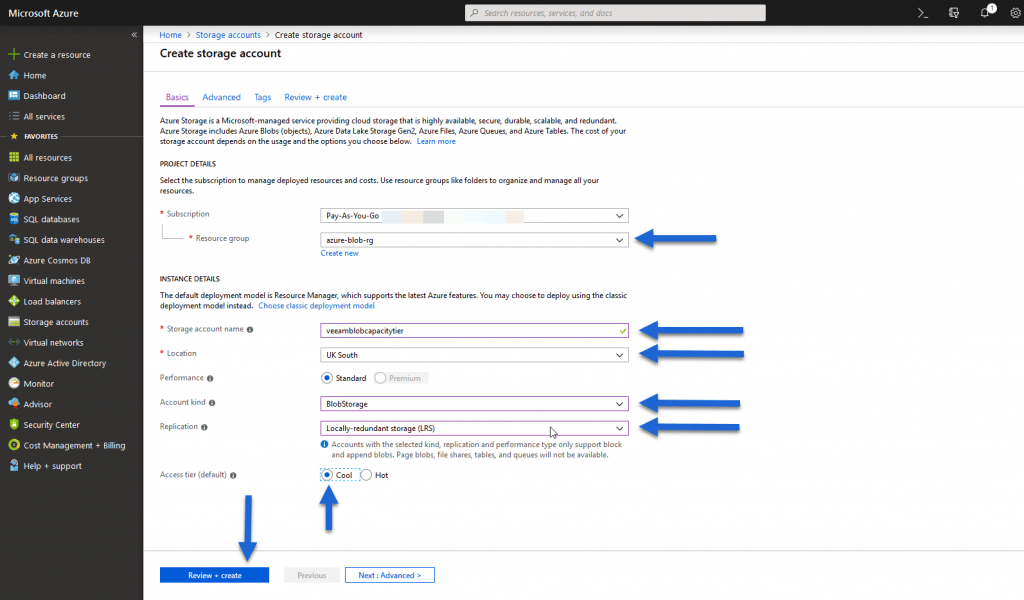
Once in Storage Accounts, click on the Add button, at the top left, or on the main button called Create storage account: 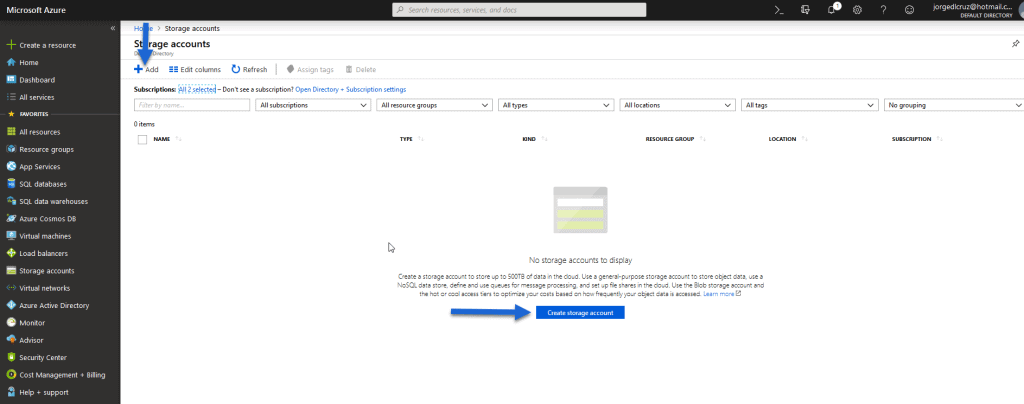 We will select our subscription, the resource group (which can be a new one if you want), and we will jump to the part that requires our attention, we will have to select a name for the storage account that must be unique in all Azure, the region where we want our blobs to be stored, the type of performance, the type of account I have selected BlobStorage directly, and the type of redundancy that we want the information, we can also select between Cool or Hot for this Storage Account, have different prices clear:
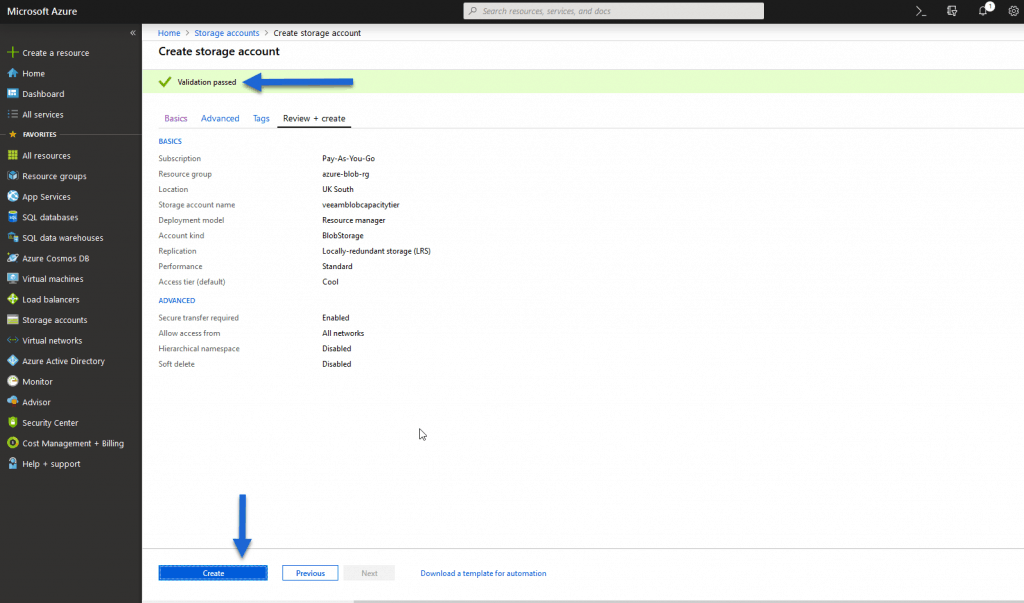
  We’ll see a brief check that everything is OK, we’ll click on Create:
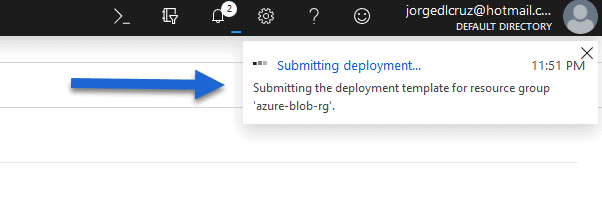
  We’ll see on the right a popup with the status of the task, which takes no more than 15 seconds:
  We can also see on the main screen the status of the deployment, after a few seconds click on Refresh to see everything already created:
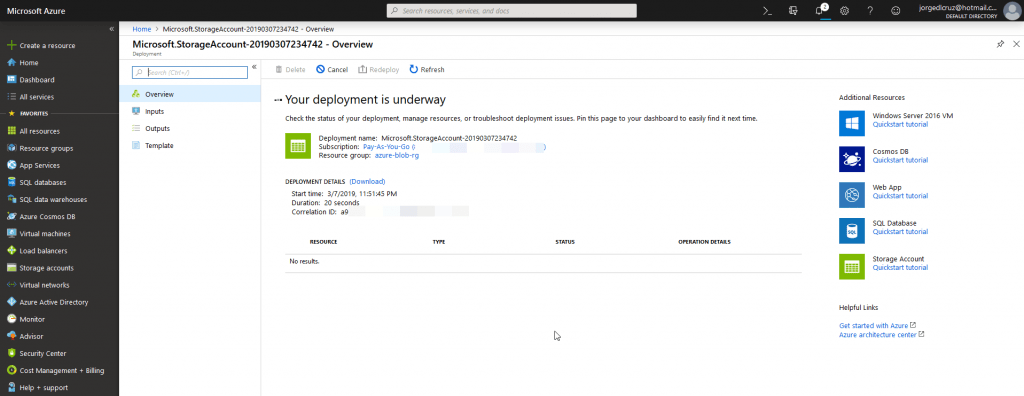 And with this we’ll have our Storage Account ready, we’ll create a blob container.
Creation of Microsoft Azure Blob Container
We will move to our new Storage account, and in the properties on the left, we can see an option called Blobs, we could look for it if we don’t find it, we’ll click on + Container to create a new container: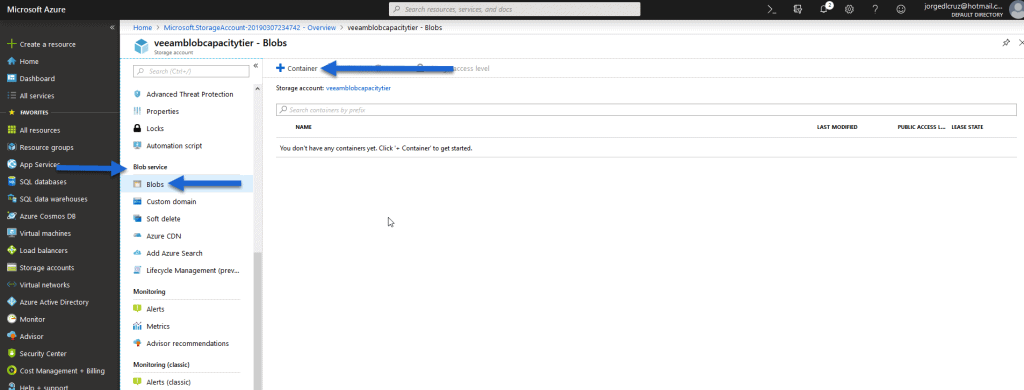 We’ll select a name, this time it’s internal so we can introduce the one we like best and fits our company, we’ll also have to select the privacy of it, in this case I’ve selected private so no one has access to my backups of course:
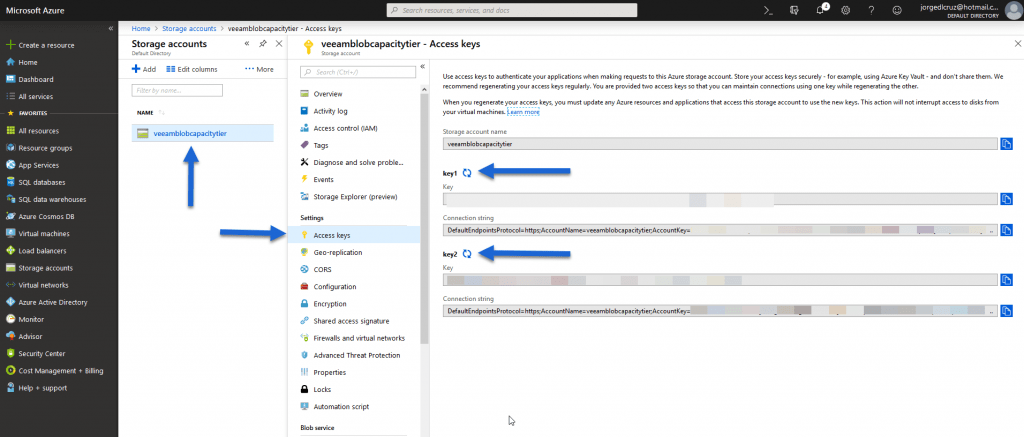
  I would be all ready, with this if we went back to our Storage Account and click on Access keys, we could see the name of the Storage Account and two keys that we can use to configure Veeam in the next episode:
  I would like to leave you the list of articles that we will see throughout the series:
- Veeam: Cloud Tier/Capacity Tier in Microsoft Azure Blob – Introduction
- Veeam: Cloud Tier/Capacity Tier in Microsoft Azure Blob – How to create a Microsoft Storage Account and Azure Blob
- Veeam: Cloud Tier/Capacity Tier in Microsoft Azure Blob – How to configure a Veeam Backup & Replication Scale-Out Backup Repository
- Veeam: Cloud Tier/Capacity Tier in Microsoft Azure Blob – Quick overview to the Capacity Tier Offload task
- Veeam: Cloud Tier/Capacity Tier in Microsoft Azure Blob – Microsoft Azure Blob Monitoring with Veeam ONE
- Veeam: Cloud Tier/Capacity Tier in Microsoft Azure Blob – Microsoft Azure Blob Monitoring with Azure Monitor and Grafana

Leave a Reply